


PTIPTV
-
Posts
200 -
Joined
-
Last visited
-
Days Won
16
Content Type
Profiles
Forums
Downloads
Everything posted by PTIPTV
-
 EGAMI 10.5 Image for Vu+ Ultimo 4K: Download, Features, Flashing & Multiboot Setup Guide The EGAMI 10.5 firmware is one of the most refined, feature-rich Linux Enigma2 operating systems available for the flagship Vu+ Ultimo 4K satellite receiver. Built on the modern OE-Alliance Python 3 core, EGAMI combines high-level interface aesthetics with powerful background features, including EGAMI Boot Control (Native Multiboot), a built-in Softcam Manager, and optimized GStreamer/exteplayer3 streaming performance. 1. Why Download EGAMI 10.5 for Vu+ Ultimo 4K? The Vu+ Ultimo 4K features a high-performance Broadcom BCM7252S dual-core 1.7GHz ARM processor, 3GB DDR4 RAM, 4GB eMMC flash memory, triple tuner slots (FBC DVB-S2X / DVB-C), and a large 4.0" color LCD display. EGAMI 10.5 takes full advantage of this hardware platform: [Satellite / Cable / IPTV Signal] ──► [Vu+ Ultimo 4K Tuners] │ ▼ [EGAMI 10.5 Python 3 OS Core] ──► [EGAMI Boot Control (Multiboot)] │ ▼ [exteplayer3 / GStreamer 1.22+] ──► [4K HDR10 / 2160p 60Hz Display] EGAMI Boot Control (Native Multiboot): Run EGAMI 10.5 in flash while running up to 16 secondary Enigma2 images (such as OpenATV, VTi, or BlackHole) directly from an internal SSD/HDD or high-speed USB flash drive. Python 3 Speed & Plugin Support: Provides snappy menu navigation, instant skin rendering, and seamless compatibility with modern Python 3 extensions like E2iPlayer, Xstreamity, and AJPanel. Integrated Softcam Manager: Built-in cam setup tool for controlling OSCam, NCam, and CCcam directly from the remote control without installing third-party panels. Custom LCD MiniTV Rendering: Native configuration for the Ultimo 4K front 4.0" LCD display, supporting high-resolution picons, extended channel info, and weather widgets. 2. Firmware Download & Package Information When preparing to flash your box, make sure to use the correct image zip file corresponding to the Ultimo 4K ARM architecture: Receiver Model SoC Architecture Flash / RAM Download Firmware Attachment Package Vu+ Ultimo 4K Broadcom BCM7252S (ARM) 4GB eMMC / 3GB DDR4 egami-10.5-r1-vuultimo4k-20240125_usb.zip (The firmware package file is available for direct download in the attachments section at the bottom of this thread.) 3. Step-by-Step USB Flashing & Multiboot Setup Follow this sequence to flash EGAMI 10.5 directly to the receiver's main eMMC flash memory using a USB drive. 1.Prepare FAT32 USB Flash Drive : Prepares flash drive for Vu+ bootloader recognition. Format an 8GB or 16GB USB drive using the FAT32 filesystem with a 4096-byte cluster size. 2.Unpack Firmware Files : Extract attachment package to USB root. Unzip the downloaded egami-10.5.r1-vuultimo4k-usb.zip attachment package directly to the root directory of your USB drive. Verify that the folder structure reads: USB_ROOT/vuplus/ultimo4k/ containing files like rootfs.tar.bz2, kernel_auto.bin, and initrd_auto.bin. 3.Flash Receiver via Front USB Port : Initiates cold boot flashing procedure. Turn off your Vu+ Ultimo 4K using the rear power switch. Plug the USB drive into the front panel USB port behind the front flap. Power on the receiver. When the 4.0" LCD display prompts "Image detected - Press Power Button", press the front standby touch sensor to start flashing. Wait until the display reads Flashing Complete - Rebooting. 4.Complete Initial Setup : First boot configuration wizard. Follow the onscreen initial wizard to configure video output (2160p @ 60Hz), setup network connections, scan satellite transponders, and restore any previous bouquet backups. 4. Softcam & IPTV Configuration Tips A. Activating Softcams in EGAMI Press the Green Button or navigate to Menu > EGAMI Panel > Softcam Panel. Press Yellow (Download Cams) to fetch Python 3 compatible OSCam or NCam packages. Transfer your server settings (oscam.server or ncam.server) via FTP to /etc/tuxbox/config/. Return to the Softcam Panel, select your installed cam, and press Green (Start/Restart). B. Optimizing IPTV Performance with ServiceApp To eliminate buffering and ensure smooth playback of 4K H.265/HEVC streams: Go to Plugins > Download Plugins > Systemplugins and install serviceapp. Go to Menu > Setup > Usage & GUI > ServiceApp. Change Enigma2 Playback System from GStreamer to serviceapp. Set Player Service Architecture to exteplayer3. Save settings and restart Enigma2. Frequently Asked Questions (FAQ)
-
VTi 15.0.4 Image for Vu+ Receivers: Features, Compatibility & ICAM Setup (2026) The VTi (Vu+ Team Image) 15.0.4 firmware remains the ultimate closed-source, driver-level operating system built exclusively for Vu+ Linux receivers. Unlike alliance-based open-source images (such as OpenATV or OpenPLi), VTi is developed directly on Vu+'s official kernel sources and proprietary Broadcom hardware drivers. This deep integration makes VTi 15.0.4 the most stable platform for running FCC (Fast Channel Change), dual FBC (Full Band Capture) satellite tuners, and ICAM (OSCam Stream Relay) decryption for high-tier satellite broadcasts like Sky Germany (Astra 19.2°E). 1. Why Choose VTi 15.0.4 for Vu+ Receivers? Because VTi utilizes proprietary Vu+ hardware driver calls directly rather than generic wrapper layers, it delivers key performance advantages over open-source alternatives: [Satellite Signal (DVB-S2X)] ──► [Vu+ FBC Hardware Tuner] │ ▼ [VTi 15.0.4 Kernel Drivers] ──► [OSCam ICAM Stream Relay (Port 17999)] │ ▼ [Hardware Video Decoder (Broadcom SoC)] ──► [4K HDR Display (0.2s Zapping)] Instantaneous FCC (Fast Channel Change): Pre-buffers adjacent satellite channels on background FBC tuners, enabling channel zapping times under 0.2 seconds. Native ICAM Stream Relay Integration: Handles internal loopback routing (127.0.0.1:17999) for CSA3/ICAM encrypted broadcasts without CPU bottlenecking or audio sync drift. Native VTi VBC/CI+ Manager: Full official CI+ module auto-assignment support for pay-TV conditional access modules. Optimized Memory Allocation: Maintains low system RAM usage (~180MB at idle), leaving ample RAM for EPG caching and recording buffering. 2. Vu+ Model Compatibility & Image Files Always select the specific firmware file corresponding to your exact receiver model. Flashing an incorrect VTi image build will halt the bootloader process. Vu+ 4K ARM Models VTi_15-0-04_vuduo2_202507160733_usb.zip VTi_15-0-04_vuduo4k_202507160625_usb.zip VTi_15-0-04_vuduo4kse_202507160616_usb.zip VTi_15-0-04_vusolo2_202507160735_usb.zip VTi_15-0-04_vusolo4k_202507160721_usb.zip VTi_15-0-04_vusolose_202507160737_usb.zip VTi_15-0-04_vuultimo4k_202507160654_usb.zip VTi_15-0-04_vuuno4k_202507160702_usb.zip VTi_15-0-04_vuuno4kse_202507160634_usb.zip VTi_15-0-04_vuzero_202507160739_usb.zip VTi_15-0-04_vuzero4k_202507160645_usb.zip 3. Step-by-Step USB Flashing & ICAM Configuration Follow this procedure to flash VTi 15.0.4 onto your receiver using the attached firmware file and configure the OSCam-ICAM stream relay service. 1.Prepare FAT32 USB Flash Drive : Required for Vu+ hardware bootloader. Format an 8GB or 16GB USB drive using the FAT32 filesystem on your PC. 2.Extract VTi 15.0.4 Image File : Preserves required firmware folder hierarchy. Unzip your downloaded VTi zip package directly to the root of your USB drive. Verify that the directory structure reads: USB_ROOT/vuplus/YOUR_MODEL_NAME/ containing core system files (rootfs.tar.bz2, kernel_auto.bin). 3.Flash Receiver via Front USB Port : Triggers cold-boot flashing sequence. Turn off your Vu+ box via the rear power switch. Plug the USB drive into the front panel USB port. Power on the rear switch. When prompted on the LCD display ("Image detected - Press Power Button"), touch the standby button to initiate flashing. 4.Install OSCam ICAM IPK Package : Enables OSCam ICAM decryption feed. Obtain the latest enigma2-plugin-softcams-oscam-icam-vti_all.ipk. Transfer the IPK file to your box's /tmp/ folder via FTP (FileZilla). On your Vu+ remote, press Blue Button > VTi Software Manager > Install local packages > /tmp and execute the installation. 5.Import ICAM Bouquet & Configure Stream Relay : Reroutes encrypted channels to local stream relay. Import the Sky DE ICAM channel bouquet (userbouquet.sky_icam.tv) into /etc/enigma2/ using E-Channelizer or DemonEditor. Go to Menu > Setup > VTi > Setup - VTi Customization. Set Include HTTP streams in service list to YES. Set Stream Relay Port to 17999. 4. Critical System Tweaks for VTi 15.0.4 & ICAM A. Resolve Conflict Between Fast Channel Change (FCC) & ICAM VTi's FCC plugin attempts to pre-tune background satellite channels. However, when tuning into ICAM stream relay channels, FCC can lock up the DVB-API demuxer, resulting in a permanent black screen. Fix: Go to Menu > Setup > VTi > Fast Channel Change Settings. Set Enable FCC to YES, but under Exclude Bouquets, select your Sky DE ICAM Bouquet. This keeps ultra-fast 0.2s zapping active for normal satellite channels while preventing tuner conflicts on ICAM channels. B. OSCam ICAM Configuration Files Location When configuring your line or server settings, transfer your configuration files to the following VTi system paths: Config Files Directory: /etc/tuxbox/config/ (or /etc/tuxbox/config/oscam-icam/) Files Needed: oscam.conf, oscam.server, oscam.user, oscam.dvbapi, oscam.streamrelay Cam Start/Stop Control: Press Blue Button > VTi Cam Center on your remote to start or set OSCam ICAM as default on boot. Frequently Asked Questions (FAQ)
-
OpenBH 6.0 Image for Vu+ Receivers: Official Download Links, USB Flashing & IPTV Setup (2026) Downloading the correct image build directly from verified sources is essential to prevent bricking or getting stuck in a bootloop on your Vu+ receiver's onboard eMMC flash. Built on the updated OE-Alliance framework with full Python 3 compatibility and the GStreamer 1.22+ media engine, OpenBH 6.0 (OpenBlackHole) provides ultra-fast channel zapping, improved RAM management, and stutter-free IPTV playback across all supported Vu+ 4K and HD models. 1. Official OpenBH 6.0 Image Download Links Always select the image compiled specifically for your exact receiver model. Flashing a build intended for a different model will result in a hardware boot halt. Vu+ 4K Models (ARM Architecture) openbh-6.0.001.release-vuuno4kse-8c6baf54_usb.zip openbh-6.0.001.release-vuduo4kse-8c6baf54_usb.zip openbh-6.0.001.release-vusolo4k-8c6baf54_usb.zip openbh-6.0.001.release-vuuno4k-8c6baf54_usb.zip openbh-6.0.001.release-vuduo4k-8c6baf54_usb.zip openbh-6.0.001.release-vuultimo4k-8c6baf54_usb.zip openbh-6.0.001.release-vuzero4k-8c6baf54_usb.zip 2. Step-by-Step USB Flashing Procedure 1.Prepare USB Drive (FAT32) : Formats the drive for Vu+ bootloader recognition. Take a standard USB 2.0 or 3.0 flash drive (8GB to 32GB capacity) and format it on your PC using the FAT32 filesystem. Do not use NTFS or exFAT, as the Vu+ bootloader will ignore the drive. 2.Extract Zip Files to USB : Preserves exact folder tree structure. Download the zip archive matching your specific model and extract its contents directly to the root directory of your formatted USB drive. Confirm that the folder path on your USB drive reads: USB_ROOT/vuplus/YOUR_MODEL_NAME/ containing core system binaries such as rootfs.tar.bz2 and kernel_auto.bin. 3.Connect USB & Cold Power Cycle : Cold boot requirement for image detection. Turn off your Vu+ box completely using the rear hardware power switch. Insert the USB drive into the front panel USB port (or rear port if no front USB port exists). Power on the rear switch while observing the front display panel. 4.Confirm Flash & Boot Setup : Triggers automated firmware installation. LCD Screen Models (Duo 4K SE, Ultimo 4K, Uno 4K SE): When the front screen displays "Image detected - Press Power Button", press the front standby button sensor within 5 seconds. Vu+ Zero 4K: The front white LED logo will slowly pulse in and out during the flashing process. Once completed, the screen will read "Flashing Complete" or reboot automatically. Remove the USB drive immediately so the box boots into the OpenBH 6.0 First-Time Setup Wizard. 3. Essential Post-Installation Commands (IPTV & Plugins) Once your receiver completes first-time setup, connect via SSH/Telnet using PuTTY or Terminal (User: root, Password: empty or root) to execute these performance scripts: [SSH Connection: 192.168.X.X] ───► [Terminal Commands] ───► [Enigma2 Feed Engine] │ ├─► Install ServiceApp (exteplayer3) ├─► Install Xstreamity IPTV Plugin └─► Deploy OSCam / NCam Configurations A. Install ServiceApp & exteplayer3 (Fix IPTV Buffer & Audio Lag) Replaces the standard Enigma2 media pipeline with FFmpeg hardware acceleration: Bash opkg update && opkg install enigma2-plugin-systemplugins-serviceapp ffmpeg exteplayer3 Activation: On your remote, navigate to Menu > Setup > System > ServiceApp. Toggle Enigma2 Service Framework to ServiceApp, set Player to exteplayer3, press Green (Save), and restart Enigma2. B. Install Xstreamity IPTV Player For organizing Xtream Codes API provider playlists with posters and full EPG parsing: wget https://raw.githubusercontent.com/KiddaC/Xstreamity/main/catchup/install.sh -O - | script -q -c "sh" /dev/null C. Configure Softcams (OSCam / NCam) Download OSCam from Blue Panel > Softcam Manager > Download Softcams. Transfer your subscription config files (oscam.server or ncam.server) via FTP to: /etc/tuxbox/config/ Restart the softcam inside Blue Panel > Softcam Manager and check Autostart on Boot. Frequently Asked Questions (FAQ)
-
[picon] 220x132 Transparent Picons for Enigma2
PTIPTV posted a topic in Channel Lists, Bouquets & Picons
Download transparent 220x132 Enigma2 picons for Astra 19.2E and Hotbird 13E. High-quality 32-bit channel logos for OpenATV, OpenPLi, and Vu+. 🎨 Overview & Specifications This high-quality 220x132 (32-bit transparent PNG) picon pack provides updated channel logos for popular satellite positions. Designed to look sharp on both dark and light Enigma2 skins (FHD & 4K). Resolution: 220x132 pixels (Standard XPicon format) Depth: 32-bit Transparent PNG Coverage: Astra 19.2°E, Hotbird 13.0°E, Eutelsat 7°W / 8°W (Nilesat) Compatibility: All Enigma2 images (OpenATV, OpenPLi, OpenBH, EGAMI, VTi, BlackHole) 📁 Where to Upload Picons Connect to your satellite receiver using FTP (FileZilla or DCC) and transfer the unzipped picon folder to one of the following paths: Internal Memory (Flash): /usr/share/enigma2/picon/ USB Drive (Recommended): /media/usb/picon/ Hard Drive (HDD): /media/hdd/picon/ (Note: Storing picons on a USB drive or HDD saves internal flash memory and prevents slow boot times.) ⚙️ How to Enable Picons in Your Channel List Open Menu $\rightarrow$ Setup $\rightarrow$ GUI Settings $\rightarrow$ User Interface. Set User Mode to Expert. Enable Show Picons in Channel Selection List. Restart your Enigma2 GUI. 📥 Download Links DVB-S_13E_19.2E_XPicons_220x132_8 Bit_transparent.zip DVB-S_19.2E_XPicons_220x132_32 Bit_transparent.zip DVB-S_13E_XPicons_220x132_32 Bit_transparent.zip (Note: You must be registered and logged in to download attachments.)
-
XStreamity v5.52 is one of the most powerful and stable IPTV Xtream Codes players for Enigma2 devices. Developed by KiddaC, it allows seamlessly playing IPTV playlists, VOD, and Series with full EPG support and custom skins on all major Enigma2 images. 📋 Key Features & Changelog (v5.52) Full Xtream Codes API Support: Connect using Server URL, Username, and Password. Multi-Playlist Management: Add and switch between multiple IPTV providers easily. Enhanced EPG & Catch-up: Integrated electronic program guide with catch-up support. VOD & Series Integration: Clean UI for movies and TV series with poster rendering and media controls. Fixes in v5.52: Fixed logo layout alignment issues. Corrected hyphen line bug in server.py. Removed duplicate imports in mainmenu.py for faster loading. Python 2 and Python 3 full compatibility (OpenATV 7.x/8.0, OpenPLi 9.x, EGAMI 11, etc.). 🖥️ Compatibility Python Architectures: Python 2.7, Python 3.9, Python 3.11, Python 3.12+ Supported Images: OpenATV, OpenPLi, OpenBH, EGAMI, PurE2, VTi, BlackHole, OpenSPA, DreamOS. Supported Receivers: Vu+, Dreambox (OE2.0 / OE2.2 / OE2.5 / OE2.6), Zgemma, Octagon, Gigablue, Edision, Formuler. 🛠️ How to Install XStreamity v5.52 Method 1: Fast One-Line Terminal Install (Recommended) Connect to your receiver via PuTTY or DCC (Telnet) and paste the following command: wget -q "--no-check-certificate" https://raw.githubusercontent.com/emil237/XStreamity/main/installer.sh -O - | script -q -c "sh" /dev/null Method 2: Manual Installation via FTP (.IPK / .DEB) Download the appropriate file format for your image below: .IPK for OpenATV, OpenPLi, OpenBH, EGAMI, etc. .DEB for Dreambox OS (DM900, DM920, Dreambox TWO/ONE). Connect to your receiver using FTP (FileZilla / DCC). Upload the downloaded file to the /tmp directory. Open PuTTY / Terminal and execute the installation command: For IPK (OpenATV / OpenPLi / OpenBH): opkg update && opkg install /tmp/*.ipk For DEB (DreamOS / Dreambox): dpkg -i /tmp/*.deb apt-get install -f Restart the Enigma2 GUI. 📥 Download Links Download XStreamity v5.52 (.IPK enigma2-plugin-extensions-xstreamity_5.52.20260628_all.ipk Download XStreamity v5.52 (.DEB): enigma2-plugin-extensions-xstreamity_5.52_20260628_all.deb (Note: You must be registered and logged in to see download attachments.)
-
Formuler Z11 Pro Max & MYTVOnline3 Setup: Stalker Portal, EPG & Buffer Fixes (2026) Formuler set-top boxes—most notably the Formuler Z11 Pro Max and Z12 Ultra—are widely considered the gold standard for dedicated IPTV hardware. Unlike generic Android TV devices that rely on third-party media applications, Formuler hardware features a custom Android environment built specifically around its proprietary streaming suite, MYTVOnline3 (MOL3). MOL3 bypasses standard Android media frameworks to communicate directly with the box’s Realtek RTD1319C chipset. This yields instantaneous channel switching (zapping times under 0.3 seconds), seamless multi-portal channel merging, native PIP (Picture-in-Picture), and system-level recording/timeshifting. This guide details the complete hardware capabilities of the Z11 lineup, walks through step-by-step MYTVOnline3 portal configuration, and provides performance-tuning steps to eliminate buffer delays and stream freezes. 1. Hardware Breakdown: Z11 Series Comparison Selecting the right Formuler hardware depends on your network setup (Wi-Fi 6 vs. Gigabit Ethernet) and whether you plan to use local storage for pause/recording features. Hardware Specification Formuler Z11 Pro Formuler Z11 Pro Max Formuler Z12 Ultra System Processor (SoC) Realtek RTD1319C Realtek RTD1319C Realtek RTD1319C RAM & Internal Storage 2GB DDR4 / 16GB eMMC 4GB DDR4 / 32GB eMMC 4GB DDR4 / 128GB eMMC Wireless Connectivity Wi-Fi 5 (AC 2x2) Wi-Fi 6 (AX 2x2) Wi-Fi 6E (6 GHz AX) Ethernet Port 1000 Mbps (Gigabit) 1000 Mbps (Gigabit) 1000 Mbps (Gigabit) DRM & Codec Support Widevine L1, 4K AV1/HEVC Widevine L1, 4K AV1/HEVC Widevine L1, Dolby Vision, HDR10+ Storage Expansion MicroSD Slot + USB 2.0 MicroSD Slot + USB 3.0 MicroSD Slot + USB 3.0 2. Step-by-Step MYTVOnline3 Portal Setup MYTVOnline3 allows you to combine multiple IPTV portals (Stalker Middleware, Xtream Codes API, or M3U Playlists) into a single unified channel guide. 1.Launch MYTVOnline3 & Access Content Manager :Opens the primary MOL3 configuration menu. Open MYTVOnline3 from your Formuler home screen. Press the Menu Button (3 horizontal lines) on your Formuler remote control. Navigate down and select Content Manager, then click Content Sources. 2.Add Your Connection Type :Supports Stalker MAC, Xtream API, or M3U. Select + Add Portal or + Add Playlist: For Stalker Portal: Enter your preferred Portal Name, the Portal URL (e.g., [http://serverdomain.com:8080/c/](http://serverdomain.com:8080/c/)), and verify that the displayed ID / MAC Address (00:1A:79:XX:XX:XX) matches the MAC address registered with your provider. For Xtream Codes API: Enter the Server URL, Username, and Password. MOL3 will automatically pull live TV, VOD movies, and series categories in parallel. 3.Configure EPG Update Mode :Ensures program guides load instantly without lag. Inside the Portal Settings screen, scroll down to EPG Mode: Change from Normal to UTC / Normal (Always Download from Server). Set the Update Interval to Every 24 Hours or At Startup. This prevents the box from repeatedly querying the server while you are actively watching a channel. 4.Format External Storage for Timeshift :Required for Timeshift & Recording features. Insert a fast MicroSD card (Class 10 / U3) or a USB 3.0 Flash Drive into the slot on your Formuler box. Go to Settings > System > Storage on the Android menu and format the drive as NTFS or exFAT. Re-open MOL3, go to Settings > DVR & Timeshift, and set your inserted drive as the default path for recordings and buffering. 3. Tuning MYTVOnline3 Settings to Stop Buffering If you encounter audio dropouts, micro-stuttering, or intermittent buffering circles during live sports, apply these hardware player tweaks inside the MOL3 system settings: A. Adjust the Stream Buffer Memory Go to MYTVOnline3 > Settings > Player Options. Change RAM Buffer Size from 0 Seconds (Disabled) to 3 Seconds or 5 Seconds. Why this works: Creating a 3-second memory buffer absorbs brief network jitter, packet loss, or ISP routing spikes without forcing the video engine to stop and reload. B. Change Video Decoder Engine Go to MYTVOnline3 > Settings > Player Options > Video Decoder. Default setting is Hardware (Auto). If a channel shows a black screen with working audio, switch the decoder for that specific channel category to Software (SW) or System Player. C. Enable Auto Frame Rate Matching (AFR) Broadcast television uses varying frame rates depending on the region (e.g., 50 FPS in Europe/UK, 59.94 FPS in North America). Go to Formuler System Settings > Display > Auto Frame Rate (AFR). Toggle AFR to ON (Match Content). This eliminates motion judder on scrolling ticker lines during news and sports broadcasts by matching your TV panel's refresh rate to the source feed. 4. Troubleshooting MYTVOnline3 Errors Problem 1: Portal Connection Error / Code 7001 Cause: The box cannot reach the provider's server or the account has expired. Fix: Check your Internet connection in Settings > Network. Change your Formuler box's DNS servers. In Network Settings, switch from DHCP to Static/Manual and enter DNS 1: 1.1.1.1 (Cloudflare) and DNS 2: 8.8.8.8 (Google). Verify that the system date and time are synchronized under Settings > Device Preferences > Date & Time > Automatic Date & Time (Use Network-Provided Time). Problem 2: EPG Details Are Blank / Missing Cause: EPG database corruption or memory overflow. Fix: Go to Content Manager > Content Sources, select your active portal, and click Clear EPG Data. Re-sync the portal to re-download a fresh EPG database file. Frequently Asked Questions (FAQ)
-
Optimizing Smart TVs for IPTV: Samsung Tizen vs LG webOS vs Sony Google TV (2026) Running IPTV directly on a Smart TV screen without an external Firestick or Android box is the cleanest setup possible—one remote, no messy cables, and native 4K display scaling. However, TV platforms handle live streaming very differently. A setup that runs smoothly on a Sony Google TV might stutter or fail on a Samsung Tizen or LG webOS panel due to strict operating system sandboxing, limited internal storage, and restrictive native app stores. This guide breaks down the hardware limitations of native Smart TV streaming, reviews the top-performing apps for each TV OS in 2026, and provides step-by-step optimization fixes for buffer lag and audio/video sync issues. 1. The Real Bottleneck: Smart TV Hardware & Ethernet Limits Most users assume plugging an Ethernet cable directly into their 4K OLED or QLED TV guarantees the fastest connection. In reality, nearly all major manufacturers (Samsung, LG, and Sony) still equip their Smart TVs with legacy 100 Mbps Fast Ethernet ports. [Router Gigabit Speed: 500 Mbps] │ ├─► [TV Built-in LAN Port (100 Mbps Limit)] ──► Max Real Throughput: ~90-94 Mbps │ └─► [TV 5 GHz Wi-Fi / Wi-Fi 6] ───────────────► Real Throughput: 250-450+ Mbps While 94 Mbps is sufficient for compressed Netflix 4K, it creates severe network bottlenecks for live IPTV when your provider pushes uncompressed 60fps sports streams, heavy EPG electronic program guide updates, or high-bitrate 4K VOD feeds. Wi-Fi 5GHz / 6GHz: In almost all cases, connecting your TV to a 5 GHz Wi-Fi channel provides significantly higher throughput (200–500 Mbps) than the physical LAN port. USB-to-Gigabit Adapter: If your Wi-Fi is unstable, you can plug a compatible USB 2.0/3.0 to Ethernet adapter into the TV’s USB port to achieve speeds up to 180–300 Mbps. 2. Platform Breakdown & Top Native IPTV Apps Because Samsung, LG, and Sony run completely different operating systems, app availability and video decoding capabilities vary widely. Feature / Metric Samsung (Tizen OS) LG (webOS 3.0 – webOS 24) Sony (Google TV / Android TV) App Store Type Samsung APPS Store LG Content Store Google Play Store Sideloading (APKs) ❌ No (Encrypted Tizen packages) ❌ No (WebOS IPK sandbox) ✅ Yes (Full APK / Downloader Support) Top Player Apps IBO Player Pro, Smart One, BOB Player IBO Player, Smart IPTV, SS IPTV TiviMate, OTT Navigator, Sparkle TV Hardware Decoding HW (Tizen Media Engine) HW (webOS Native Player) HW / HW+ (ExoPlayer / VLC Engine) A. Samsung Smart TVs (Tizen OS) Samsung’s Tizen OS is fast and responsive, but its app store enforces strict policy checks and does not allow APK sideloading. IBO Player Pro / Smart One IPTV: Currently the two most reliable Tizen applications. Both support direct Xtream Codes API authentication and automated M3U parsing without crashing the Tizen memory buffer. Setup Model: Most Tizen apps operate on a MAC Address Activation model. You download the app, note the MAC address and Key from the settings menu, and upload your playlist via the app’s web portal on your phone or PC. B. LG Smart TVs (webOS) LG’s webOS handles RAM management well, but app developers frequently face app removal issues from the LG Content Store. IBO Player / Hot IPTV / IPTV Smart Player: The preferred players on webOS 4.0 through webOS 24. They offer fast zapping times (0.4s – 0.8s) and native 4K HDR color space pass-through. Avoid Legacy Smart IPTV (SIPTV): While historic, the classic red-icon Smart IPTV app frequently experiences buffer loops on modern high-bitrate HEVC/H.265 streams on newer LG OLED panels. C. Sony Smart TVs (Google TV / Android TV) Sony TVs run full Google TV OS, giving them a massive advantage over Samsung and LG. TiviMate IPTV Player: Hands-down the best IPTV player across any platform. It offers multi-screen viewing, automatic EPG matching, seamless catch-up TV, and customizable buffer delays. Direct Sideloading: You can install apps via Google Play or sideload custom APKs using the Downloader app just like on an Amazon Firestick. 3. Step-by-Step IPTV Optimization for Smart TVs Follow this step-by-step procedure to resolve buffering, fix audio lip-sync delays, and prevent sudden app crashes on Samsung, LG, or Sony Smart TVs: 1.Switch TV DNS to Public Servers : Prevents network throttling and DNS blocking. Go to your TV's Network Settings (Wired or Wireless): Change IP Settings from Automatic to Manual / Static (keep your TV's current IP address and Subnet Gateway). Set Primary DNS (DNS 1) to 1.1.1.1 (Cloudflare) or 8.8.8.8 (Google). Set Secondary DNS (DNS 2) to 1.0.0.1 or 8.8.4.4. 2.Clear TV Memory & Force Deep Restart : Frees up system memory on Tizen and webOS. Smart TVs do not completely turn off when you press the power button; they enter a low-power standby mode that preserves clogged RAM. Samsung: Hold the Power button on the Smart Remote for 5 seconds until the TV turns off and the Samsung logo reappears on screen. LG: Unplug the main power cable from the wall outlet for 60 seconds, then press and hold the physical TV power button on the panel for 10 seconds before plugging it back in. Sony: Go to Settings > System > Restart. 3.Configure App Decoder & Buffer Settings : Bypasses stream decoding bottlenecks. Inside your player app (IBO Player, Smart One, or TiviMate): Navigate to App Settings > Playback / Decoder. Set the Video Decoder to Hardware (HW). If video plays with audio but a black screen, switch to System / HW+. Change the stream format from .m3u8 (HLS) to MPEG-TS (.ts) for faster channel zapping times. Set the stream buffer size to Small / Medium (2 to 5 seconds). Avoid setting the buffer to Large on Smart TVs, as it starves the TV's small onboard storage. 4. Fixing Common Smart TV Playback Bugs Problem A: Video Plays Fine, But There Is No Audio (E-AC3 / DTS Issue) Cause: Many Samsung and LG TVs do not support native DTS audio decoding or Dolby Digital Plus (E-AC3) passthrough over raw stream channels without a soundbar. Fix: Go to your TV's Sound Settings > Expert Settings. Change Audio Output Format from PCM to Auto or Pass-Through. In your IPTV app settings, toggle Software Audio Decoder to ON. Problem B: App Freezes or Closes to TV Home Screen Cause: Smart TVs typically have only 4GB to 8GB of total storage, with under 1GB available for app cache. Large IPTV playlists containing 50,000+ VOD movies and series overwhelm the TV’s RAM during EPG syncing. Fix: Ask your IPTV service provider to filter your playlist line. Remove unwanted country categories, adult channels, and heavy VOD libraries so your TV only syncs active live TV categories. Frequently Asked Questions (FAQ)
-
How to Unlock Developer Options & Sideload IPTV Apps on FireOS 7 & 8 (2026 Guide) Amazon Fire TV devices (including Fire TV Stick 4K Max, Fire TV Stick HD, and Fire TV Cube) run Amazon's modified FireOS software base. By default, Amazon restricts users to the official Amazon Appstore and hides advanced developer settings to prevent external application installation. With recent updates across FireOS 7 and FireOS 8, Amazon introduced individual application permission management and hidden system menus. This guide provides the updated 2026 process to unlock hidden system privileges, authorize the Downloader utility, sideload third-party IPTV engines (such as TiviMate, XCIPTV, or OTT Navigator), and troubleshoot package parsing errors. 1. FireOS Version Permission Matrix Unlike standard Android TV devices, FireOS handles third-party application execution via a strict dual-layer security model: FireOS System Version Device Models Hidden Menu Unlock Method Unknown Apps Authorization FireOS 6 (Legacy) Firestick 2nd Gen, Fire TV Edition Exposed by Default Global Toggle (Settings > My Fire TV > Developer Options) FireOS 7 Firestick 4K (1st Gen), Firestick Lite, Firestick 3rd Gen Tap Device Name 7 Times Per-App Permission List FireOS 8 Firestick 4K Max (2nd Gen), Firestick 4K (2nd Gen) Tap Device Name 7 Times Isolated Sandbox Permission per App 2. Step-by-Step Sideloading Blueprint 1.Enable Hidden Developer Options : Unlocks hidden OS developer settings. From the Fire TV Home Screen: Navigate to Settings (Gear Icon) > My Fire TV (or Device & Software). Select About. Highlight the exact name of your device (e.g., Fire TV Stick 4K Max) and press the Select (Center) button on your Fire TV remote 7 times rapidly. A confirmation prompt will appear saying: "No need, you are already a developer." Press the Back button once to reveal the newly exposed Developer Options menu under About. 2.Install Downloader from Amazon Appstore : Required utility for retrieving APK files. Return to the Home Screen and click the Find / Search icon. Type Downloader using the on-screen keyboard. Select the official Downloader application (orange icon developed by AFTVnews). Click Get / Download to install it. Do not launch the application yet. 3.Authorize Unknown App Permissions : Grants APK execution rights. Go to Settings > My Fire TV > Developer Options. Click Install Unknown Apps (or Apps from Unknown Sources on older firmware). Scroll down to Downloader in the list of applications and toggle the switch to ON. 4.Sideload Your Target IPTV App : Fetch and execute IPTV binaries. Open the Downloader application from your Apps list. Grant storage permissions when prompted on the first launch. In the main URL address field, type your direct .apk download URL or numeric shortcode. Click Go. The file will download automatically. When the installation prompt appears, click Install, then click Done. Select Delete on the Downloader prompt to remove the temporary installation file and conserve flash storage. 3. Recommended Player Sideloading Codes When using Downloader, numeric shortcodes eliminate the need to type long URLs using the remote control. [Downloader App URL Bar] ---> [Enter 6-Digit Code] ---> [Auto Redirect & Download APK] TiviMate IPTV Player: Enter shortcode 250931 (Official TiviMate APK mirror). IPTV Smarters Pro: Enter shortcode 75340 or 444752. XCIPTV Player: Enter shortcode 26330. 4. Fixing Sideloading & Installation Errors Error 1: "There was a Problem Parsing the Package" This error occurs when the downloaded binary is corrupted or incompatible with your Firestick architecture: Architecture Mismatch: Modern 64-bit FireOS 8 devices require 32-bit (armeabi-v7a) or universal APKs. Ensure you are not attempting to force a 64-bit-only (arm64-v8a) mobile APK onto the device. Incomplete Download: Clear the cache in Settings > Applications > Manage Installed Applications > Downloader, re-open Downloader, and re-download the file. Error 2: "App Not Installed" Screen Insufficient Internal Storage: FireOS requires double the APK size in free temporary flash storage to extract and execute installation scripts. Maintain at least 1.5 GB of free space under Settings > My Fire TV > About > Storage. Existing Package Conflict: If an older version of the same application exists (e.g., standard IPTV Smarters), uninstall the existing version before sideloading an updated or custom APK. Frequently Asked Questions (FAQ)
-
How to Optimize Firestick / Fire TV for IPTV & Fix Buffer Lag (2026 Guide) Amazon Fire TV Stick devices (such as the Fire TV Stick 4K Max, Fire TV Stick HD, and Fire TV Cube) are built on Amazon's customized FireOS. While their hardware easily supports 60fps high-bitrate live TV and 4K streams, the system is aggressive with background ad tracking, telemetry services, auto-playing video previews, and memory management. Over time, these background processes saturate the limited RAM (typically 1.5GB to 2GB) and CPU cycles, resulting in buffer loops, app crashes, and micro-stuttering during live IPTV playback. This guide provides the complete 2026 optimization process to debloat FireOS, configure network protocols, and tune IPTV player hardware decoders. 1. Disable Privacy Tracking & Background Telemetry Amazon collects anonymized diagnostic and usage data continuously in the background. Disabling telemetry features frees up CPU cycles and prevents background network bandwidth consumption. 1.Open Firestick Preferences : From the Fire TV Home Screen, go to Settings (Gear Icon) > Preferences. 2.Configure Privacy Settings :Stops background usage tracking. Navigate to Privacy Settings and switch all three of the following options to OFF: Device Usage Data Collect App Usage Data Interest-Based Ads 3.Disable Data Monitoring :Frees RAM used by telemetry. Go back to Preferences > Data Monitoring and turn Data Monitoring OFF. 4.Disable Featured Content Autoplay :Prevents CPU spikes on UI homepage. Go to Preferences > Featured Content. Turn OFF both Allow Video Autoplay and Allow Audio Autoplay. 2. RAM Optimization & Cache Clearance FireOS keeps recently closed streaming apps suspended in RAM, which starves dedicated player engines like TiviMate, Smarters Pro, or OTT Navigator. A. Clear App Caches Go to Settings > Applications > Manage Installed Applications. Sort apps by Size. Select heavily used applications (e.g., Prime Video, YouTube, Netflix, screensaver apps) and click Clear Cache. Note: Do NOT select "Clear Data" unless you wish to reset your login details for that application. B. Uninstall Unused Apps Maintain at least 1.5 GB to 2 GB of free internal flash storage at all times. When solid-state storage drops below 1GB, memory swap speeds decrease dramatically, triggering system-wide streaming stutter. 3. Wi-Fi & Network Settings for Buffer-Free Streaming Wireless interference is the primary cause of dropouts during live sports and 60fps streams. Network Parameter 2.4 GHz Band 5 GHz / Wi-Fi 6 Band Recommended Setting Coverage Range Long Range (Through Walls) Short Range (Line of Sight) Use 5 GHz if within 5–7 meters of router. Max Real-World Throughput ~30 – 50 Mbps ~200 – 600+ Mbps 5 GHz handles high-bitrate 4K raw feeds easily. Channel Congestion High (Crowded) Low Force router channel width to 80 MHz. Optional Fix: Static IP & Public DNS If your Internet Service Provider (ISP) throttles live streaming traffic or manipulates DNS queries, change your Firestick DNS: Go to Settings > Network. Press the Options Button (3 lines) on your current Wi-Fi network to forget it, then reconnect. Select Advanced Options and assign a Static IP. Set DNS 1 to 1.1.1.1 (Cloudflare) and DNS 2 to 8.8.8.8 (Google). 4. Player-Level Settings Optimization (TiviMate & ExoPlayer) Configuring your IPTV application's playback engine ensures the Firestick hardware processes video streams correctly. [Raw H.264 / HEVC Stream] ---> [ExoPlayer Decoder: HW] ---> [Display Output: Auto-Frame Matching] | v [Buffer Size: Medium (10-15s)] Output Format: Switch playlist output format from standard .m3u8 (HLS) to Xtream Codes API (TS / MPEG-TS). TS streams provide faster channel switching and more stable timestamps for live feeds. Decoder Type: Set Video and Audio decoders to Hardware (HW). Avoid Software (SW) decoding, as it forces the CPU to decode frames manually, generating excessive heat and dropped frames. Auto Frame Rate (AFR): Enable AFR (Switch Frame Rate) inside TiviMate/FireOS. This forces your TV panel to match the native broadcast frame rate (e.g., 50Hz for European sports, 60Hz for US broadcasts), eliminating motion judder. Stream Buffer Size: Set buffer size to Medium (or 5-10 seconds). Setting the buffer to "Very Large" consumes limited RAM and can cause video freezing on Firestick Lite/Select models. Frequently Asked Questions (FAQ)
-
Fix MAG Box Portal Errors: MAC Activation, Page Loading Error, & Network Setup (2026) Infomir MAG set-top boxes (such as the MAG 540, MAG 524, MAG 420, and MAG 322) are built specifically for dedicated Stalker Middleware and Ministra portal streaming. Unlike generic Android TV boxes that use software apps, MAG devices connect directly to IPTV server portals via hardcoded MAC address authentication (00:1A:79:XX:XX:XX). However, portal setup issues—such as "Page Loading Error", "Your STB is Blocked", infinite loading loops, or NTP server sync failures—are common when migrating to newer hardware or updating portal URLs. This guide breaks down how Stalker portal authentication works, provides step-by-step portal setup procedures, and details fixes for network timeouts and bootloader errors. 1. How MAG Stalker Authentication Works MAG boxes bypass traditional username/password playlists by transmitting the device's unique hardware MAC address and serial number (SN) directly to the provider's Ministra server panel during boot. MAG Hardware Generation Linux OS Version Stalker / Ministra Compatibility Recommended Video Output Legacy (MAG 254 / 322) Linux 3.8 (Legacy) Stalker v5.1 – v5.3 1080p 60Hz (HDMI 1.4) Mid-Range (MAG 420 / 424) Linux 4.4 Ministra v5.4+ / Stalker 4K 60fps (HEVC / H.265) Modern (MAG 524 / 540) Linux 4.9 (High-Perf) Ministra 5.6.1+ / Portal API v2 4K 60fps (AV1 / HEVC / HDR10) 2. Step-by-Step Portal Setup & MAC Registration Before booting your MAG box into a live portal, ensure your provider has registered your exact MAC Address (found on the sticker on the bottom of the device, starting with 00:1A:79). 1.Access the Inner System Portal : Power on your MAG box without an internet cable connected, or press and hold the Gear Icon / Setup button on your MAG remote during boot to enter the System Settings menu. 2.Configure Network Connection : Navigate to Network > Wired (Ethernet) and set Auto (DHCP) to enable automatic local IP address assignment from your router. 3.Synchronize Network Time (NTP) :Fixes SSL certificate handshake failures. Go to System Settings > Servers > NTP. Ensure the NTP Server address is set to pool.ntp.org or time.nist.gov. If the system date and time are incorrect, secure HTTPS portals will fail to load. 4.Configure Portal URL :Enter exact URL provided by your host. Navigate to System Settings > Servers > Portals. Portal 1 Name: Enter your preferred name (e.g., Main Portal). Portal 1 URL: Type the exact server portal address (e.g., [http://provider-domain.com:8080/c/](http://provider-domain.com:8080/c/)). 5.Save and Reboot Device : Press the OK button to save changes, then press Exit until prompted to restart the portal. Select Reboot. 3. Troubleshooting Common MAG Portal Errors Error A: "Page Loading Error" (Host Timeout / Network Drop) This error occurs when the MAG box cannot resolve the server's domain name or establish a socket connection. DNS Resolution Fix: In System Settings $\rightarrow$ Network $\rightarrow$ Auto (DHCP), change DNS Server 1 to 1.1.1.1 (Cloudflare) and DNS Server 2 to 8.8.8.8 (Google). ISP default DNS servers frequently block Stalker portal domains. Portal URL Extension Check: Ensure the portal URL ends with /c/ or /index.html depending on your provider's portal framework. Missing trailing slashes (/) often trigger loading loops. Incorrect URL: http://mag.serverdomain.com:8080 Correct URL: http://mag.serverdomain.com:8080/c/ Error B: "Your STB is Blocked / Check Account Details" MAC Address Mismatch: Double-check that there are no typos in the MAC address registered with your provider. Letters must match, and the prefix must be 00:1A:79. Expired Subscription or Active Session Lock: If you previously used your MAC address on a software emulator (like STB Emulator or Smart STB on a Smart TV), log out of the emulator completely. The server portal will reject connection requests if it detects an active ghost session. 4. Resetting via BIOS / Bootloader Menu If your MAG box gets stuck in an infinite boot loop or displays a black screen after a resolution mismatch, you must reset the video output or perform a factory reset via the hardware bootloader. [Unplug Power] ---> [Hold Rear FN / Remote Menu Button] ---> [Plug Power In] ---> [BIOS Menu Screen] Disconnect the power cable from your MAG box. Press and hold the FN button on the back of the box (or hold the Menu button on the remote pointed directly at the IR receiver). Reconnect the power cable while continuing to hold the button until the blue BIOS / Boot Options screen appears on your TV. Fix Black Screen: Navigate to TV System and change the resolution to 1080i-50 or 720p-50, then select Save & Exit. Factory Reset: Navigate to Def. Settings $\rightarrow$ Select Yes to restore factory firmware settings. Frequently Asked Questions (FAQ)
-
Fix Android TV Box Overheating, Thermal Throttling, & CPU Stuttering During 4K IPTV Streams (2026) Streaming live 4K IPTV, 60fps sports broadcasts, and high-bitrate HEVC/AV1 streams places continuous computational demand on an Android TV box's System-on-Chip (SoC). While modern processors like the Amlogic S905X4, Allwinner H616, and Rockchip RK3566/RK3528 handle heavy hardware decoding, budget TV box enclosures lack active cooling fans or adequate aluminum heatsinks. When SoC temperatures cross critical thresholds, the Android kernel engages thermal throttling, intentionally slowing down CPU and GPU clock speeds to prevent hardware failure. This hardware protection mechanism manifests as micro-stuttering, sudden frame drops, progressive audio-video desync, and eventual system reboots mid-stream. 1. How Thermal Throttling Destroys Live 4K Playback When video decoders process 4K 60fps streams, both CPU cores (handling network packet demuxing and buffer allocation) and GPU/VPU cores (handling hardware decoding) operate at max capacity. Without heat dissipation, internal temperatures surge rapidly. Temperature Range System Status Impact on IPTV Playback $35^\circ\text{C} - 65^\circ\text{C}$ Nominal Operating Temp Smooth 4K decoding, stable frame rates, zero buffer lag. $66^\circ\text{C} - 79^\circ\text{C}$ Warm / High Load Increased fan noise (if active); minor UI lag in player EPGs. $80^\circ\text{C} - 89^\circ\text{C}$ Thermal Throttling Active CPU drops clocks by 30-50%; video frames drop; lip-sync drifts. $\ge 90^\circ\text{C}$ Critical Emergency Zone Kernel force-closes streaming apps or triggers hard system reboot. [Normal Load: 1.8 GHz CPU] ---> Temps Rise (> 80°C) ---> [Thermal Throttling: 1.0 GHz] | v [Dropped Frames & Stutter] <--- [ExoPlayer Buffer Starvation] <--- 2. Real-Time Temperature Monitoring Setup Before applying hardware or software fixes, measure your baseline temperatures under actual 4K stream loads. Install Diagnostic App: Download CPU-Z or AIDA64 from the Google Play Store (or sideload via Downloader). Enable ADB Overlay (Optional): Use apps like Thermal Monitor for Android to display a live floating temperature reading over your IPTV player. Run a Stress Test: Open TiviMate or OTT Navigator, switch to a 4K 60fps live sports channel, and allow it to play for 20 minutes. Evaluate: If your temperature climbs continuously past $82^\circ\text{C}$ without stabilizing, your box is actively throttling CPU performance. 3. Software Optimizations to Lower Thermal Load Reducing background rendering and display overhead frees up processor headroom, significantly dropping internal temperatures without hardware modifications. A. Render the Android UI at 1080p (Keep 4K Video Passthrough) Many generic Android boxes attempt to render the system launcher and player interface in native 4K, placing a constant 4K frame-buffer burden on the GPU. Navigate to Settings > Device Preferences > Display & Sound > Screen Resolution. Set Display Mode to 1080p 60Hz (or 1080p 50Hz for PAL/European TV feeds). Note: Modern IPTV media engines (like ExoPlayer and VLC) bypass the display UI resolution layer, allowing 4K video streams to output in full 4K resolution while the menu interface runs coolly at 1080p. B. Disable Picture Enhancements & Post-Processing Hardware picture processing modules generate significant heat on the SoC die. In Android Settings $\rightarrow$ Display, turn OFF MEMC (Motion Estimation, Motion Compensation), Dynamic Contrast Enhancers, and Noise Reduction. Disable "Always-On HDR" or SDR-to-HDR conversion modes. Force HDR to Auto / Passthrough so the box only processes HDR metadata when watching native HDR streams. C. Clean Background Services & Disable Autoplay Go to Settings > Apps > See all apps. Force-stop unused background applications (games, secondary media players, file managers). Inside your launcher settings, turn off live video background previews and animated wallpapers. 4. Hardware Cooling Solutions: Passive & Active Upgrades If software tweaks do not bring temperatures below $75^\circ\text{C}$, physical cooling upgrades are required. 1.Elevate Chassis Vents Off Surfaces :Simple Airflow Clearance. Avoid placing Android TV boxes directly on carpeted surfaces, glass stands, or enclosed TV cabinets. Use small rubber feet or standoffs to raise the box 1–2 cm, enabling airflow underneath the bottom intake grilles. 2.Install a 5V USB Cooling Fan :Silent Active Cooling. Purchase a dual 80mm or 120mm 5V USB cooling fan. Plug the fan directly into an open USB port on the TV box or TV panel. Position the fan underneath or on top of the box to exhaust heat away from the chassis. This reduces temperatures by $15^\circ\text{C} - 25^\circ\text{C}$. 3.Replace Factory Thermal Pad with Aluminum Heatsink :Advanced Thermal Mod. Unscrew the bottom plastic casing of the Android box. Remove the stock low-grade silicone thermal pad covering the main SoC. Clean the CPU die with 99% isopropyl alcohol. Apply a solid aluminum or copper heatsink using double-sided thermal adhesive tape. 5. Player-Level Decoder Settings for Cooler Playback Different video decoders utilize hardware resources with varying efficiency. ExoPlayer (Default in TiviMate): Extremely fast, but relies heavily on system RAM caching. In TiviMate $\rightarrow$ Settings > Playback, set Buffer Size to Small or Medium. Excessively large buffers force continuous flash memory writes, generating heat inside the internal eMMC/UFS storage chip. VLC / HW+ Engine (in OTT Navigator): Excellent for low-end SoCs. Switching decoder mode to Hardware (HW+) offloads rendering strictly to specialized hardware fixed-function blocks, minimizing general CPU core utilization. Frequently Asked Questions (FAQ)
-
Fix Audio-Video Sync Delays & Surround Sound Passthrough on Android TV Boxes (2026) Audio out-of-sync issues (lip-sync lag) and sudden sound dropouts are among the most frustrating technical problems on Android TV and Google TV devices (such as NVIDIA Shield Pro, Xiaomi TV Box S, Chromecast 4K, and Mecool boxes). When streaming live 4K IPTV or watching high-definition VOD movies, video and audio tracks are demuxed in real-time. If your Android TV box tries to decode multi-channel Dolby Digital/Atmos audio internally instead of passing the raw bitstream to your soundbar or AV receiver, the extra processing load creates a micro-delay. Over time, the audio drifts several seconds behind the video. This guide details how to resolve audio-video sync delays, configure surround sound passthrough across different player engines (ExoPlayer, VLC, and System Player), and eliminate audio lag caused by Auto Frame Rate (AFR) switching. 1. Understanding Android Audio Output Modes Android TV handles audio routing through three distinct pipeline modes. Selecting the wrong mode for your home audio setup causes hardware latency and PCM channel downmixing. Audio Output Mode How It Works Audio Processing Location Latency / Sync Risk Best For PCM (Decoded) Android TV decodes compressed audio into uncompressed 2.0/5.1 PCM Inside the Android TV Chipset High Latency (CPU processing delay) Basic TV speakers / 3.5mm Jack Auto (System Default) OS auto-detects downstream receiver via HDMI EDID handshaking Hybrid (Depends on format) Moderate (EDID mismatches can cause sync lag) Standard setups without AV Receivers Passthrough (Bitstream) Bypasses TV decoding; sends raw Dolby/DTS data straight to receiver Inside Soundbar or AV Receiver Zero Latency (Hardware bitstream matching) Soundbars, AV Receivers, Home Theaters 2. Step-by-Step Audio Passthrough Configuration To eliminate CPU processing delay on budget and mid-range Android boxes, you must enable hardware bitstream passthrough at both the system level and inside your IPTV player app. 1.Configure System-Level Digital Audio Output : Go to Settings (Gear Icon) > Display & Sound > Advanced Audio Settings. Change Digital Audio Output (or Select Formats) from Auto to Passthrough (or Manual and check Dolby Digital, Dolby Digital Plus, and DTS). 2.Configure TiviMate Audio Settings : Open TiviMate $\rightarrow$ Settings > Playback > Audio. Enable Audio Passthrough. If you experience audio dropouts on live channels, set Audio Track Switching to Software while keeping main stream audio on Hardware. 3.Configure OTT Navigator Audio Settings : Open OTT Navigator $\rightarrow$ Settings > Media Player > Audio Output. Change output driver from AudioTrack (Standard) to OpenSL ES or AAudio. Enable Pass-through mode for AC3 / EAC3 / DTS. 4.Set eARC / ARC Latency Control on TV Panel :Prevents HDMI ARC handshake delays. If your Android box is connected directly to your TV and passing audio down to a soundbar via HDMI eARC, open your TV display settings $\rightarrow$ Sound $\rightarrow$ Audio Delay / Lip-Sync Adjustment and set it to 0 ms or Auto Passthrough. 3. Fixing Video Decoder Lag (ExoPlayer vs. Hardware Fallback) If audio passthrough is enabled but sound is still out of sync with video, the issue usually stems from video decoding bottlenecks rather than audio pipelines. Modern high-bitrate live feeds (such as 4K 60fps broadcasts using HEVC/H.265 or AV1) can choke budget Android TV decoders using default media engines. [M3U Stream Feed] ---> [ExoPlayer Decoder] ---> Drops Video Frames ---> Audio Out-of-Sync [M3U Stream Feed] ---> [VLC / Hardware HW+ Engine] ---> Smooth Demuxing ---> Perfect Sync How to Switch Video Decoders in IPTV Apps: In TiviMate: Go to Settings > Playback > Decoder. Change Video Decoder from Hardware to Software only if hardware acceleration produces video stuttering. Alternatively, set Use External Player to VLC Player. In OTT Navigator: Go to Settings > Media Player > Decoder. Switch the primary engine from ExoPlayer to System (VLC) or Hardware (HW+). VLC features superior audio/video demuxers that automatically resynchronize audio timestamps when network packets drop. 4. Resolving Frame Rate Switching Drift (AFR Fine-Tuning) When Auto Frame Rate (AFR) matching is turned ON, your Android TV box changes its HDMI display refresh rate to match the incoming video feed (e.g., switching from 60Hz to 50Hz for European sports). However, during the refresh rate switch, the video clock resets while the audio stream continues, causing a static delay. Setting Audio Delay Offsets: If audio is consistently delayed by the exact same amount across all channels (e.g., audio arrives 200ms after video): While playing a channel in TiviMate, press OK to bring up the player controls. Click the Gear icon (Playback Options) $\rightarrow$ Audio Track. Select Audio Delay. Adjust the offset slider (e.g., -200 ms or +150 ms) until lip movements match the spoken audio. Click Apply for all channels to save the global correction factor. Frequently Asked Questions (FAQ)
-
Best IPTV Apps for Smart TVs in 2026: Samsung Tizen, LG webOS, & Sony Google TV Setup Streaming live IPTV directly on a Smart TV eliminates the need for extra remote controls and HDMI dongles. However, running live streams on native television hardware comes with distinct challenges. Operating system restrictions, limited application stores, lower system RAM, and hardware decoding bottlenecks vary wildly across Samsung (Tizen OS), LG (webOS), and Sony (Google TV / Android TV). This technical guide breaks down the best IPTV applications for each major Smart TV ecosystem in 2026, compares native OS performance, and provides actionable optimization steps to eliminate buffering and memory crashes. 1. Operating System Breakdown: Tizen vs. webOS vs. Google TV Not all Smart TV operating systems treat live stream playback equally. While Sony TVs run on open Google TV architecture (allowing third-party APK sideloading), Samsung and LG use closed operating systems that restrict software installation strictly to their official app stores. Feature / Capability Samsung (Tizen OS) LG (webOS) Sony (Google TV) App Store Openness Closed (Samsung App Store) Closed (LG Content Store) Open (Google Play Store) TiviMate Compatibility ❌ No (Requires external box) ❌ No (Requires external box) Yes (Native Installation) APK Sideloading ❌ No ❌ No Yes (Direct / Downloader) Built-in LAN Speed 100 Mbps Fast Ethernet 100 Mbps Fast Ethernet 100 Mbps (Wi-Fi 6 on high-end) Primary Player Apps IBO Player, Smart One, Smarters IBO Player, Smart One, SS IPTV TiviMate, OTT Navigator, Sparkle Background RAM Handling Aggressive app kill Moderate app cache drop Flexible memory management 2. Top Recommended IPTV Apps per Smart TV Platform A. Samsung Smart TVs (Tizen OS) Samsung’s Tizen OS prohibits installing .apk files directly. You must rely on native players available in the Samsung App Store. IBO Player Pro: Currently the fastest and most reliable app on Tizen. It supports M3U links and Xtream Codes API with rapid zapping speeds and clean EPG layouts. Smart One IPTV: A light, fast player that handles heavy playlists with over 50,000 items without crashing Tizen's limited system RAM. IPTV Smarters Pro (Tizen Edition): A custom web-app build of Smarters. While feature-rich with VOD categories, it can feel sluggish on older Samsung 4K models. B. LG Smart TVs (webOS) LG’s webOS features a modern pointer-based magic remote interface, but system memory on entry-level OLED/NanoCell models can fill up quickly when caching large EPG files. Nanomid Player: Offers exceptional video buffer management and custom player parameters optimized for webOS web-view rendering. IBO Player / Smart One IPTV: Both are fully available on the LG Content Store and provide seamless MAC-address activation portals. SS IPTV: A legacy free app that works well for basic M3U playlist uploads, though its user interface feels dated compared to modern alternatives. C. Sony Smart TVs (Google TV / Android TV) Sony BRAVIA TVs powered by Google TV enjoy access to the full Android TV app ecosystem. TiviMate IPTV Player: The undisputed standard for live streaming. Supports multi-screen playback, local SMB network recording, and deep EPG integration. OTT Navigator: Highly customizable alternative to TiviMate with advanced video filters, automatic stream backup servers, and codec tweaks. Sparkle TV: A modern player designed specifically to integrate seamlessly into Android TV’s native "Live Channels" interface. 3. How to Set Up IPTV on Your Smart TV 1.Install a Native Player App :For Samsung (Tizen) & LG (webOS). Open the Samsung App Store or LG Content Store. Search for IBO Player or Smart One IPTV and install the application directly to your TV. 2.Retrieve Your TV Device MAC Address : Launch the app on your TV. Note the displayed MAC Address and Device Key shown on the splash screen. 3.Upload Your Playlist via Web Portal : On a smartphone or PC, navigate to the application's official management website (e.g., [iboplayer.com/manage](https://iboplayer.com/manage) or smartone-iptv.com). Enter your TV's MAC address along with your provider's Xtream API (Server URL, Username, Password) or M3U URL. 4.Reload Content on Your TV : Return to your TV, restart the application, and click Reload / Refresh. Your channel categories, live guide (EPG), and VOD libraries will populate automatically. 4. Troubleshooting & Performance Optimization Fixing the 100Mbps Built-in Ethernet Bottleneck Almost all modern 4K Smart TVs (including premium OLED models from Samsung, LG, and Sony) are manufactured with standard 100 Mbps Fast Ethernet ports rather than 1000 Mbps Gigabit ports. High-bitrate 4K uncompressed streams or multi-connection feeds can peak above 80–90 Mbps, causing sudden buffer spikes over wired cable. Solution: If your router is near your TV, connect over 5GHz Wi-Fi (Wi-Fi 5 or Wi-Fi 6), which routinely yields 250–500 Mbps on modern Smart TVs, or use a compatible USB-to-Gigabit Ethernet adapter. [TV Built-in RJ45 Port] ---> Restricted to 100 Mbps MAX (Can cause 4K Stream Buffering) [5GHz Wi-Fi / USB Adapter] ---> Achieves 300+ Mbps (Smooth High-Bitrate Playback) Resolving RAM Memory Leaks & App Freezes Because Smart TVs keep recently used apps suspended in memory, running demanding IPTV applications for days without closing them causes background buffer accumulation. Samsung Tizen: Hold the Back/Exit button on your remote for 3 seconds while inside the app to force-close it completely, clearing the system cache. LG webOS: Open the webOS Recents/Home menu, hover over the IPTV player tile, and click the "X" icon to terminate the process. Sony Google TV: Navigate to Settings > Apps > See all apps > Select App > Force Stop, then Clear Cache. Frequently Asked Questions (FAQ)
-
TiviMate Premium Masterclass: Advanced Recording to NAS/SMB, EPG Sync, & Multi-Screen Setup (2026) TiviMate is widely acknowledged as the premier IPTV player for Android TV, Google TV, and Amazon Fire TV devices. While its stock interface looks clean right after importing an Xtream Codes or M3U playlist, unlocking its full potential requires configuring network storage, auto-syncing EPG sources, and tuning its video engine for high-bitrate live streams. This masterclass walks through setting up an SMB network recording drive (DVR), mapping secondary XMLTV sources, optimizing stream buffers to eliminate buffering, and backing up your entire layout for seamless deployment across multiple devices. 1. Free vs. Premium Architecture Breakdown While the basic version of TiviMate serves as a lightweight playlist viewer, activating TiviMate Premium (via Google Play or TiviMate Companion) unlocks critical system-level functions. Feature TiviMate Free Version TiviMate Premium Playlist Support 1 Active Playlist Unlimited Playlists & Provider Aggregation DVR / Recording Engine Disabled Local Storage, USB OTG, & SMB / NAS Drive Support Multi-Screen (Multi-View) Disabled Up to 9 Concurrent Live Streams EPG Mapping Single Provider Feed Multi-Source XMLTV Assignment & Manual Offsets Catch-up / Time-Shift Basic Native Provider Catch-up Integration Layout Backups Disabled Full .tmb Configuration Export / Import 2. Configuring Network Recording (DVR) via Windows / NAS (SMB) Recording live streams directly to internal Firestick storage or cheap USB flash drives frequently causes dropped frames or failed writes due to FAT32 file size limits and slow write speeds. Setting up a dedicated Server Message Block (SMB) share on a local PC, Synology, or TrueNAS server provides unlimited, high-speed storage. [TiviMate App (Firestick/Shield)] ---(Local LAN / Wi-Fi 6)---> [Windows/NAS Shared Folder] ---> [Recorded .ts File] 1.Create Dedicated Local PC / NAS Account :Do not use Windows Hello PIN. On your Windows PC or NAS, create a standard local user account (e.g., tivimate_dvr / Password: YourPassword123). Windows Hello PINs will fail authentication over local network shares. 2.Share Your Target Recording Folder : Right-click your dedicated storage folder (e.g., D:\IPTV_Recordings) > Properties > Sharing > Advanced Sharing. Check Share this folder, click Permissions, add your tivimate_dvr account, and check Full Control. 3.Locate Your Storage Server IP Address : Open Command Prompt (cmd) on Windows and type ipconfig. Note your static local IPv4 address (e.g., 192.168.1.150). 4.Connect TiviMate to the SMB Share : In TiviMate, go to Settings > Other > Recording > Recording folder > Select folder > LAN/SMB. Server Address: 192.168.1.150 Server Name / Share: Leave default or select from auto-scan. Username: tivimate_dvr Password: YourPassword123 3. Optimizing EPG Mapping & Resolving Channel Schedules Empty "No Information" program guides or incorrect program times disrupt the viewing experience. TiviMate allows you to fix these issues globally or on a per-channel basis. A. Assigning Secondary EPG Sources If your provider's native XMLTV feed is missing guide data for specific channels, you can add a secondary EPG source (such as m3u4u or epg.best URLs): Go to Settings > EPG > EPG sources > Add source. Insert the external XMLTV URL and click Done. Go back to Settings > Playlists > [Your Provider] > EPG sources, and enable the new source alongside your primary line. B. Manual Channel EPG Matching & Time Shifts Fixing Blank Channel Schedules: Long-press the OK/Select button on any channel displaying "No Information" > Select Assign EPG source from the right-hand panel > Search for the matching channel name manually. Fixing Time Offsets: If sports broadcasts appear 1 hour ahead or behind your local time, go to Settings > EPG > EPG sources > [Select Source] > Time offset and adjust from -12:00 to +12:00 hours to match your local clock. 4. Playback Optimization: Buffering & Multi-Screen For smooth 4K/60fps playback without macroblocking or audio desync, fine-tune the built-in ExoPlayer hardware acceleration settings. Stream Buffer Configuration Go to Settings > Playback > Buffer size: None / Small: Recommended for fast fibre connections (100 Mbps+) with low latency to reduce zapping times. Medium / Large: Recommended for Wi-Fi streaming or connections subject to minor ISP throttling. This creates a 3 to 5 second stream cache to absorb packet loss. Multi-Screen Rules (Xtream Connection Limits) TiviMate supports viewing up to 9 channels simultaneously (Grid / Picture-in-Picture). Critical Note: Every open window in Multi-View consumes one active connection from your IPTV subscription. If your provider only permits 1 active line, opening 2 channels in Multi-View will cause immediate buffering or trigger an automated IP lock from your provider's server. 5. System Migration & Configuration Backup Re-configuring custom channel groups, hidden categories, favorites, and network login parameters on new Firesticks or TV boxes can be tedious. Use TiviMate's built-in backup engine to streamline deployment. [Primary Device] ---> Export Settings ---> backup.tmb ---> [USB Drive / Network Share] ---> Import ---> [New Device Ready] Go to Settings > General > Backup data. Save the .tmb file directly to your SMB network share or an OTG-connected USB drive. On your secondary streaming box, install TiviMate, go to Settings > General > Restore data, and select the saved .tmb file. All accounts, favorites, and server passwords will populate instantly. Frequently Asked Questions (FAQ)
-
Formuler Z11 Pro Max vs NVIDIA Shield Pro for IPTV (2026 Benchmark) When choosing a flagship streaming box dedicated to live IPTV, the debate inevitably settles on two industry leaders: the NVIDIA Shield TV Pro with its powerful Tegra X1+ processor, and the Formuler Z11 Pro Max running its proprietary MYTVOnline3 (MOL3) middleware engine. While the Shield Pro has dominated high-end media playback for years, dedicated IPTV hardware like the Formuler Z11 series offers deep portal integration, custom EPG catch-up handling, and hardware-level AV1 decoding. This technical benchmark compares both flagship devices across video processing, RAM optimization, zapping speed, and middleware features. 1. Hardware Architecture & Codec Support Despite its age, the NVIDIA Shield Pro features a desktop-class GPU pipeline optimized for heavy processing. However, newer Realtek chipsets found in Formuler devices include hardware decoding for modern broadcast codecs that the Shield lacks. Hardware Metric Formuler Z11 Pro Max NVIDIA Shield TV Pro Processor SoC Realtek RTD1319C NVIDIA Tegra X1+ System RAM 4GB DDR4 3GB LPDDR4 Storage Speed 32GB eMMC 5.1 16GB High-Speed eMMC Network Interface Gigabit LAN (1000 Mbps) / Wi-Fi 6 Gigabit LAN (1000 Mbps) / Wi-Fi 5 AV1 Hardware Decode Yes (4K @ 60fps) No (Software fallback) Primary Middleware MYTVOnline3 (Native) TiviMate / OTT Navigator (3rd Party) 2. MYTVOnline3 vs. TiviMate Engine Performance The core user experience comes down to the video engine driving your M3U playlist or Xtream API credentials. [Formuler Hardware] ---> [Integrated MYTVOnline3 Engine] ---> Direct Stalker / Xtream Pipeline [NVIDIA Shield Pro] ---> [Android TV OS] ---> [TiviMate ExoPlayer Core] ---> Up-scaled 4K Stream MYTVOnline3 (Formuler Exclusive): Integrated Hardware Stalker Portal: Connects directly to server portals without relying on Android framework emulation layers. Multi-Group EPG Sync: Downloads and parses heavy EPG feeds in the background without dropping frames on live channels. Advanced PVR Recording: Supports simultaneous recording of one stream while watching another across multiple provider lines. TiviMate on NVIDIA Shield Pro: Customization: Unmatched UI personalization, custom panel layout sizes, and multiple multi-view display options (up to 9 split screens). AI Upscaling Engine: The Shield Pro uses machine learning to upscale 720p and 1080p live IPTV feeds to 4K in real time, making low-bitrate sports broadcasts look significantly sharper. 3. Channel Zapping Speed & Memory Management In real-world tests parsing a massive playlist containing over 80,000 live channels and VOD titles, both devices exhibit distinct strengths: 1.Channel Zapping Delay : Formuler Z11 Pro Max achieves channel switching times under 0.5 seconds when connected to Xtream Code servers using HLS (.m3u8) streams. The Shield Pro using TiviMate averages 0.7 to 1.1 seconds. 2.RAM Overhead under Heavy Load : Formuler's 4GB DDR4 RAM allows MYTVOnline3 to cache multi-day EPG data without memory pressure. The Shield's 3GB RAM can occasionally force Android TV to clear background app cache if multiple heavy apps are open. 3.Wi-Fi 6 Throughput : Formuler's Wi-Fi 6 module provides higher wireless throughput and lower packet jitter in crowded home networks compared to the Shield's older Wi-Fi 5 chip. 4. Hardware Verdict: Which Box Should You Choose? Choose the Formuler Z11 Pro Max if: You want an out-of-the-box, dedicated "satellite receiver" feel with MYTVOnline3, require native AV1 hardware decoding, use Wi-Fi 6, or focus heavily on Xtream/Stalker portal connections. Choose the NVIDIA Shield TV Pro if: You want the best possible image quality via AI Upscaling, rely on TiviMate, require Dolby TrueHD/DTS-HD MA lossy audio passthrough for home theaters, or plan on using the device for advanced media emulation and Plex server hosting. Frequently Asked Questions (FAQ)
-
Apple TV 4K vs Android TV for IPTV: Performance & App Ecosystem (2026) Choosing between Apple TV 4K and premium Android TV devices (like the NVIDIA Shield Pro, Formuler Z11, or Google TV Streamer) for live IPTV streaming comes down to a trade-off between raw hardware horsepower and software flexibility. While Apple TV 4K offers unmatched processing speeds and system smoothness, Android TV remains the dominant platform due to powerful, feature-rich media players like TiviMate. This guide breaks down real-world hardware performance, auto frame rate matching, network throughput, and app choices on both platforms. 1. Hardware Speed & RAM Optimization Apple's A15 Bionic chipset drastically outperforms every standard Android TV SoC on the market in raw single-core CPU and GPU benchmarks. However, hardware utilization differs significantly between tvOS and Android TV OS. Benchmark Metric Apple TV 4K (3rd Gen) NVIDIA Shield TV Pro Formuler Z11 Pro Max Processor SoC Apple A15 Bionic NVIDIA Tegra X1+ Realtek RTD1319C RAM Architecture 4GB LPDDR5 3GB LPDDR4 4GB DDR4 UI Frame Rate Constant 60fps / 120Hz 60fps (Occasional drops) 60fps AV1 Hardware Decode Yes No Yes Local Storage Options 64GB / 128GB NVMe 16GB eMMC 32GB eMMC Apple TV 4K Advantage: High-speed NVMe storage allows instant app launches and immediate background caching for multi-gigabyte M3U playlists and EPG files. Android TV Advantage: Unrestricted access to local file systems, allowing direct external USB drive expansion and custom caching directories. 2. Auto Frame Rate Matching & Display Sync Motion judder occurs when a live sports broadcast running at 50Hz (PAL) or 59.94Hz (NTSC) is forced to display on a 60Hz screen setting. [50Hz Live Stream] ---> [Display Match System] ---> [Dynamic TV Refresh Rate Adjustment] ---> Zero Motion Stutter tvOS System-Level AFR: Apple TV features dynamic, system-wide Auto Frame Rate (AFR) matching. When enabled under Settings > Video and Audio > Match Content (Range & Frame Rate), tvOS automatically forces your television panel to adjust its refresh rate to match the incoming stream source (e.g., switching to 50Hz for European sports feeds). Android TV App-Level AFR: Android TV relies on individual developers to implement AFR APIs. While premium players like TiviMate handle AFR switching seamlessly, cheaper Android boxes without certified display drivers can introduce black screen delays or handshake failures during dynamic refresh rate changes. 3. App Ecosystem: TiviMate vs. Top tvOS Players The primary deciding factor for most cord-cutters is software availability. 1.Android TV Ecosystem : TiviMate remains the undisputed gold standard for IPTV. It offers customizable multi-view (up to 9 streams simultaneously), native Xtream API integration, advanced EPG mapping, and automatic recording directly to local network NAS drives. 2.tvOS Ecosystem : While TiviMate is not available on Apple TV, modern tvOS alternatives have bridged the gap. Snappier, iPlayTV, UHF, and GSE Smart IPTV offer sleek interfaces, fast zapping times, and iCloud sync across Apple devices. 4. Hardware Verdict: Which Should You Buy? Buy Apple TV 4K if: You want the fastest navigation, zero UI clutter, seamless system-wide frame rate matching, and hardware longevity without manual debloating. Buy a Premium Android TV Box if: You require TiviMate, multi-stream viewing, custom sideloaded utilities, advanced VPN split-tunneling, or true audio passthrough (Dolby TrueHD / DTS-HD MA) for home theater receivers. Frequently Asked Questions (FAQ)
-
AJPanel Enigma2 Masterclass: Streamline IPTV, Bouquets, & Backups (2026) Managing IPTV playlists, satellite bouquets, and system configurations on Enigma2 Linux receivers (Vu+, Zgemma, Dreambox, Octagon) usually requires jumping between multiple computer tools like FileZilla, PuTTY, and e2skinner. AJPanel consolidates all these functions directly into your receiver using your TV remote. Built for modern Python 3 images (OpenATV 7.x, Egami, BlackHole), AJPanel is an all-in-one control center for converting M3U playlists, fixing broken EPG links, managing system files, and creating instant image backups. 1. Why AJPanel Outperforms Traditional Plugins Unlike single-purpose extensions, AJPanel interacts directly with the Linux system kernel to handle heavy IPTV tasks without crashing your GUI. Feature Standard Enigma2 Plugins AJPanel All-in-One Engine Playlist Conversion Requires PC software Direct M3U to Bouquet on-device conversion Stream Player Engine Locked to default system player Dynamic switching (4097, 5002, 5001) System Terminal Requires Telnet/SSH on PC Built-in TV Terminal with command history IPTV Server Inspection Blind connection Real-time portal expiration & active stream info 2. Instant M3U to Bouquet Conversion Instead of running external scripts, AJPanel can parse local M3U files or remote Xtream Codes API links and turn them into native TV channels in seconds. 1.Open AJPanel Tools : Launch AJPanel from your receiver's extensions menu and select Plugins / IPTV / Streams Options. 2.Import Your Playlist : Select IPTV Server Manager or M3U File Converter. Insert your server URL or browse to your M3U file stored on a USB drive. 3.Choose Player Service Type : Select Service Type 5002 (Exteplayer3) for fast channel switching, or 4097 (GStreamer) for standard compatibility. 4.Generate Native Bouquets :No system reboot required. Click Process File. AJPanel will build separate channel groups (Sports, News, VOD) directly in your channel list. 3. High-Speed EPG Sync & Picon Import Missing guide data or empty channel logos make navigating live TV frustrating. AJPanel features a background fetching tool that maps XMLTV files and picons directly to your generated IPTV bouquets. Key Optimization Ticks: Automatic Service Ref Matching: AJPanel auto-matches channel names against reference tables to populate program grids without manual coding. Direct Picon Mapping: Downloads channel logos directly to /media/hdd/picon/ or /media/usb/picon/ to prevent filling up internal flash memory. Table Cleansing: Removes dead links and duplicate channels automatically during the synchronization process. 4. One-Click Full System Backup Flashing new firmware images often means losing your custom channel layouts, provider logins, and skin settings. AJPanel includes a lightweight backup module that saves your entire OS environment. Go to AJPanel > Backup & Restore Options. Select Backup System Settings & IPTV Data. Choose your destination storage (USB Drive or HDD). Click Start Backup. If your receiver ever crashes or gets stuck in a boot loop, you can re-flash OpenATV and restore your entire setup in under two minutes. Frequently Asked Questions (FAQ)
-
OpenATV 7.x IPTV Setup for Enigma2 Boxes (2026 Guide) Enigma2 boxes (like Vu+, Zgemma, and Octagon) are incredibly powerful, but out-of-the-box software is designed for satellite, not IPTV. To get the best streaming performance, you need to upgrade to OpenATV 7.x. Built on Python 3, OpenATV 7 handles massive IPTV playlists, modern video codecs (HEVC/AV1), and fast EPG loading much better than older firmware. Here is the fast setup guide. 1. Why OpenATV 7.x? Older images (like OpenATV 6.4) use Python 2, which is now dead. Modern IPTV plugins require Python 3 to function. Feature Older Images (Python 2) OpenATV 7.x (Python 3) Plugin Support Dying / Outdated Fully Supported IPTV Zapping Speed Slow Instant Security & SSL Fails on secure portals Modern SSL/TLS Support 2. Install XStreamity Once OpenATV 7 is flashed via USB, the first thing you need is a dedicated IPTV player. XStreamity is the best plugin for playing Xtream Codes API on Enigma2. How to install via Terminal/PuTTY: Connect to your box via SSH (using its IP address, username root) and paste this command: Bash wget -qO- https://raw.githubusercontent.com/biko-73/xstreamity/main/installer.sh | bash Once installed, the box will restart. Open XStreamity from the Plugins menu, enter your server details, and your VOD and Live TV will load perfectly. 3. Fix "No Audio" or Lag By default, Enigma2 uses a video engine called GStreamer. This engine struggles with IPTV formats, causing delayed audio or black screens. You must switch to Exteplayer3. 1.Install ServiceApp : Go to Menu > Plugins > Download Plugins (Green Button) > systemplugins. Download ServiceApp. 2.Change the Player : Go to Menu > Setup > System > ServiceApp. 3.Save and Reboot : Change the Enigma2 playback system to serviceapp. Change the Player to exteplayer3. Press Green to save and restart. Your IPTV channels will now open in under a second with perfectly synced audio. FAQ
-
Fix Firestick IPTV Buffering (2026 Guide) When your IPTV streams buffer on a Firestick, it is rarely the app's fault. The Amazon Fire TV Stick has a notoriously weak internal Wi-Fi antenna, and many Internet Service Providers (ISPs) actively throttle IPTV traffic during live sports events. To achieve zero buffering on high-bitrate 4K streams, you need to address both the hardware connection and the network route. Here is how to fix Firestick buffering permanently. 1. The Hardware Fix: Use Ethernet Wi-Fi is inherently unstable for constant live video streams because it suffers from packet loss and interference from other household devices. The best upgrade for your Firestick is moving to a wired connection. How to connect it: Since the Firestick only has one Micro USB port for power, you cannot plug a standard Ethernet cable directly into it. You must buy an Amazon Ethernet Adapter or a generic OTG Micro USB to RJ45 Adapter. Plug the adapter into the wall power. Plug the Ethernet cable from your router into the adapter. Plug the micro-USB end into your Firestick. Your Firestick will automatically disable Wi-Fi and route all traffic through the faster, stable wired connection. 2. Wi-Fi Tuning (If You Cannot Use Ethernet) If running an Ethernet cable to your TV is impossible, you must optimize your Wi-Fi settings. Connection Type Speed Interference Risk Best For 2.4 GHz Wi-Fi Slower High (Microwaves, Bluetooth) Devices far from the router 5 GHz Wi-Fi Very Fast Low Devices in the same room as the router Ethernet Maximum None 4K Live IPTV Streaming Action required: Go to Settings > Network on your Firestick. Disconnect from your standard Wi-Fi name, and connect strictly to your router's 5GHz band (often labeled as YourNetworkName_5G). Keep the Firestick as close to the router as possible. 3. The ISP Fix: Change Your DNS ISPs often use their default DNS servers to monitor your web traffic, block specific IPTV server URLs, or throttle your speeds during major football matches. Changing to a fast, public DNS (like Cloudflare) bypasses this restriction and speeds up channel loading. 1.Forget Your Network : Go to Settings > Network. Highlight your connected Wi-Fi, press the Menu button (3 horizontal lines) on your remote, and click Select to forget the network. 2.Start Reconnection : Click on your Wi-Fi name again. Enter your password, but DO NOT click Connect yet. Instead, click on Advanced. 3.Enter IP and Gateway :Required for manual setup. IP Address: Enter an IP that matches your router (e.g., 192.168.1.150). Gateway: Enter your router's IP (usually 192.168.1.1 or 192.168.0.1). Network Prefix: Enter 24. 4.Set Custom DNS Servers : DNS 1: Enter 1.1.1.1 (Cloudflare). DNS 2: Enter 1.0.0.1 (Cloudflare Backup). Once connected, open your IPTV app. You will instantly notice faster EPG loading and quicker channel zapping. FAQ
-
Bypass Amazon Restrictions: Sideload TiviMate & OTT Navigator + Expand Firestick Storage (2026 Guide) Amazon's Fire OS has become increasingly restrictive, removing the best IPTV players from their official Appstore and pushing aggressive OTA (Over-The-Air) updates that hide Developer Options. Furthermore, base models like the Fire TV Stick 4K only ship with 8GB of internal storage—leaving less than 3GB for the user. When you load a comprehensive XMLTV EPG database, the device quickly runs out of space, causing streams to buffer or crash entirely. This guide provides the definitive 2026 method to unhide Developer Options, sideload premium IPTV applications like TiviMate and OTT Navigator IPTV, and permanently solve the "Storage Almost Full" error using an OTG hardware modification. Part 1: Sideloading IPTV Apps (Bypassing the Appstore) Before you can install third-party APKs, you must restore the hidden Developer Options menu and install a downloader utility. 1.Unhide Developer Options : Navigate to the gear icon (Settings) > My Fire TV > About. Highlight the first option (your Fire TV Stick's name) and click the Select/OK button on your remote 7 times rapidly until you see "No need, you are already a developer." 2.Enable Unknown Sources : Press the Back button once to return to My Fire TV. You will now see Developer Options. Open it, and turn ON ADB Debugging and Apps from Unknown Sources. 3.Install the Downloader App : Return to the Fire TV Home Screen. Go to the Find / Search magnifying glass and type "Downloader". Install the official Downloader app (orange icon) from the Amazon Appstore. 4.Sideload Your Preferred IPTV Player :Use direct APK URLs or shortcodes. Open Downloader, allow storage permissions, and enter the official APK URLs or Downloader shortcodes for your player: TiviMate: Enter tivimate.com (or search for the latest stable APK). OTT Navigator IPTV: Ensure you are getting the official release from its authorized repository or trusted APK mirrors to avoid modified, unstable versions. Once the download completes, click Install. You can now delete the installation APK file inside Downloader to immediately recover space. Part 2: Fixing "Storage Almost Full" (The OTG Cable Expansion) Even if you clear your app cache daily, downloading VOD metadata and multi-day EPG guides will eventually crush a standard Firestick. The only permanent fix is hardware-based storage expansion. The Hardware Setup: You need two cheap components: Micro USB OTG Y-Cable: This splits the power connection, allowing you to plug the Firestick into the wall while simultaneously connecting a USB accessory. USB 3.0 Flash Drive: A 32GB or 64GB drive is more than enough. (Format it to FAT32 on your PC before connecting). Configuring the External Storage: Unplug your Firestick from the wall power. Connect the OTG Y-Cable to the Firestick. Plug the power cord into the OTG cable, and insert your USB Flash Drive into the female USB port. Plug the power back into the wall. Once the Firestick boots, you will see a notification: "USB Drive Connected". Go to Settings > My Fire TV > USB Drive and select Format for Internal Storage. Important: After formatting, navigate to Settings > Applications > Manage Installed Applications. Select your IPTV player (e.g., OTT Navigator IPTV) and choose Move to USB Storage. Your EPG databases will now write directly to the flash drive, eliminating low-storage crashes. Frequently Asked Questions (FAQ)
-
How to Remove Google TV Ads & Install Custom Launcher (Speed Up IPTV 2026) If you use an Android TV Box (like Chromecast with Google TV, Xiaomi Box, or NVIDIA Shield) primarily for IPTV, you've likely noticed the home screen becoming increasingly sluggish. Google's latest updates push heavy auto-playing video ads, suggested content banners, and background recommendation engines that consume up to 400MB of your device's limited RAM. When your device runs out of RAM, IPTV apps like TiviMate or OTT Navigator suffer from frame drops, slow channel zapping, and random crashes during live sports. The ultimate solution? Replacing the bloated stock Google TV interface with a lightweight, ad-free custom launcher like Projectivy Launcher. This guide will show you how to set it up and auto-boot directly into your IPTV app. Why Switch to a Custom Launcher? Zero Ads: Completely removes Google's sponsored banners and autoplay trailers. Massive RAM Boost: Frees up hundreds of megabytes of memory, eliminating IPTV buffering caused by background system processes. The "Cable Box" Experience: You can configure the launcher to automatically open your favorite IPTV player the second you turn on the TV. Customization: Organize your streaming apps without Google dictating the layout. Step 1: Install Projectivy Launcher Unlike older methods that required complex ADB commands just to install a launcher, Projectivy is fully supported and available directly from the official store. Open the Google Play Store on your Android TV Box. Search for Projectivy Launcher and click Install. Open the app. You will immediately notice a clean, ad-free grid of your installed applications. Step 2: Override the Default Google TV Launcher By default, pressing the "Home" button on your remote will still take you back to the ad-heavy Google TV screen. To make Projectivy your permanent home screen, you need to grant it Accessibility permissions. 1.Open Android TV Settings : Navigate to the gear icon at the top right of your screen. 2.Access Device Preferences : Go to System (or Device Preferences on older Android TV versions) > Accessibility. 3.Enable Projectivy Service :Crucial for overriding the home button. Scroll down to Projectivy Launcher, click on it, and toggle the switch to Enable. Click OK on the warning prompt. 4.Configure the Launcher Override : Press the Home button to open Projectivy. Go to Projectivy's internal settings (gear icon) > General > Override current launcher and turn this ON. Now, every time you press the Home button on your remote, it will instantly load the lightning-fast Projectivy interface instead of Google TV. Step 3: Auto-Boot into Your IPTV App (Optional) If your Android TV Box is strictly used for live TV, you can make it act exactly like a traditional satellite receiver by bypassing the home screen entirely on startup. Open Projectivy Settings. Navigate to the Power / Display section. Look for the Launch on Boot (or Startup App) option. Select your preferred IPTV application (e.g., TiviMate, OTT Navigator, or Smarters). Now, when you plug in or restart your TV box, it will bypass all menus and directly load your live TV channels. Frequently Asked Questions (FAQ)
-
Fix Missing EPG & Optimize XMLTV Data: tvg-id Matching, Gzip Compression, & Multi-Source Merging (2026) A fully functional Electronic Program Guide (EPG) is what turns a raw stream playlist into a polished, cable-like interface. However, missing program grids, blank "No Information" tags, and slow database updating across players like TiviMate, OTT Navigator, and Enigma2 are frequently caused by tvg-id attribute mismatches, uncompressed raw XML payloads, or incorrect UTC time offset tags. This technical guide breaks down the architecture of the XMLTV standard, demonstrates how to fix identifier mismatches, optimizes update speeds using Gzip compression (.xml.gz), and explains how to merge multiple EPG feeds into a single optimized URL. EPG Data Delivery Methods Comparison Delivery Format Network Bandwidth Parsing Hardware Impact Auto-Refresh Speed Primary Use Case Uncompressed .xml High Payload (20MB–100MB+) Low CPU usage during parse Slow download / High network load Internal LAN / Server-side parsing Gzip Compressed .xml.gz Ultra-Low Payload (2MB–10MB) Moderate CPU spike (Instant RAM unzip) Fast download / Instant fetch Android TV, TV Sticks, Remote EPGs Xtream API JSON Direct Medium Payload Low CPU / Incremental database Fast background polling Xtream Codes / XUI One Portals 1. The Root Cause of Missing EPG: tvg-id vs id Matching When an IPTV player attempts to render guide data for a channel, it performs a strict string comparison between the channel's tvg-id parameter in your M3U playlist and the <channel id="..."> tag inside the XMLTV feed. Structure Breakdown: In M3U Playlist: Extrait de code #EXTINF:-1 tvg-id="BeIN_Sports_1_Premium.qatar" tvg-name="beIN Sports 1 HD" group-title="Sports",beIN Sports 1 HD http://your-server.com:8080/live/user/pass/101.m3u8 In XMLTV Feed (epg.xml😞 XML <tv generator-info-name="CustomEPG"> <channel id="BeIN_Sports_1_Premium.qatar"> <display-name lang="ar">beIN Sports 1 HD</display-name> <icon src="http://your-server.com/picons/bein1.png"/> </channel> <programme start="20260805200000 +0000" stop="20260805220000 +0000" channel="BeIN_Sports_1_Premium.qatar"> <title lang="ar">Champions League Match</title> <desc lang="ar">Live broadcast of the match.</desc> </programme> </tv> 2. Optimizing Download Performance with .xml.gz Compression Fetching raw, uncompressed 50MB XML files every 24 hours places heavy bandwidth loads on your server and causes TV stick apps (like Firestick 4K or Chromecast) to time out during background updates. Enabling Gzip Compression on Web Server (Nginx): If hosting a custom XMLTV guide, enable Nginx static Gzip compression to reduce the transfer payload by up to 90%: Nginx # Add to /etc/nginx/conf.d/epg.conf location ~* \.(xml|xml\.gz)$ { root /var/www/epg/; gzip_static on; gzip_types application/xml text/xml; add_header Content-Encoding gzip; expires 12h; add_header Cache-Control "public, no-transform"; } When providing an EPG URL to clients, always prefer supplying [http://domain.com/epg.xml.gz](http://domain.com/epg.xml.gz) instead of raw .xml. 3. Merging Multiple EPG Sources & Fixing Time Offsets If your main provider fails to supply guide data for international or niche channels, you can stack external EPG feeds (such as iptv-org/epg or custom XMLTV endpoints). A. Assigning Multiple EPG Sources in TiviMate: Navigate to Settings > EPG > EPG Sources. Click Add Source and insert your secondary XMLTV URL (.xml.gz). Go to Playlists > [Your Playlist] > EPG Sources. Enable both Primary and Secondary EPG sources. In the Channel Guide, long-press a channel with missing guide data $\rightarrow$ Select Assign EPG $\rightarrow$ Search and bind the matching channel manually. B. Correcting Timezone Offset Issues (e.g., Guide is 2 Hours Ahead): XMLTV timestamps use ISO 8601 formatting with UTC offset tags (e.g., 20260805200000 +0000). If your local guide shows programs shifted by a few hours: Open your IPTV Player's EPG Settings. Adjust Time Shift / EPG Offset to match your local timezone offset (e.g., -2.0 hours or +1.0 hour). 4. Troubleshooting Common EPG Errors Error 1: "XML Parsing Error: Unclosed Tag" Cause: A corrupted server-side script generated an incomplete XML file (e.g., missing </programme> or </tv> closing tag at the end of the file). Fix: Validate the XML file using an online XML validator or parse tool (xmllint --noout epg.xml). Error 2: EPG Loads Initially, Then Disappears Cause: Storage limit reached on budget TV streaming hardware (e.g., 8GB storage filling up with cached EPG databases). Fix: In player settings (e.g., TiviMate), set EPG Retention Days from 7 days down to 2 days or 1 day, and clear app cache regularly. Frequently Asked Questions (FAQ)
-
Setup WireGuard VPN for IPTV: Bypass ISP Throttling & Bufferbloat (2026) Live IPTV buffering during high-demand events—such as live football matches or prime-time broadcasts—is frequently caused by ISP Deep Packet Inspection (DPI) throttling rather than lack of bandwidth. ISPs identify incoming M3U/Xtream HTTP video traffic patterns and throttle specific ports. While standard OpenVPN connections add heavy processing overhead and latency, deploying WireGuard at the kernel level or directly on router hardware encrypts traffic with sub-15ms latency, bypassing ISP filters while preserving high-throughput 4K streams. This guide covers how to set up WireGuard on Android TV, Firestick, and GL.iNet / Asus routers, adjust MTU packet sizes, and tune router QoS to eliminate bufferbloat. WireGuard vs. Legacy VPN Protocol Performance Technical Metric WireGuard Protocol OpenVPN UDP OpenVPN TCP Codebase Overhead ~4,000 Lines (Ultra-Light) ~70,000+ Lines ~70,000+ Lines Average Latency Added 5 ms – 15 ms 40 ms – 70 ms 80 ms – 150 ms 4K Stream Buffer Time < 1.0 Second 3.0s – 5.0s 5.0s+ (Buffering risk) Low-Power TV Stick CPU Load Minimal (< 8% CPU usage) High (25%–40% CPU usage) Very High (Thermal throttling risk) 1. Configure WireGuard on Android TV & Firestick Running WireGuard directly on your streaming device (NVIDIA Shield, Firestick 4K Max, or Google TV) encrypts IPTV data before it leaves your local network. Step-by-Step Setup: Download the official WireGuard app from the Google Play Store or sideload it via Downloader on Firestick. Obtain your .conf configuration file or QR code from your WireGuard provider. Import the configuration into the WireGuard app. Edit the configuration parameters to optimize for UDP streaming: Plaintext [Interface] PrivateKey = YOUR_PRIVATE_KEY Address = 10.2.0.2/32 DNS = 1.1.1.1, 8.8.8.8 MTU = 1420 [Peer] PublicKey = SERVER_PUBLIC_KEY Endpoint = server-ip-address:51820 AllowedIPs = 0.0.0.0/0 PersistentKeepalive = 25 Toggle the tunnel ON and verify connection state. 2. Adjust MTU Size to Prevent Packet Fragmentation VPN encryption headers add extra bytes to standard IP packets. If your local connection MTU is set to standard 1500, the router must break each video packet into smaller fragments, introducing packet loss and stream stalling. How to Calculate & Set MTU: Standard WireGuard MTU overhead requires reducing MTU from 1500 down to 1420 or 1360 on cellular / PPPoE connections. Test connection stability in your WireGuard app interface: Fiber/Broadband connections: Set MTU = 1420. 4G/5G LTE Home Internet: Set MTU = 1360. Lowering MTU prevents TCP/UDP packet re-transmissions and eliminates mid-stream loop-freezes. 3. Flash Router-Level WireGuard & SQM (Smart Queue Management) To protect non-Android devices (such as MAG boxes, Enigma2 receivers, and Smart TVs) without installing apps on each box, configure WireGuard at the router level on OpenWrt, GL.iNet, or Asus Merlin firmwares. Enabling SQM Bufferbloat Control: Access your router admin dashboard (192.168.1.1 or 192.168.8.1). Navigate to Network > SQM (Smart Queue Management) or QoS Settings. Set Interface to your WAN / WireGuard interface. Set Download & Upload speeds to 85% – 90% of your total measured ISP speed test results. Set Queue Discipline to Cake or fq_codel. Result: SQM prevents home network uploads/downloads from causing latency spikes on your live IPTV stream. 4. Enable Split Tunneling for Native Local Apps Routing high-bandwidth local apps (like Netflix or YouTube) through an encrypted VPN tunnel wastes CPU power on budget streaming hardware. Use Split Tunneling to isolate IPTV traffic. Setting Up Split Tunneling: Open your VPN or WireGuard settings menu. Navigate to Split Tunneling / Allowed Apps. Select Include only selected apps. Check TiviMate, OTT Navigator, or your preferred IPTV player app. All other TV apps will bypass the VPN and connect directly to local internet, saving device memory and CPU cycles. Frequently Asked Questions (FAQ)
-
Infomir MAG Boxes Configuration & Portal Optimization Guide (MAG 540 / 544 / 520) Infomir MAG set-top boxes remain the benchmark for pure Linux-based Stalker/Ministra Portal streaming. Unlike Android devices that rely on heavy software emulators or third-party APKs, MAG devices connect directly to server-side middleware using hardware MAC address authentication (00:1A:79:XX:XX:XX). However, network time desynchronization, improper video buffer configuration, and DNS resolution failures often lead to portal boot loops, "Page Loading Error" alerts, or unexpected audio-video desync. This guide details how to configure Stalker Portals on modern MAG hardware, optimize system playback settings, fix common portal loading errors, and maintain stable stream connections. MAG Box Specs & Hardware Overview Modern MAG devices (Linux 4.9 / 5.4 OS) use high-efficiency Amlogic SoCs designed for continuous, low-latency video demuxing. Feature / Model MAG 520 MAG 540 / 540w3 MAG 544 / 544w3 Chipset Amlogic S905X2 Amlogic S905Y4-B Amlogic S905Y4-B CPU Core Quad-core ARM Cortex-A53 Quad-core ARM Cortex-A35 Quad-core ARM Cortex-A35 RAM / Storage 1GB LPDDR4 / 4GB eMMC 1GB LPDDR4 / 4GB eMMC 1GB LPDDR4 / 4GB eMMC 4K HDR & AV1 4K @ 60fps (HEVC/H.265) 4K @ 60fps (AV1 & HEVC) 4K @ 60fps (AV1 & HEVC) Network 100 Mbps Ethernet / Wi-Fi 5 100 Mbps Ethernet / Wi-Fi 5 100 Mbps Ethernet / Wi-Fi 5 1. Stalker Portal Setup (Step-by-Step) Setting up a Stalker/Ministra portal requires registering your device's unique MAC address with your service provider prior to boot. Locate your MAC Address: Check the sticker on the bottom of your MAG box. It begins with 00:1A:79:. Boot to Inner Portal: Power on the box without an active network connection, or hold the Menu button on the remote during reboot to enter System Settings. Navigate to Servers: Go to System Settings $\rightarrow$ Servers $\rightarrow$ Portals. Enter Portal Information: Portal 1 Name: PTIPTV (or preferred label) Portal 1 URL: [http://your-server-domain.com:8080/c/](http://your-server-domain.com:8080/c/) (Ensure the trailing slash /c/ or / is included as required by your provider) Save & Reboot: Press OK to save, go back to the main system screen, and select Restart Portal or press Reboot. 2. Advanced Playback & Network Buffer Optimization To eliminate stream micro-stuttering or black screen delays during live channel switching, tune the internal playback parameters inside the Inner Portal settings: [Server Stream] ---> [MAG Hardware Buffer (1000ms-3000ms)] ---> [HDMI Dynamic Output (Auto Frame Rate)] Recommended Parameters: Buffer Delay (ms): Go to System Settings > Playback. Set Buffer Size from 0 to 1500 ms or 2000 ms. A 1.5–2 second buffer absorbs packet jitter over Wi-Fi without introducing significant channel-change latency. Auto Frame Rate (AFR): Set Video Output Mode to Auto or match your country's display standard (1080p 50Hz for EU/PAL broadcasts, 1080p 60Hz for US/NTSC). HDMI Event Reaction: Set to Immediately to prevent HDMI handshaking delay when switching between standard definition (SD) and 4K streams. 3. Troubleshooting Common MAG Portal Errors Error A: "Page Loading Error" or "Server Not Found" Primary Cause: Wrong Portal URL, inactive internet connection, or DNS lookup block by your ISP. Fix: Go to System Settings > Network > Auto (DHCP). Change DNS settings from automatic to manual and input public DNS servers: Primary DNS: 8.8.8.8 Secondary DNS: 1.1.1.1 Verify the Portal URL spelling (ensure no hidden spaces or missing http://). Error B: "Your STB is Blocked / Invalid MAC Address" Primary Cause: The MAG MAC address registered in your panel does not match the hardware address of the unit, or the subscription has expired. Fix: Cross-check the MAC address registered in your portal dashboard against System Settings > Device Info. Ensure letter characters are entered in uppercase if required by your middleware panel. Error 😄 Infinite Boot Loop or Black Screen After Portal Load Primary Cause: System time desynchronization. MAG Linux OS uses NTP protocols for SSL certificate verification. If system date defaults to 1970, encrypted portal endpoints will fail to establish a handshake. Fix: Go to System Settings > Servers > NTP. Set NTP Server to pool.ntp.org or time.nist.gov. Save and reboot. The box will fetch the correct UTC time prior to loading the Stalker Portal interface. Frequently Asked Questions (FAQ)
-
Enigma2 IPTV Bouquet & EPG Sync Setup: Xtreamity & E2m3u2bouquet (2026) Integrating IPTV streams directly into native satellite/cable bouquets on Enigma2 Linux receivers (Vu+, Dreambox, Zgemma, Octagon) allows users to browse live channels using traditional remote controls and native channel lists. However, improper service type mapping, unoptimized picon caching, or misconfigured EPGImport XMLTV sources can cause system GUI crashes (GSOD), missing channel guides, or long tuning delays when switching between IPTV streams and satellite transponders. This technical guide details how to automatically generate native IPTV bouquets using E2m3u2bouquet, configure Xtreamity for VOD, map EPG data using EPGImport, and optimize GStreamer / Exteplayer3 service types. Enigma2 IPTV Plugin Comparison Matrix Plugin Name Primary Function EPG Auto-Sync Service Type Support Best Enigma2 Image E2m3u2bouquet Native Bouquet Generation Yes (Direct XMLTV) 1 (DVB), 4097 (GStreamer), 5002 (Exteplayer3) OpenATV 7.x / OpenPLi 9.x Xtreamity Dedicated Xtream API Player Yes (XStream API) Hardware Auto-Detect All Python 3 Images EPGImport Global XMLTV Guide Fetcher Yes (Scheduled CRON) Standard Service Ref Mapping OpenATV / BlackHole / Egami AJPanel Multi-Tool & M3U Converter Yes Flexible Custom Converter Universal Enigma2 1. Auto-Generate IPTV Bouquets via E2m3u2bouquet (Telnet / SSH) The E2m3u2bouquet plugin automatically converts Xtream Codes credentials into background system bouquets, updating channel streams on a scheduled daily timer without clogging system RAM. Installation & Setup via SSH: Connect to your Enigma2 receiver via SSH/PuTTY (Port 22) as user root. Execute the official installation script: Bash wget -q "--no-check-certificate" https://e2m3u2bouquet.com/install.sh -O - | dh Open the configuration file located at /etc/enigma2/e2m3u2bouquet/config.xml and insert your Xtream Codes API details: XML <supplier> <name>PTIPTV</name> <enabled>1</enabled> <m3uurl><![CDATA[http://your-server.com:8080/get.php?username=USER&password=PASS&type=m3u_plus&output=hls]]></m3uurl> <epgurl><![CDATA[http://your-server.com:8080/xmltv.php?username=USER&password=PASS]]></epgurl> <streamtype>5002</streamtype> </supplier> Save the file and execute a manual update command: Bash python /usr/lib/enigma2/python/Plugins/Extensions/e2m3u2bouquet/e2m3u2bouquet.py 2. Configure Service Type 5002 (Exteplayer3) for Zero Zapping Lag Enigma2 uses default system decoders (Service Type 4097 via GStreamer) which can cause black screen delays or audio sync issues when processing high-bitrate live streams. Setting Up Exteplayer3: Install serviceapp and exteplayer3 via terminal: Bash opkg update && opkg install enigma2-plugin-systemplugins-serviceapp exteplayer3 ffmpeg On your Enigma2 box, go to Menu > Setup > System > Serviceapp. Set Enigma2 Service Architecture to serviceapp. Set Player to exteplayer3. Reboot your receiver (init 6). Why? Exteplayer3 uses direct FFmpeg demuxing, reducing channel switching speed down to under 0.8 seconds. 3. Sync EPG Data with EPGImport Plugin If your native bouquet channels show empty broadcast timelines, use EPGImport to download and map channel guide data automatically every night. EPG Configuration: Install the plugin: opkg install enigma2-plugin-extensions-epgimport. Open Menu > Plugins > EPGImport. Press the Blue Button (Sources) and check your active IPTV provider source file. Enable Automatic Import: Set schedule to 04:00 AM. Toggle Show in Channel Selection to Yes. Save and press the Yellow Button (Manual Import) to load EPG timelines immediately. 4. Optimize Local Storage & Clean Flash Memory Generating large IPTV bouquets with full picon sets can quickly consume internal NAND flash memory, leading to system freezes or bootloops on older hardware. Memory Optimization Tips: Move Picons to External Storage: Store channel picon icons on a mounted USB drive (/media/hdd/picon or /media/usb/picon) instead of internal root flash memory (/usr/share/enigma2/picon). Set EPG File Location: Inside Menu > Setup > System > EPG > EPG Settings, change EPG Location to /media/hdd or /media/usb. Clear Temp Files Automatically: Add a daily CRON job to remove temporary cached M3U files: Bash rm -rf /tmp/*.m3u /tmp/*.xml Frequently Asked Questions (FAQ)
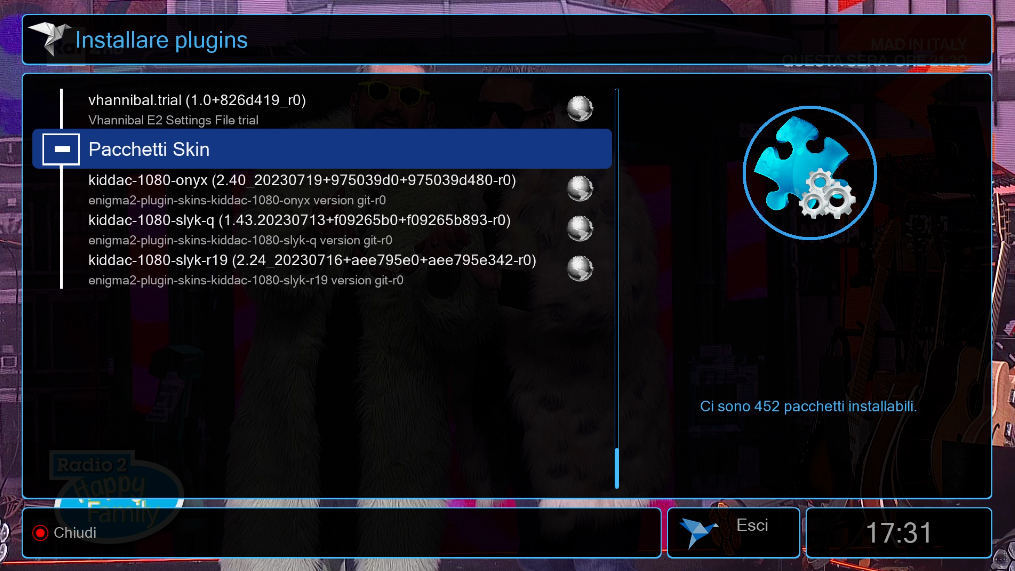
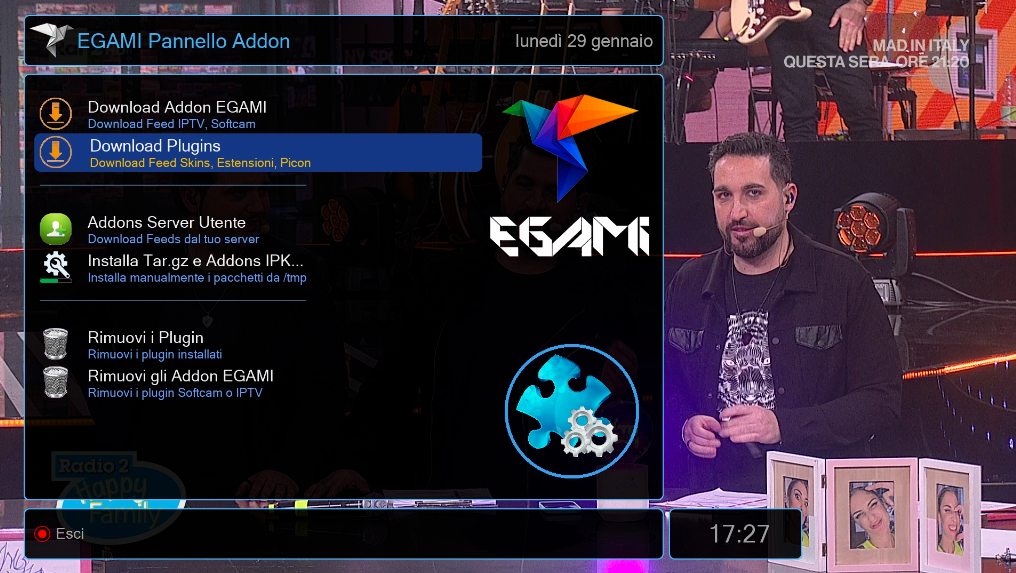
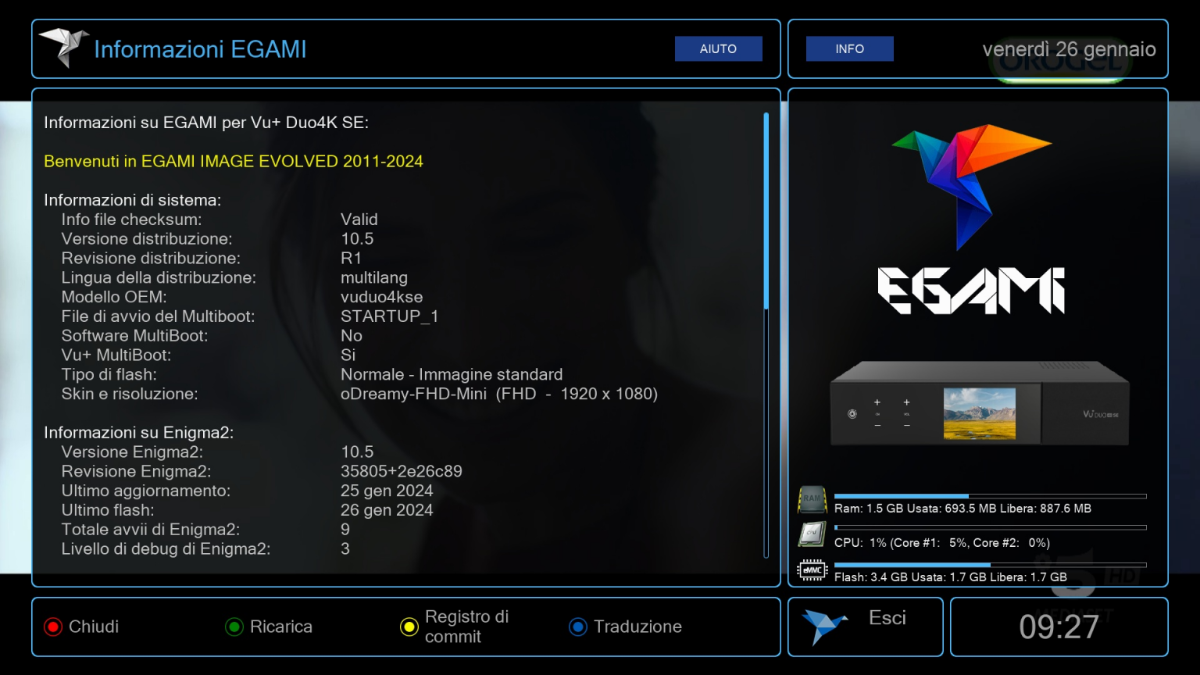
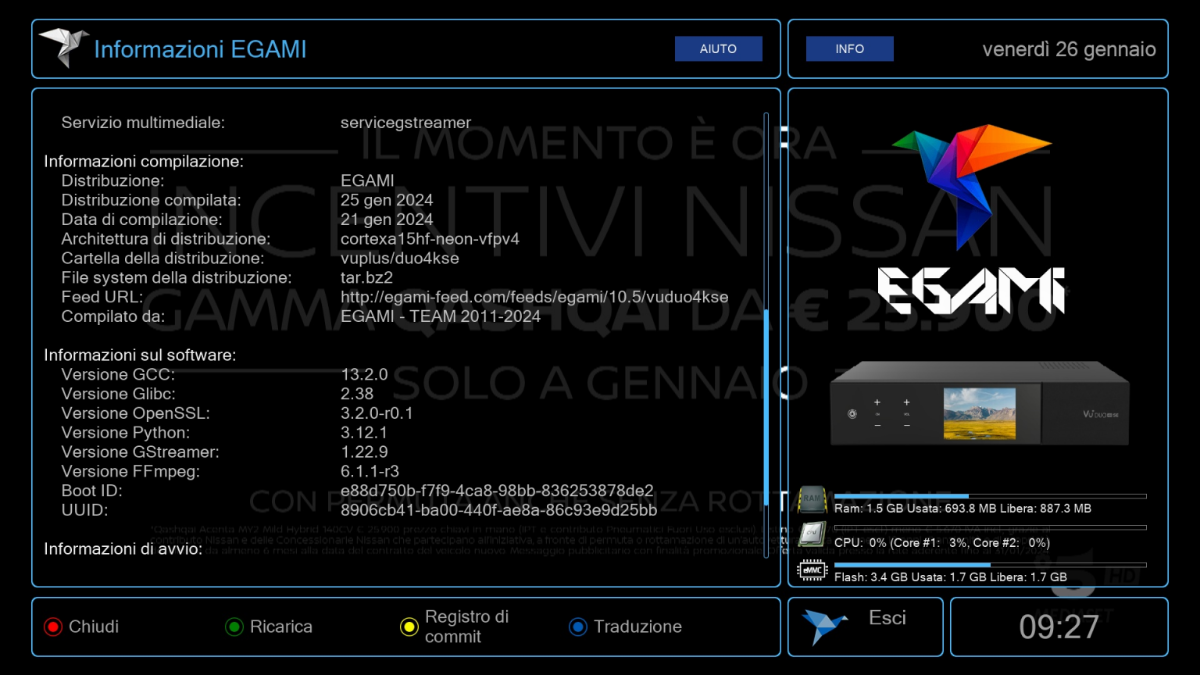
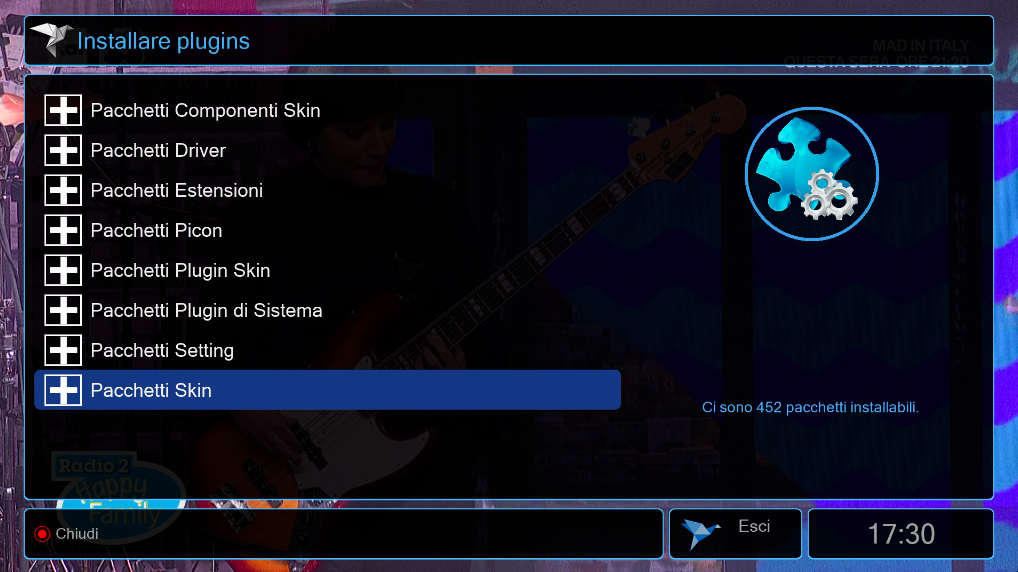
.png.8d599f6155fdcf621b8f543c9f5a28d2.png)
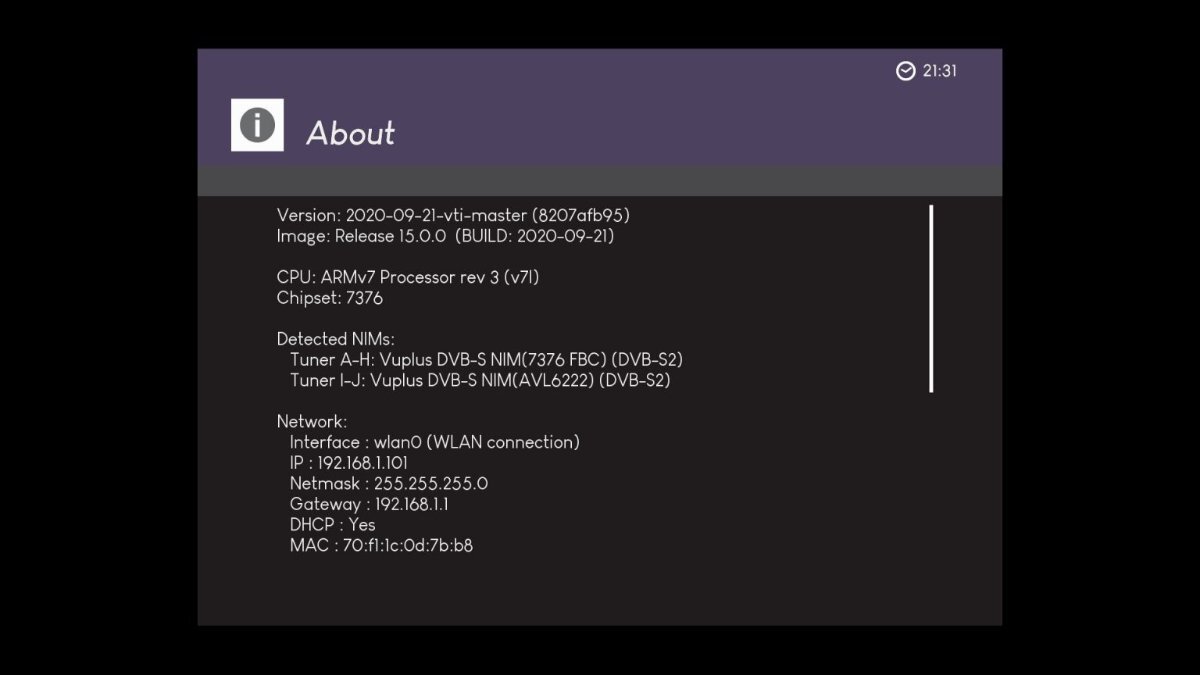

.png.622c1a57c5719dd804abdbf123e11e7f.png)
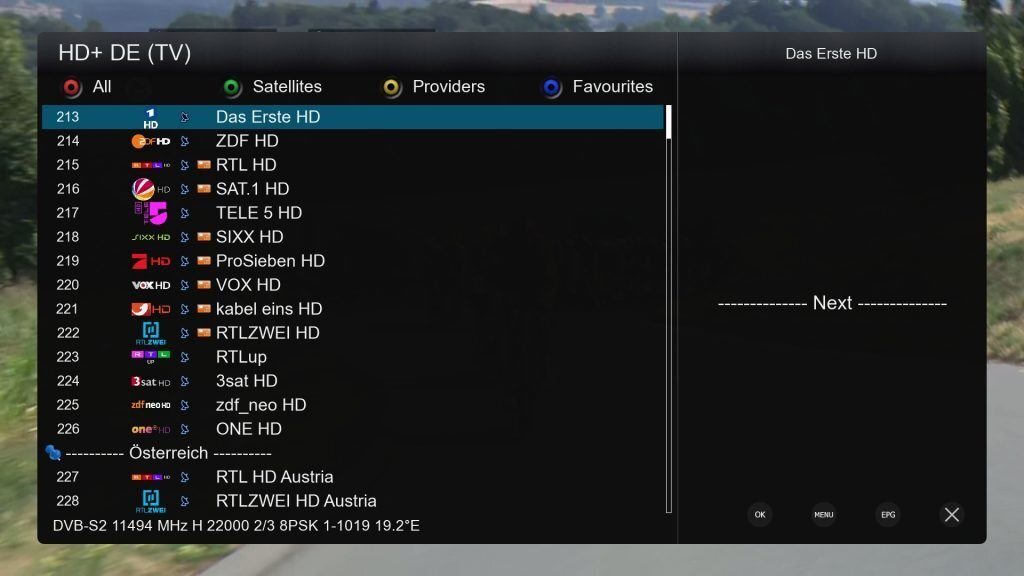
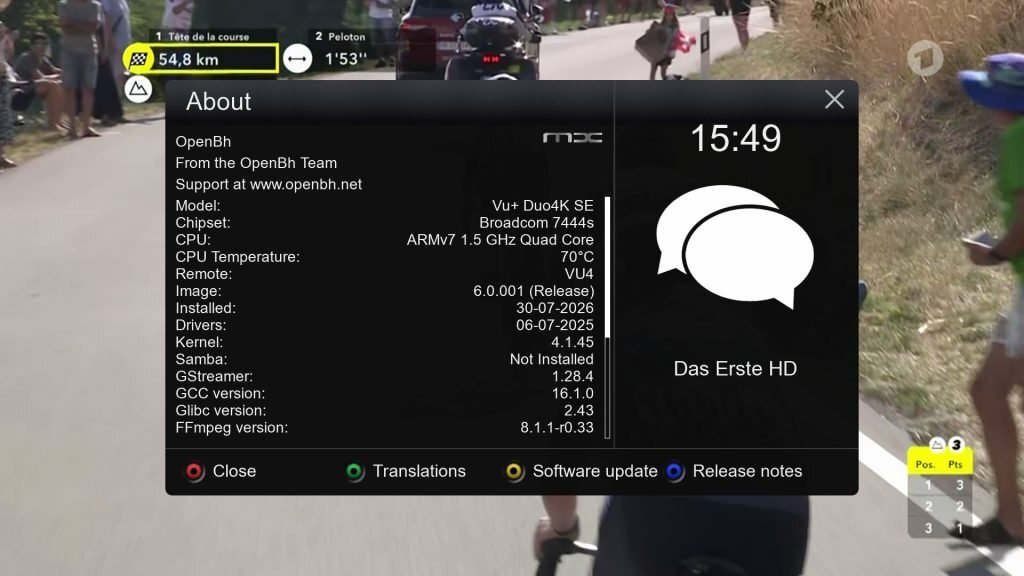
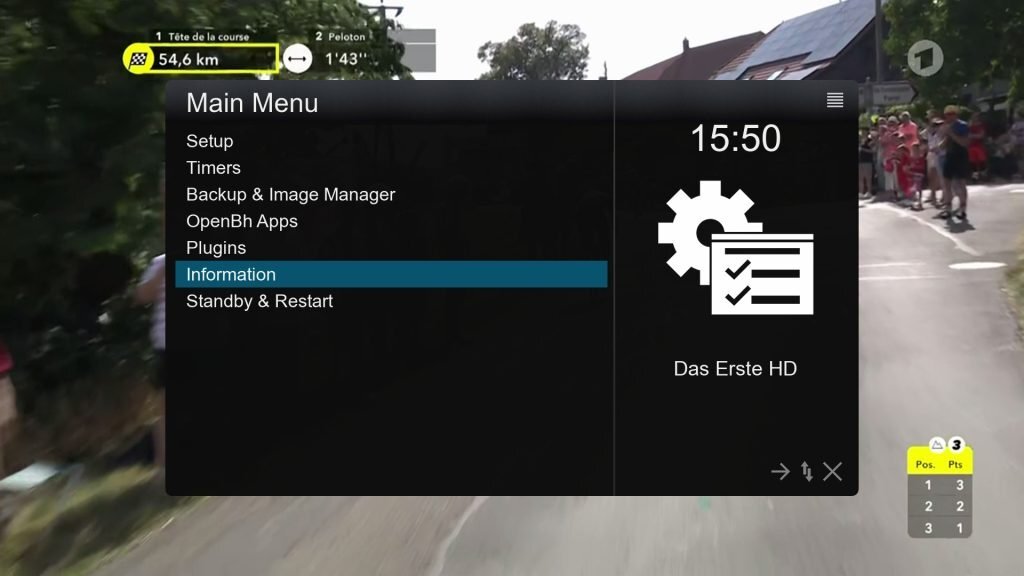
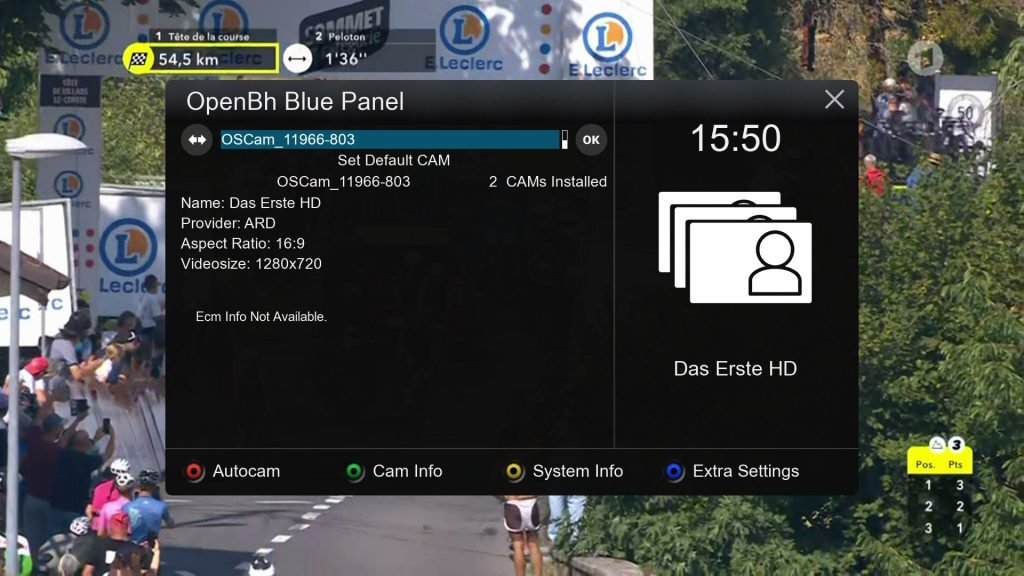
.png.d59e6ee73116e378aa8df97140be9637.png)
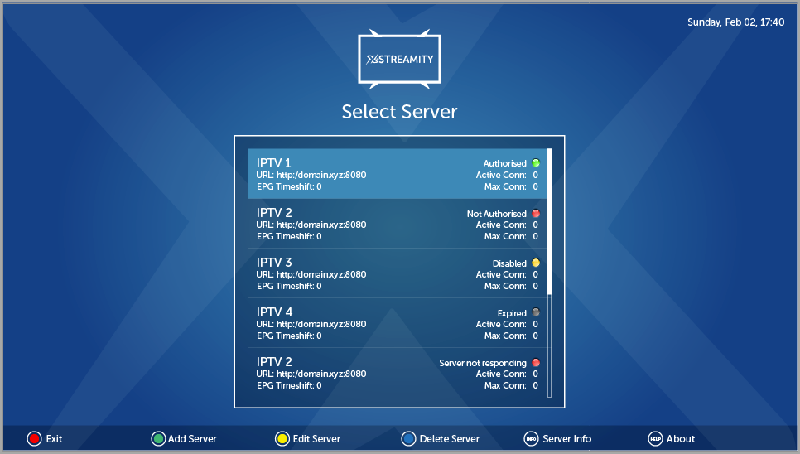
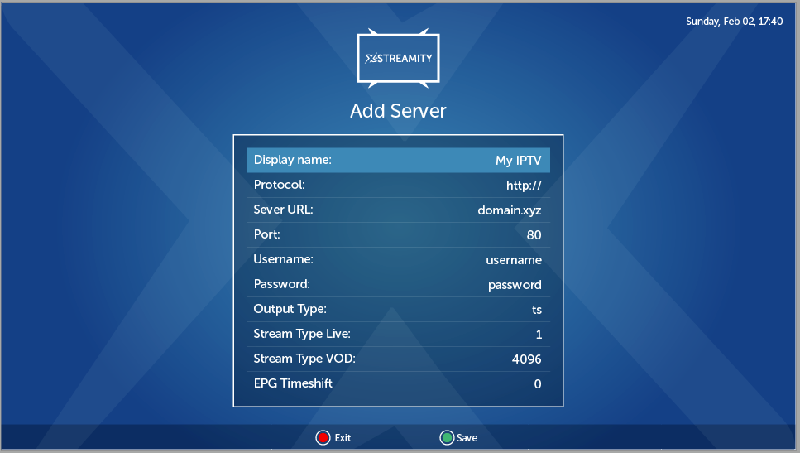
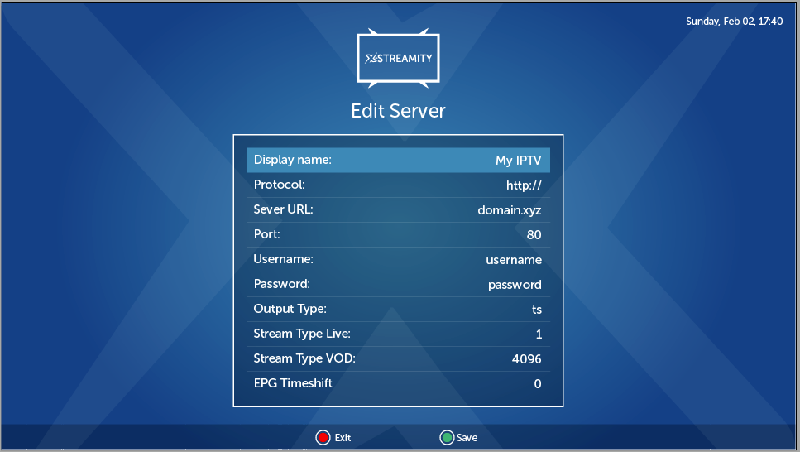
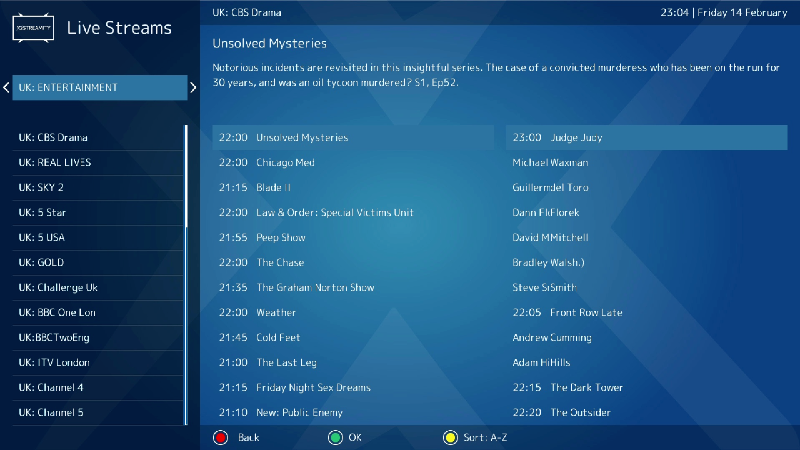
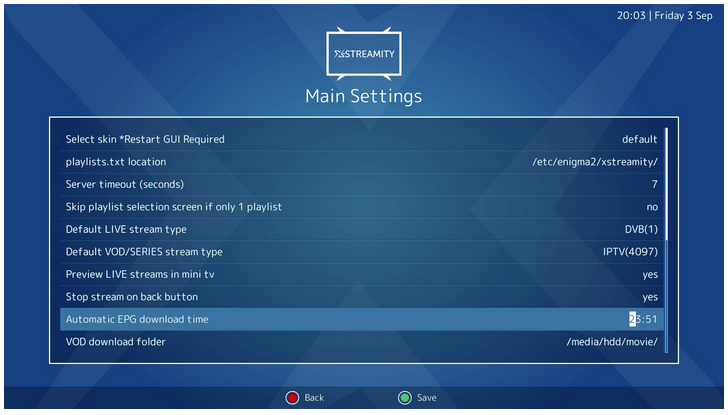
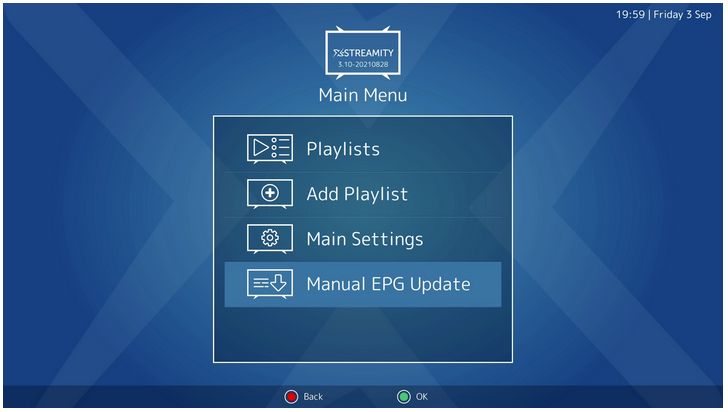
.png.7c27fbc9e4ab4c7d6215b8594f9977a1.png)
.png.febce5715f0fd522a4ccc9f294634373.png)
.png.940fec4f24e8f5456e7c8f5f378636fd.png)
.png.84d23ae9dc7e59645c9bdfa1db89bc20.png)
.png.91dd83a8af6a51f3c93d06beca451cf8.png)
.png.6f357690cf05f0ae22190aecae84ecdd.png)
.png.061ce85b626492b29e49e43303487c93.png)
SetupGuide(2026).png.e26a70eef6f8069ca9ef5e356aef8d81.png)
.png.a14c5b4d390eda30e0e3d310d3e44959.png)
.png.400f5b174e9671767c687488939e975f.png)
.png.f3086fe39748538307cc70917d820403.png)
.png.e387774ae19f6629d91d89d1077196ba.png)
.png.7fd08b29a562c34f2181263f22273c8a.png)
.png.db9a248ae14d5a2c87554e7a25625022.png)
.png.e55478c9ee106295403bba0bd0a9d84a.png)
.png.293ad239a559d34811af299507a99989.png)
.png.3034c781399e0069ee9f7345cb3d4f8b.png)
.png.03e11dfc8a332cf4659da260769697cb.png)
.png.6321da1e72e6ef0418d1d55c95f3d677.png)