


PTIPTV
-
Posts
200 -
Joined
-
Last visited
-
Days Won
16
Content Type
Profiles
Forums
Downloads
Everything posted by PTIPTV
-
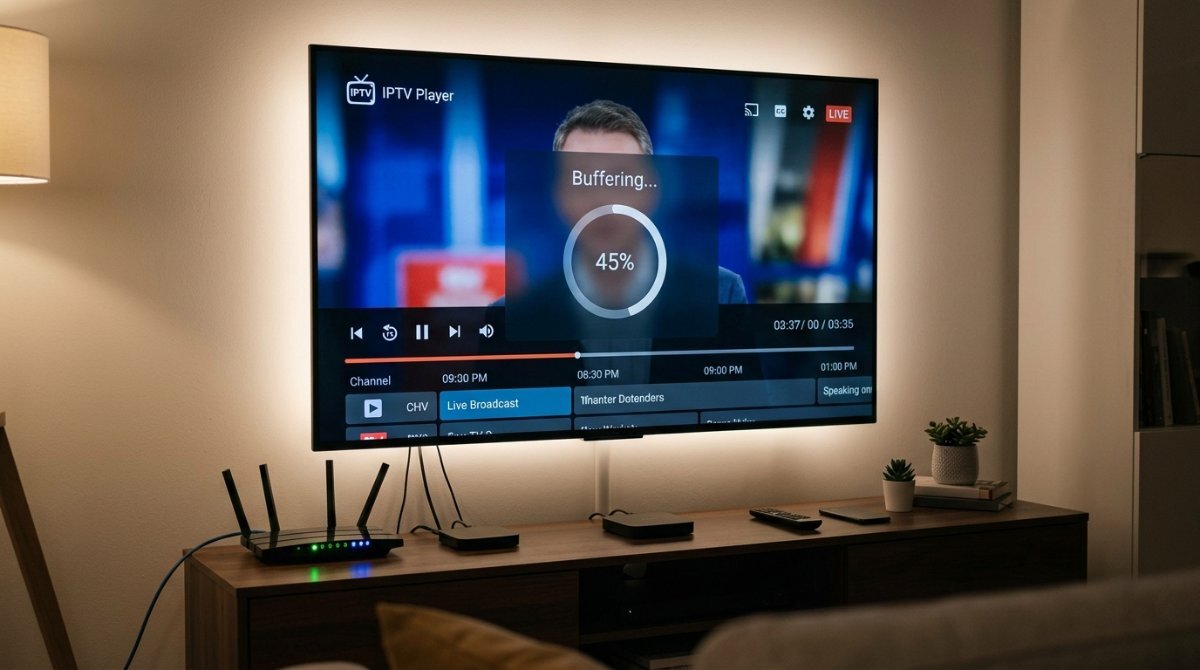
 [Guide] How to Fix IPTV Buffering & Freezing: Complete Troubleshooting Guide Is your IPTV stream constantly buffering, freezing, or lagging during live sports and popular broadcasts? Before assuming your provider is at fault, there are several network, app, and device-level bottlenecks you should check and optimize. Here is a step-by-step tutorial to diagnose and eliminate IPTV buffering once and for all. 1. Test Your Connection Speed & Ping Live IPTV streaming requires a stable connection with low jitter and low latency, not just high download speeds. Minimum Recommended Speeds: SD Channels: 5 - 10 Mbps HD / FHD Channels: 15 - 25 Mbps 4K UHD Channels: 50+ Mbps Action: Run a speed test on your streaming device (e.g., using Analiti on Firestick/Android TV or Speedtest.net). Key Metric: Pay attention to your Ping/Latency (should be below 50ms) and Jitter (should be under 10ms). High jitter causes instant buffering even if your download speed is 100 Mbps. 2. Switch to Ethernet (Ditch Wi-Fi) Wi-Fi signals are subject to interference from walls, Bluetooth devices, and neighbor networks, which causes packet loss during continuous video streams. Connect your Smart TV, Android Box, or MAG device directly to your router using a Cat6 Ethernet cable. If Ethernet isn't possible, connect your device to the 5 GHz Wi-Fi band instead of the 2.4 GHz band, and bring the router closer to your device. 3. Change Your DNS Servers Default ISP (Internet Service Provider) DNS servers are often slow, poorly routed, or restrict streaming servers during peak hours. Switch your router or device DNS settings to custom high-performance resolvers: Cloudflare DNS: Primary: 1.1.1.1 Secondary: 1.0.0.1 Google Public DNS: Primary: 8.8.8.8 Secondary: 8.8.4.4 4. Change the Media Player Hardware Decoder Most premium IPTV apps (like TiviMate, IPTV Smarters Pro, or OTT Navigator) allow you to change how the device processes video streams: Open your player's Settings. Go to Playback / Video Decoder. Toggle between Hardware (HW), Software (SW), or Hardware+ (HW+). Tip: Most modern Android devices work best with Hardware, but switching to Software can fix playback loops and black screens on older chips. 5. Increase Buffer Size in Your IPTV App Increasing the buffer buffer size allows your app to download a few extra seconds of video ahead of time, smoothing out short network dips. In TiviMate: Settings ➔ Playback ➔ Buffer size ➔ Set to Medium or Large. In OTT Navigator: Settings ➔ Player ➔ Buffer ➔ Set to 5 seconds or 10 seconds. (Note: Avoid setting the buffer too high, as it may increase channel switching times). 6. Check for ISP Throttling (Use a VPN) During major sporting events, many ISPs deliberately throttle high-bandwidth video traffic and IPTV protocols. Diagnosis: If your stream buffers on Wi-Fi/Ethernet but plays smoothly on 4G/5G mobile data, your ISP is likely throttling your connection. Solution: Install a fast VPN on your streaming device and connect to a local server or a nearby country with open internet policies. Quick Checklist Summary Problem Primary Cause Recommended Solution Stream drops every 10–20 seconds Packet loss on Wi-Fi Switch to Cat6 Ethernet cable Black screen / Audio only Codec incompatibility Change Video Decoder (HW to SW) Buffering during peak hours only ISP Throttling / Slow DNS Use Cloudflare DNS / Connect to VPN Channel stays stuck on loading App cache bloat Clear app cache in device settings Feel free to leave a reply below if you are still experiencing playback issues or need help configuring a specific player!
-
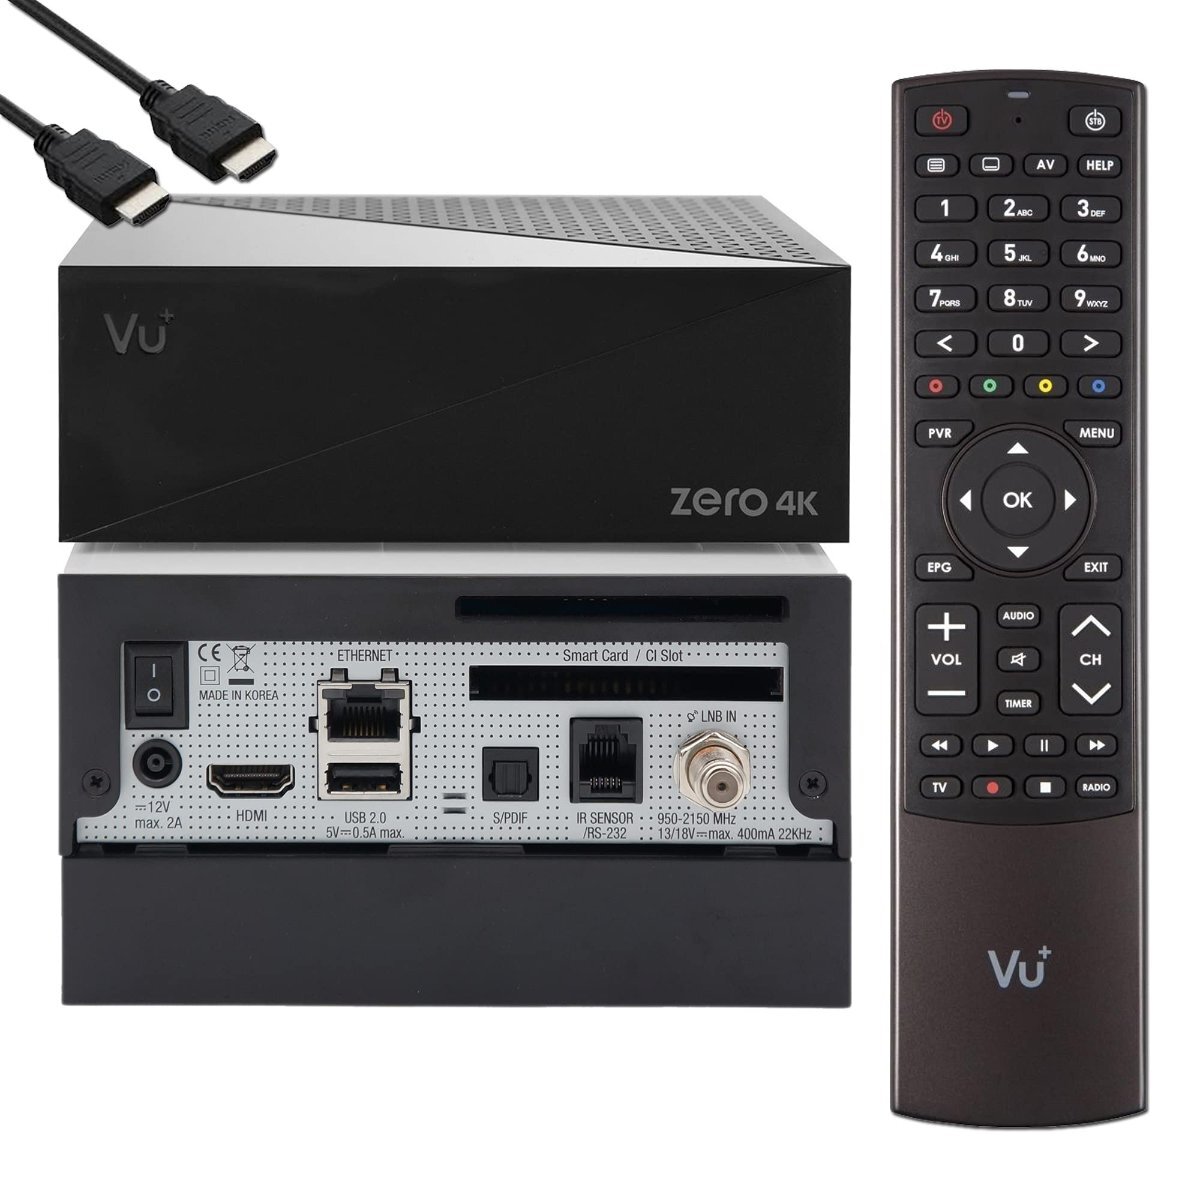
Official Vu+ Original Firmware Image for Vu+ Zero 4K (Release 2023-06-13) This is the official stock factory firmware release from Vu+ for the Vu+ Zero 4K satellite receiver (VUPLUS-Image-VUZERO4K-2023/06/13-154111). Designed as the definitive reference build, this official image includes baseline hardware drivers, Broadcom kernel modules, and the core Enigma2 environment. Whether you need to recover a soft-bricked device, restore factory settings, or set up a clean, rock-solid Internal Flash (IN) base image to host custom images in MultiBoot (OpenMultiboot or Barry Allen), this release delivers maximum stability and system compatibility. Technical Specifications Overview System Attribute Details Receiver Model Vu+ Zero 4K (Broadcom ARM 4K Architecture) Firmware Type Official Factory Stock Firmware (Original Vu+) Build Tag VUPLUS-Image-VUZERO4K-2023/06/13-154111 Release Date June 13, 2023 File Name vuplus-image-vuzero4k-20230613154111_usb.zip Primary Use Cases Factory recovery, clean base image, MultiBoot main host Highlights & Usage Guidelines Pure Factory Environment: Clean, untouched Enigma2 system directly from the official Vu+ development team. Hardware Recovery: Resolves reboot loops, software crashes, or damaged flash partitions caused by incompatible plugins or corrupt image builds. Ideal MultiBoot Host: Serves as a reliable, conflict-free primary image installed on Internal Flash when running OpenMultiboot, Barry Allen, or Egami MultiBoot on external USB storage. Official Driver Base: Includes original Broadcom chipset modules and DVB-S2X tuner drivers for optimal signal lock and low hardware power consumption. Step-by-Step USB Flashing Guide 1.Prepare USB Media : Formating USB flash drive. Format a standard USB 2.0 or 3.0 flash drive (8GB–32GB recommended) to FAT32. 2.Unpack Firmware Package : Maintaining exact directory structure. Download the zip file vuplus-image-vuzero4k-20230613154111_usb.zip and extract its contents directly to the root directory of the USB drive. Ensure the resulting path on the USB drive is: USB:\vuplus\zero4k\ containing files such as rootfs.tar.bz2, kernel_auto.bin, and initrd_auto.bin. 3.Flash the Receiver : Executing the bootloader update. Turn OFF the Vu+ Zero 4K using the rear power switch. Insert the prepared USB drive into the rear USB port. Turn ON the receiver using the rear power switch. Watch the front panel Touch Power Button LED: when it starts pulsing/fading, press the Touch Button on the front panel once to initiate flashing. The LED will pulse rapidly while flashing. Wait until it finishes and reboots automatically. 📥 Downloads & Attachments Official Original Image Archive: vuplus-image-vuzero4k-20230613154111_usb.zip
-
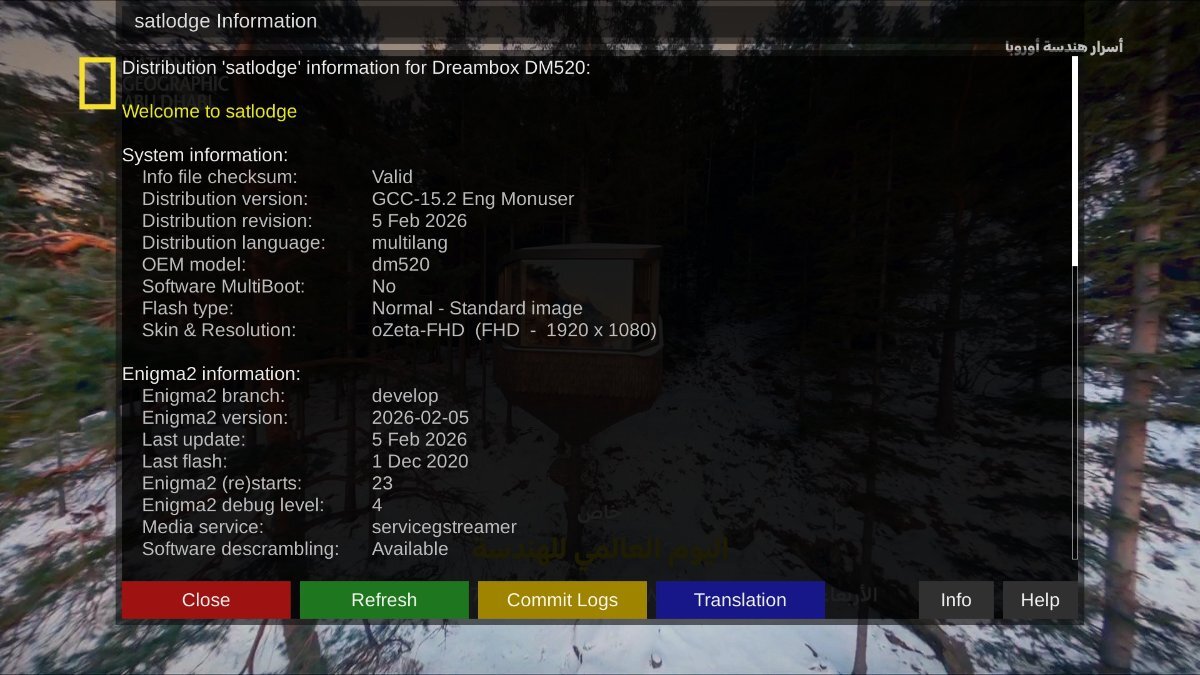
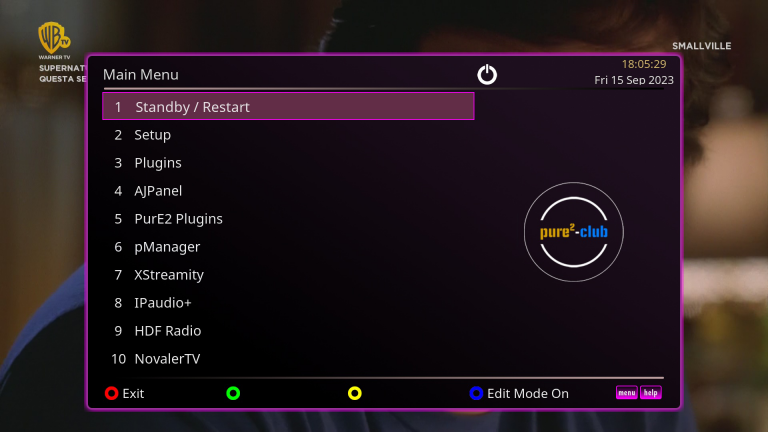
SatLodgo 15.2 Full Backup for Dreambox DM520HD / DM525HD / DM520 Mini This custom SatLodgo 15.2 Full Backup is built specifically for the Dreambox DM520HD, DM525HD, and DM520 Mini receivers. Featuring a full 1080p Full HD presentation powered by the popular oZeta-FHD Skin, this backup includes pre-installed Wi-Fi drivers, comprehensive channel bouquets with matching picons across 4 major satellite positions, updated softcams with SoftCSA support, and the AISubtitles translation plugin. This image is fully tested and operational on both Internal Flash and External Flash (MultiBoot Manager) environments. Technical Specifications Overview System Attribute Details Supported Models Dreambox DM520HD / DM525HD / DM520 Mini Base Firmware SatLodgo 15.2 (FHD Image) Flash Mode Internal Flash & External Flash (IN & OUT) Default Skin oZeta-FHD Skin Wireless Support Pre-installed Wi-Fi Drivers (WIFI Ready) Default Softcam NCam v15.7-SoftCSA Channel Bouquets Badr (26.0°E), Nilesat (7.0°W), Hotbird (13.0°E), Eutelsat 9B / Euro9 (9.0°E) Channel Picons Full Coverage for Badr, Nilesat, Hotbird, and Eutelsat 9B Release Date February 23, 2026 Softcams & Pre-Installed Plugins NCam v15.7-SoftCSA: Updated emulator softcam compiled with SoftCSA support for low-latency descrambling, fast zapping, and stable connection to CCcam and Newcamd protocols. AISubtitles: Advanced AI-powered automated translation tool for live broadcast channels, movies, and VOD content. MultiBoot Manager: Utility for managing, installing, and switching between multiple backup images on USB/SD external storage. xtraEvent: Dynamic EPG metadata scraper for high-resolution movie posters, backdrops, and channel banners. Bouquet Maker Xtream (BMX): Complete IPTV playlist importer and automated bouquet organizer. Savior: System tool for rapid configuration backup and system state restoration. Media Player: Built-in player for local network and USB media file playback. Step-by-Step Installation Guide 1.Choose Flash Installation Mode : Select target storage environment. Determine whether you want to flash directly to the receiver's Internal Flash or deploy via MultiBoot / External Storage. 2.Method A: Internal Flash Installation : Web browser flashing via Dreambox Rescue Loader. Turn OFF the Dreambox using the rear power switch. Touch and hold the front panel power sensor while switching power ON until the LED flashes to enter Rescue Mode. Open a web browser on your PC, enter the IP address displayed on screen, and click Firmware Upload. Select the SatLodgo 15.2 image archive, press Flash, and reboot the receiver upon completion. 3.Method B: External Flash Installation (MultiBoot) : Deployment via MultiBoot plugin. Connect to your active main image on the receiver via FTP (FileZilla or WinSCP). Upload the backup archive (.tar.gz or .zip) to your multiboot media directory (/media/usb/openMultiboot-Upload/ or /media/ba/backup/). Open MultiBoot Manager from your receiver's plugin menu. Select Install / Unpack Image, pick the uploaded backup file, and boot into SatLodgo 15.2 after extraction. 📥 Downloads & Attachments SatLodgo 15.2 DM520 / DM525 Backup Package: satlodgo-15.2-dm520-fhd-23022026.tar.xz satlodgo-15.2-dm520-fhd-23022026_usb.zip
-
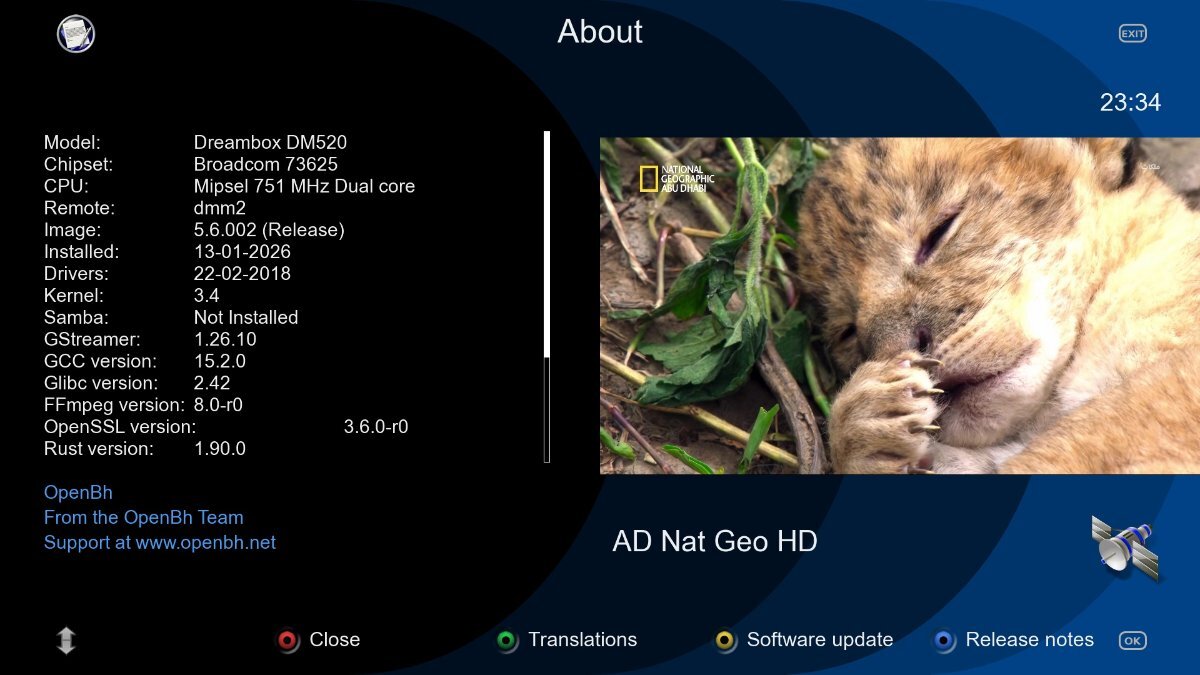
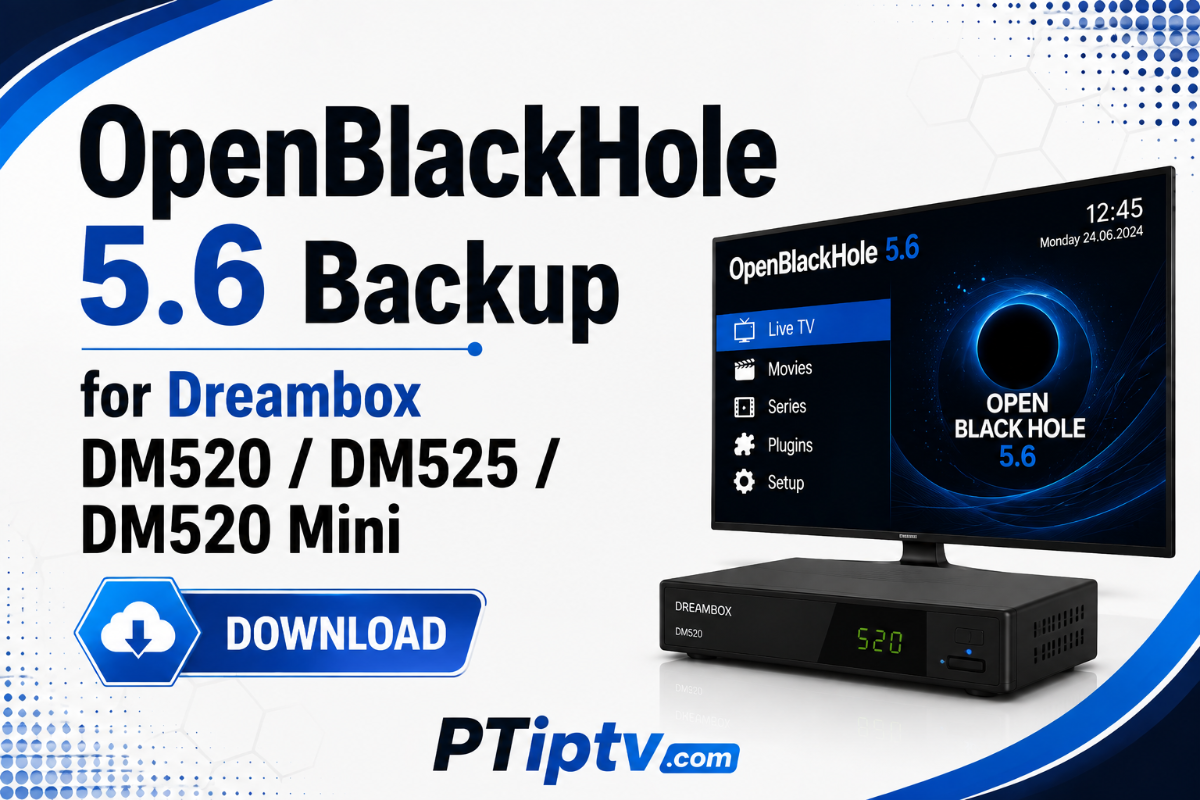
OpenBlackHole 5.6 Full Backup for Dreambox DM520HD / DM525HD / DM520 Mini This custom OpenBlackHole 5.6 Full Backup is specifically built for the Dreambox DM520HD, DM525HD, and DM520 Mini satellite receivers. Delivering a high-performance Full HD experience, this backup comes pre-loaded with the Waves4-FHD Skin, full Wi-Fi driver integration, pre-configured multi-satellite channel bouquets with matching picons, updated softcams, and modern utilities including AISubtitles. Fully operational on both Internal Flash and External Flash (MultiBoot Manager). Technical Specifications Overview System Attribute Details Supported Models Dreambox DM520HD / DM525HD / DM520 Mini Base Firmware OpenBlackHole 5.6 (FHD Image / Python 3) Flash Deployment Internal Flash & External Flash (IN & OUT) Default Skin Waves4-FHD Skin Wireless Support Pre-installed Wi-Fi Drivers (WIFI Ready) Default Softcam NCam v15.8 Channel Bouquets Nilesat (7.0°W), Badr / Arabsat (26.0°E), Hotbird (13.0°E) Channel Picons Full Coverage for Nilesat, Badr, and Hotbird Release Date May 20, 2026 Included Softcams & Key Plugins NCam v15.8: Updated softcam emulator pre-configured for low ECM zapping times, PowerVu/BISS key handling, and card-sharing protocol connectivity (CCcam/Newcamd). AISubtitles: Advanced AI-powered subtitle translation plugin for live channels and VOD media. MultiBoot Manager: Tool for creating and managing multiboot environments on external USB/SD storage. xtraEvent: Automatic scraper for high-definition movie backdrops, event posters, and EPG metadata. Bouquet Maker Xtream (BMX): Easy IPTV playlist loader and channel bouquet creator. Savior: System configuration, plugin, and firmware backup/restore utility. Media Player: High-performance media center for local network and USB video playback. Installation Guide (Internal & External Flash) 1.Choose Flash Mode : Select target storage environment. Determine whether you want to flash directly to the receiver's Internal Flash or deploy via MultiBoot / External Storage. 2.Method A: Internal Flash Installation : Web browser flashing via Rescue Loader. Turn OFF the Dreambox using the rear switch. Press and hold the front panel touch sensor while switching power ON until the LED flashes red/red-blue to enter Rescue Mode. Open a web browser on your PC, type the IP address displayed on screen, and select Firmware Upload. Upload the OpenBlackHole 5.6 image archive, click Flash, and reboot once complete. 3.Method B: External Flash Installation (MultiBoot) : Deployment via MultiBoot plugin. Connect to your active main image on the receiver via FTP (FileZilla or WinSCP). Transfer the backup file archive (.tar.gz or .zip) to your multiboot upload directory (/media/usb/openMultiboot-Upload/ or /media/ba/backup/). Open MultiBoot Manager or Barry Allen from the plugins menu. Select Install / Unpack Image, pick the uploaded backup, and boot into OpenBlackHole 5.6 upon extraction. 📥 Downloads & Attachments OpenBlackHole 5.6 Backup (DM520 / DM525 Series): openbh-5.6-dm520-fhd-20052026-rootfs.tar.xz openbh-5.6-dm520-fhd-20052026_usb.zip
-
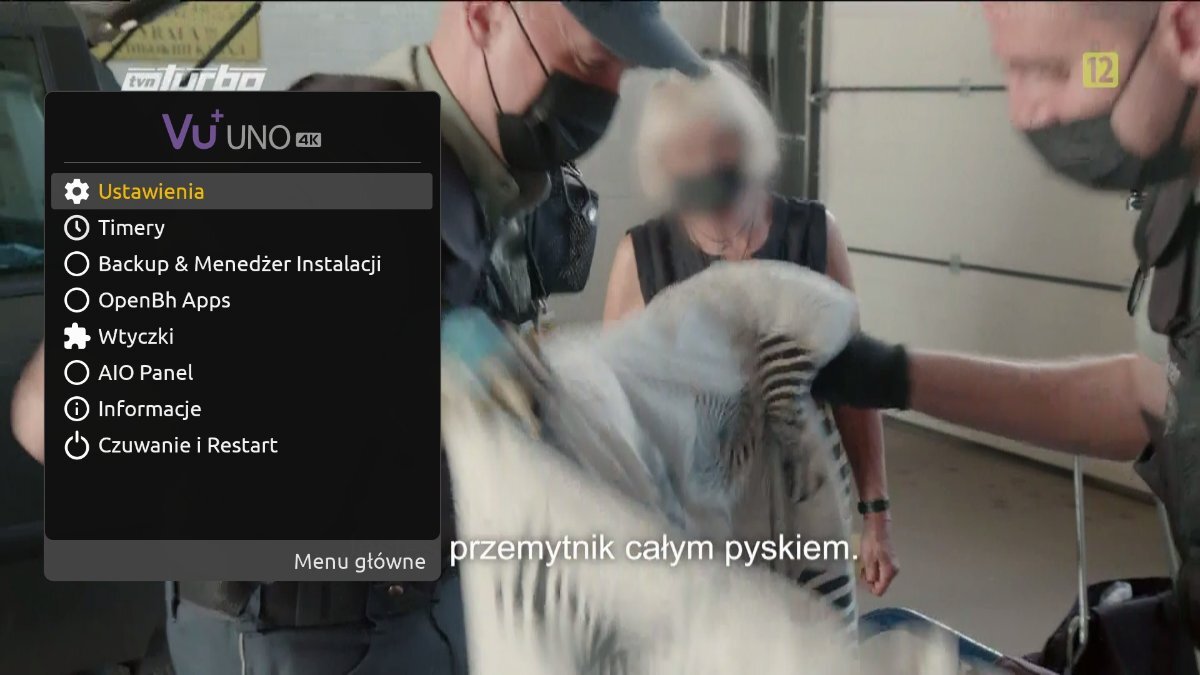
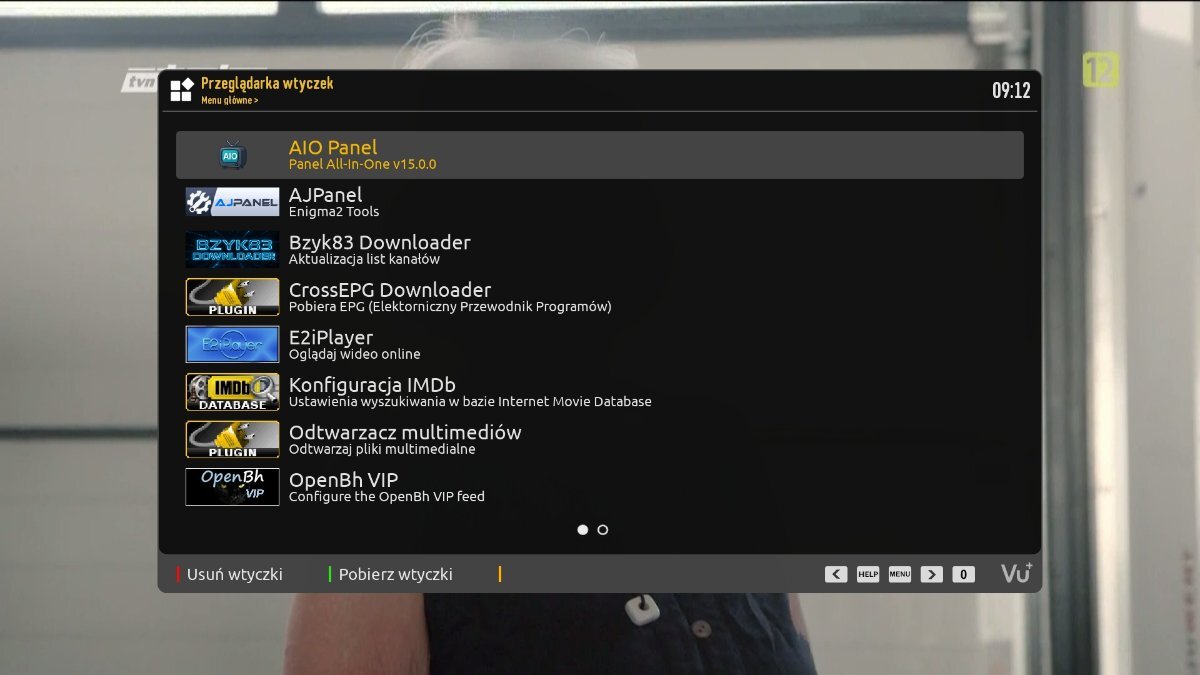
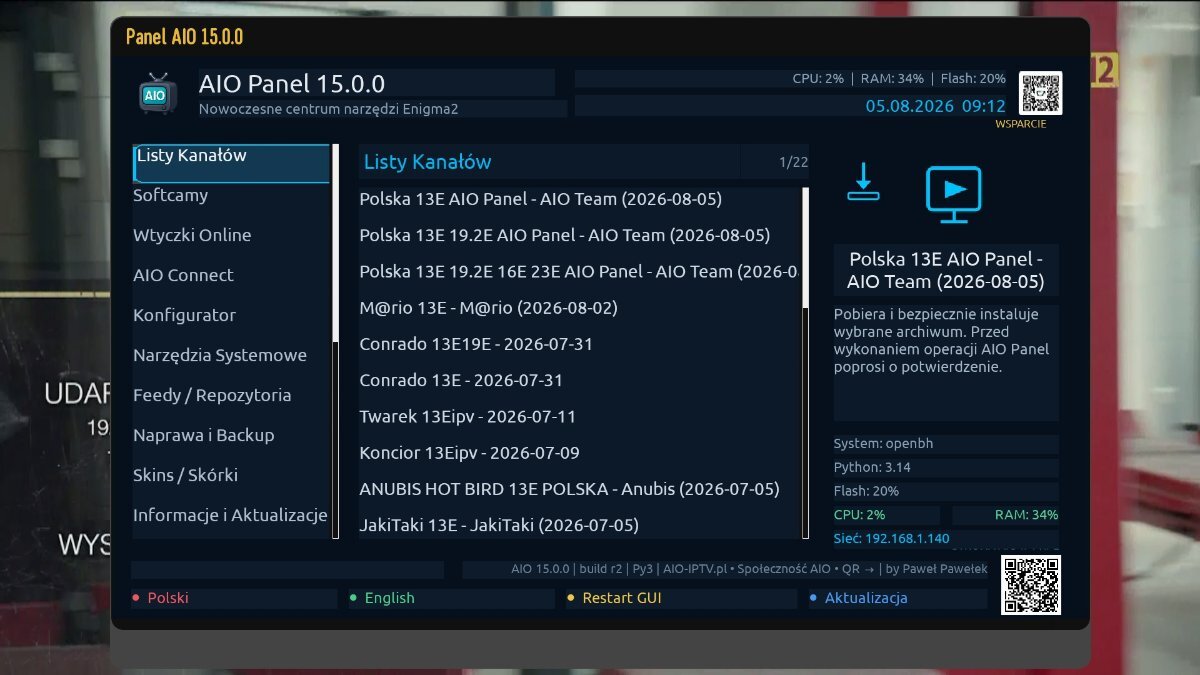
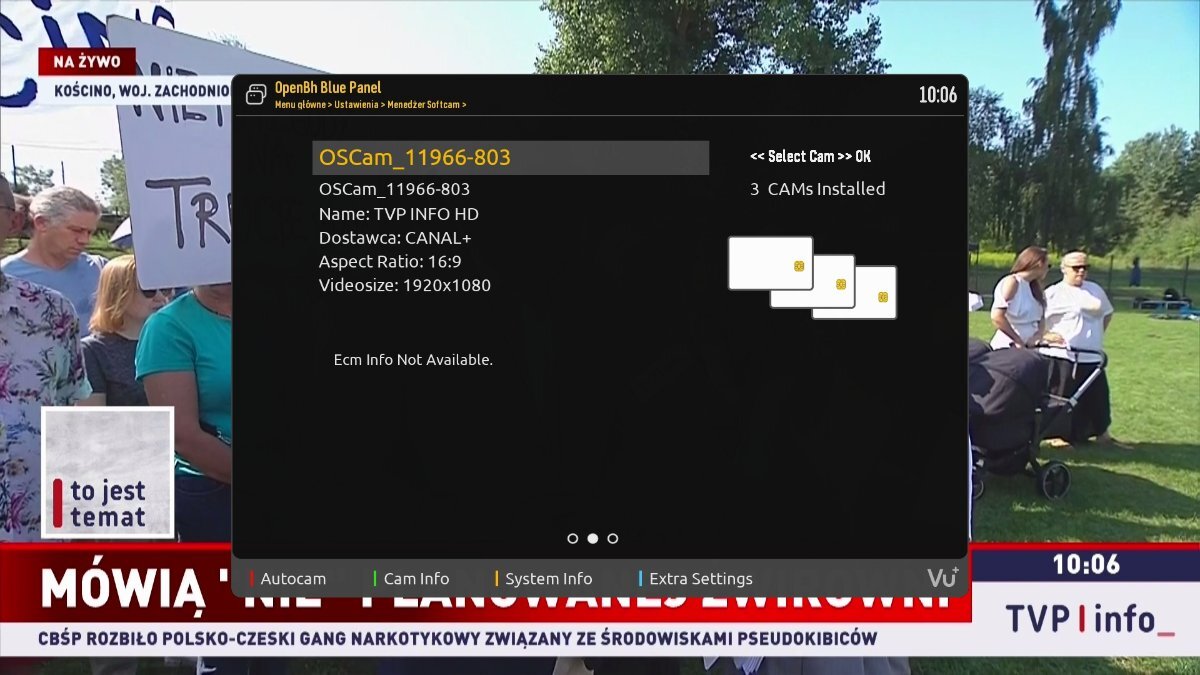
OpenBH 6.0 Custom Backup for Vu+ Uno 4K by ProSat (Python 3.14.6) This custom OpenBH 6.0 Full Backup by ProSat for the Vu+ Uno 4K is built on the official OpenBH 6.0.001 release, running on the Python 3.14.6 environment. Built for high performance and visual clarity, this image comes pre-configured with modern Full HD/4K skins, updated OSCam softcam binaries, essential streaming and system management plugins, and high-resolution Zet71 (400x240) channel picons. Technical Specifications & Access Credentials System Attribute Details Target Hardware Vu+ Uno 4K (ARM Architecture) Base Firmware OpenBH 6.0.001 Release Python Environment Python 3.14.6 Backup Creator ProSat FTP / SSH Username root FTP / SSH Password globalsat.com.pl Channel List Bzyk83 Hotbird 13°E (Modified by ProSat) Picon Collection Zet71 (400x240 Resolution) Release Date August 5, 2026 Pre-Installed Softcams & Skins Softcam: OSCam 11966-803 Levi45 — Pre-configured for low-latency ECM descrambling and reliable card-sharing protocol support (CCcam / Newcamd). Pre-Loaded Skins: E2 darkos: High-contrast dark theme optimized for modern 4K/FHD displays. Mx slim-line np: Lightweight, minimalist skin designed for fast menu zapping. Included Plugins & System Utilities AJPanel: The ultimate Enigma2 multi-tool for system management, iptv playlist conversion, terminal execution, file editing, and backup management. E2iPlayer: Comprehensive media center plugin for online VOD streams and web media playback. AIO Panel (All-In-One Panel): Centralized control suite for image tweaks, softcam restarts, and system telemetry. Bzyk83 Download: Dedicated updater plugin for downloading channel lists and system resources. Step-by-Step USB Flashing Guide 1.Prepare USB Flash Drive : Prepares flash drive for bootloader recognition. Format a USB flash drive (16GB or smaller recommended) to FAT32. 2.Extract Image to USB :Preserves required folder hierarchy. Download the backup zip archive and extract it directly to the root of your USB drive. Ensure the folder structure on the drive is: USB:\vuplus\uno4k\ containing files such as rootfs.tar.bz2 and initrd.bin. 3.Flash Image via USB : Executes firmware upgrade via receiver front panel. Turn OFF the Vu+ Uno 4K using the rear power switch. Insert the USB drive into the side USB port. Power ON the receiver using the rear power switch. When the front LED button pulses/blinks, press the Front Touch Power Button to initiate flashing. 4.Reboot & FTP Login Access : Connect via FTP/SSH after reboot. Wait until the receiver finishes flashing and reboots automatically. Access the system filesystem via FTP (FileZilla or WinSCP) using: Username: root Password: globalsat.com.pl 📥 Downloads & Attachments OpenBH 6.0.001 Backup for Vu+ Uno 4K: openbh-6.0.001.release-vuuno4k-20260805_100922-usb.zip
-
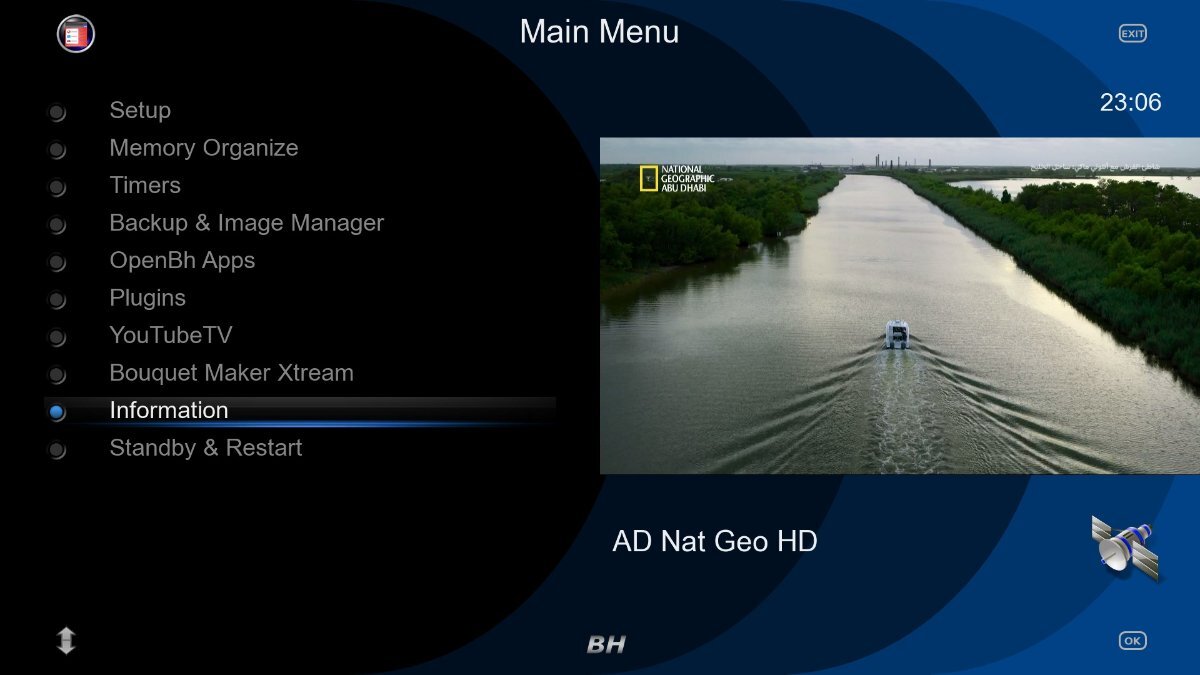
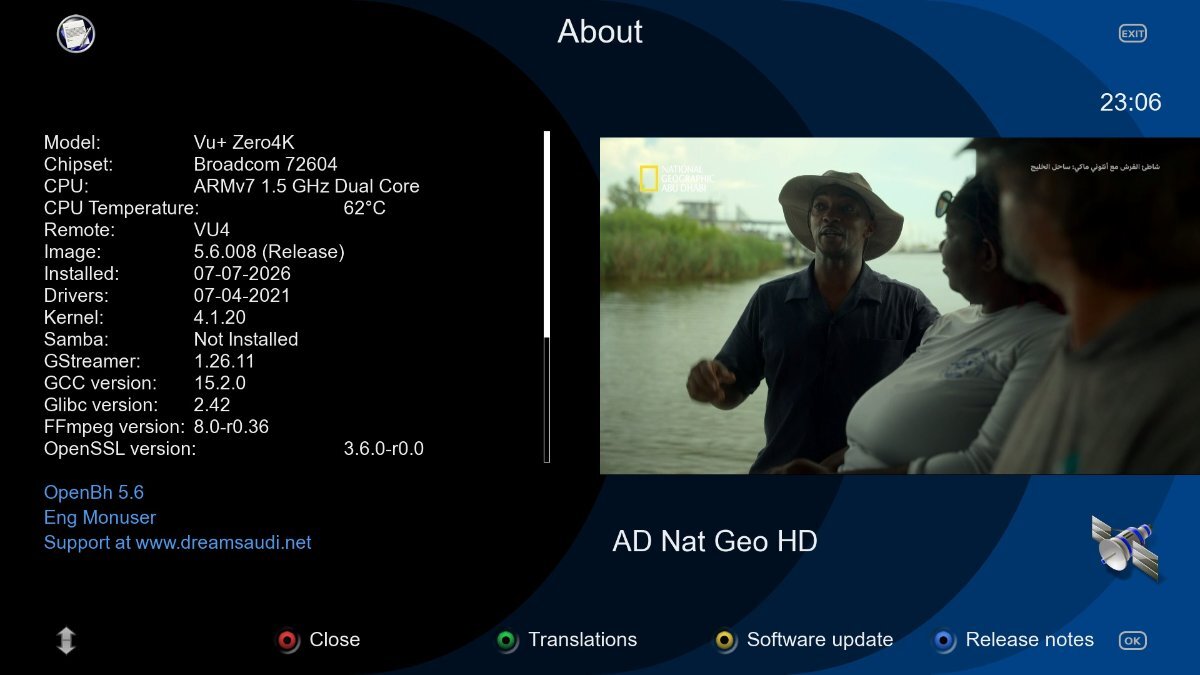
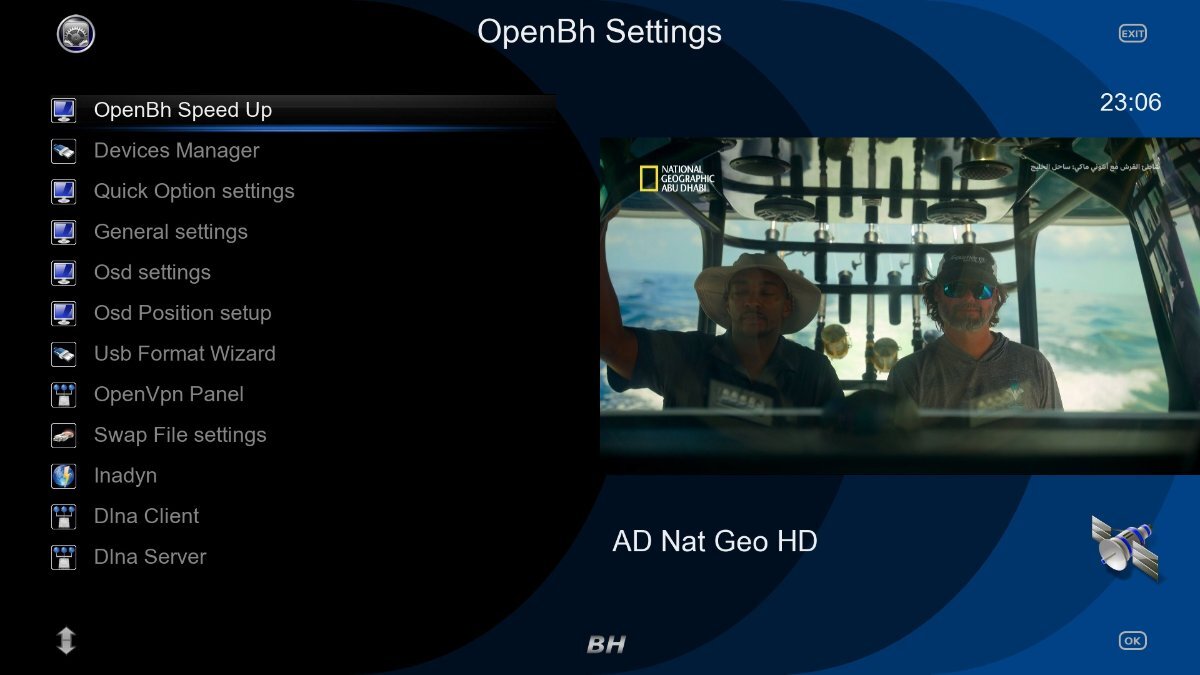
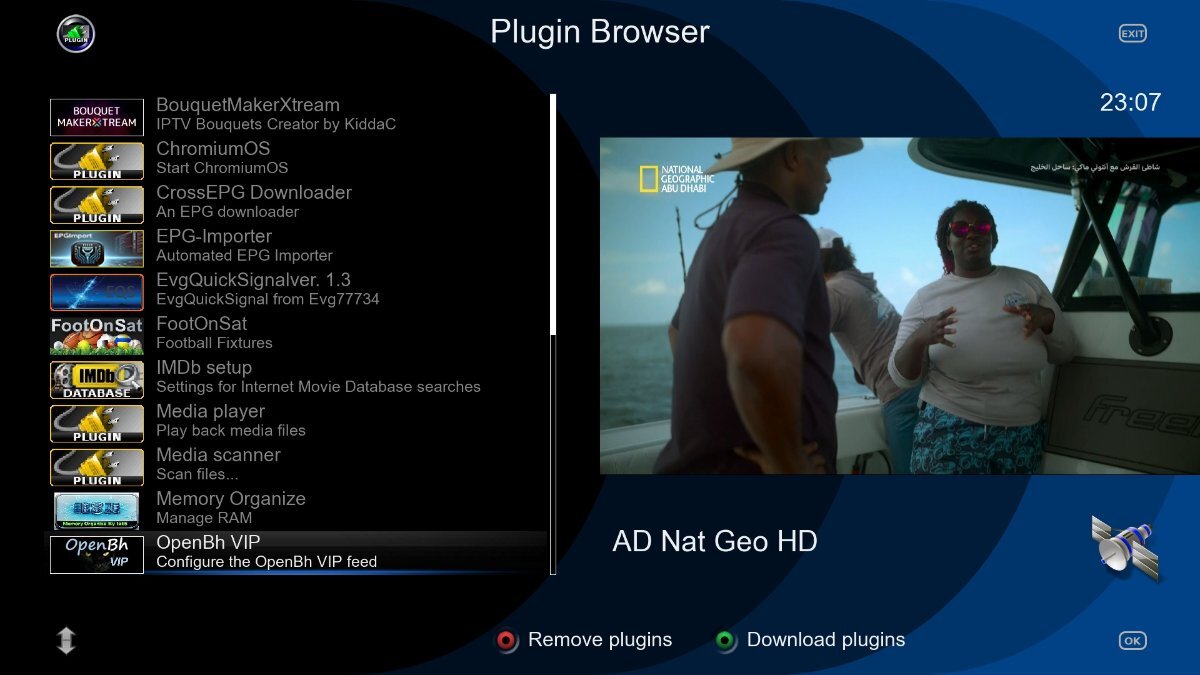
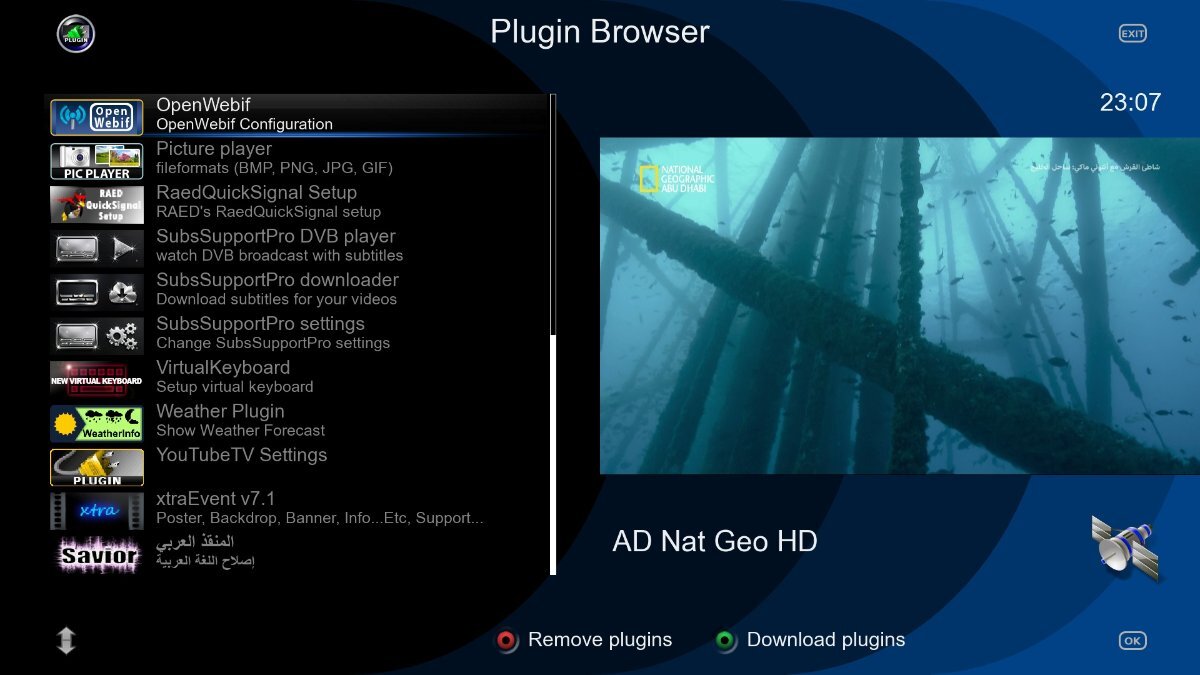
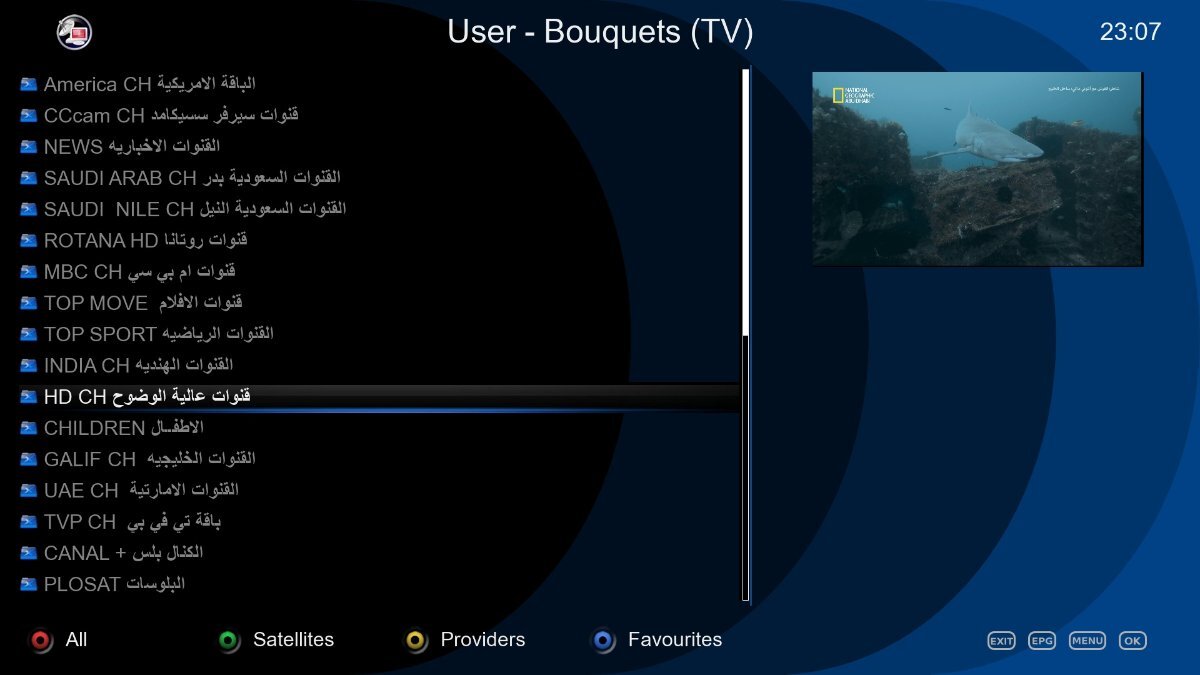
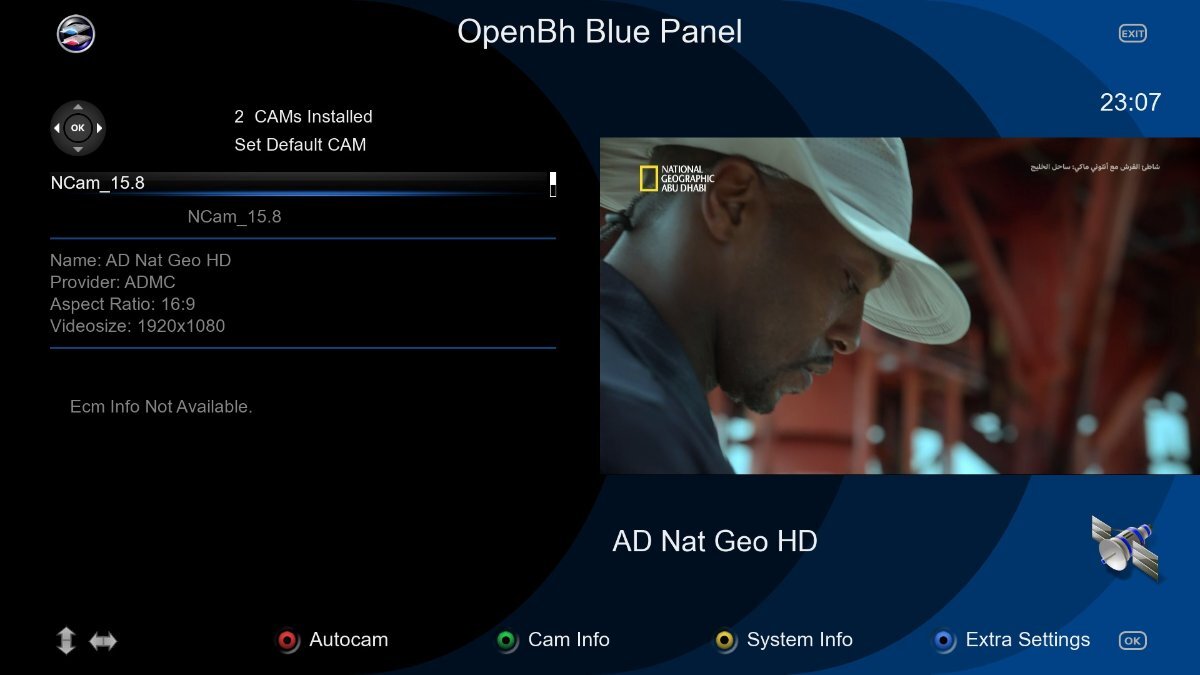
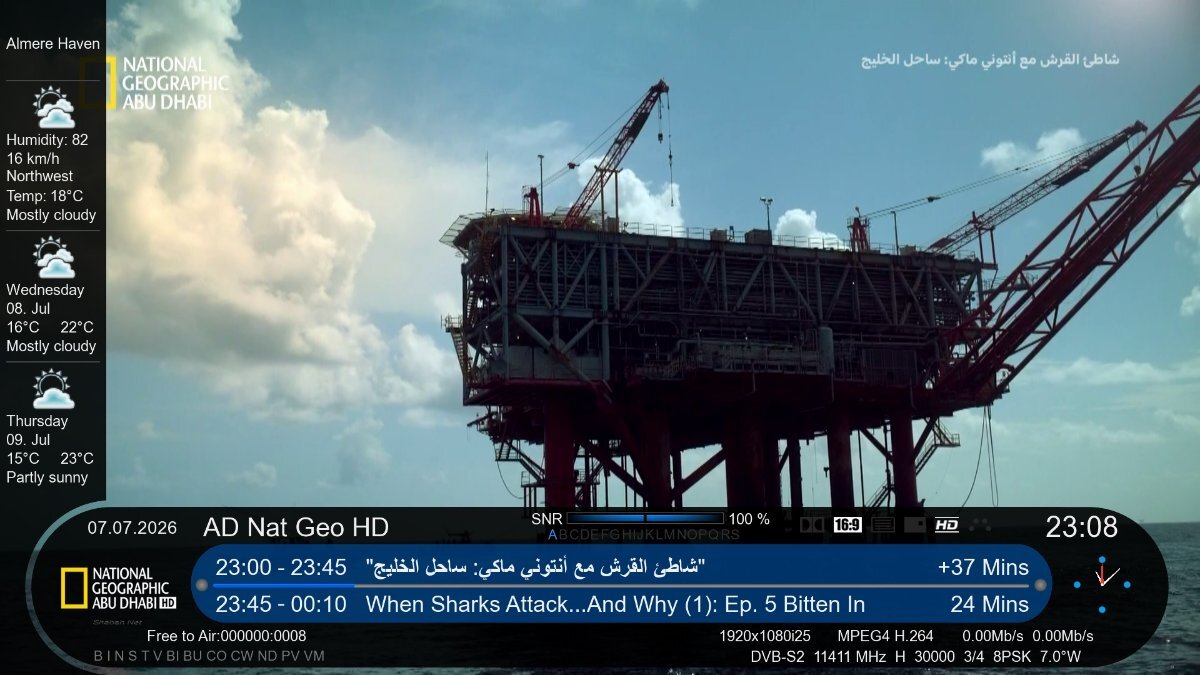
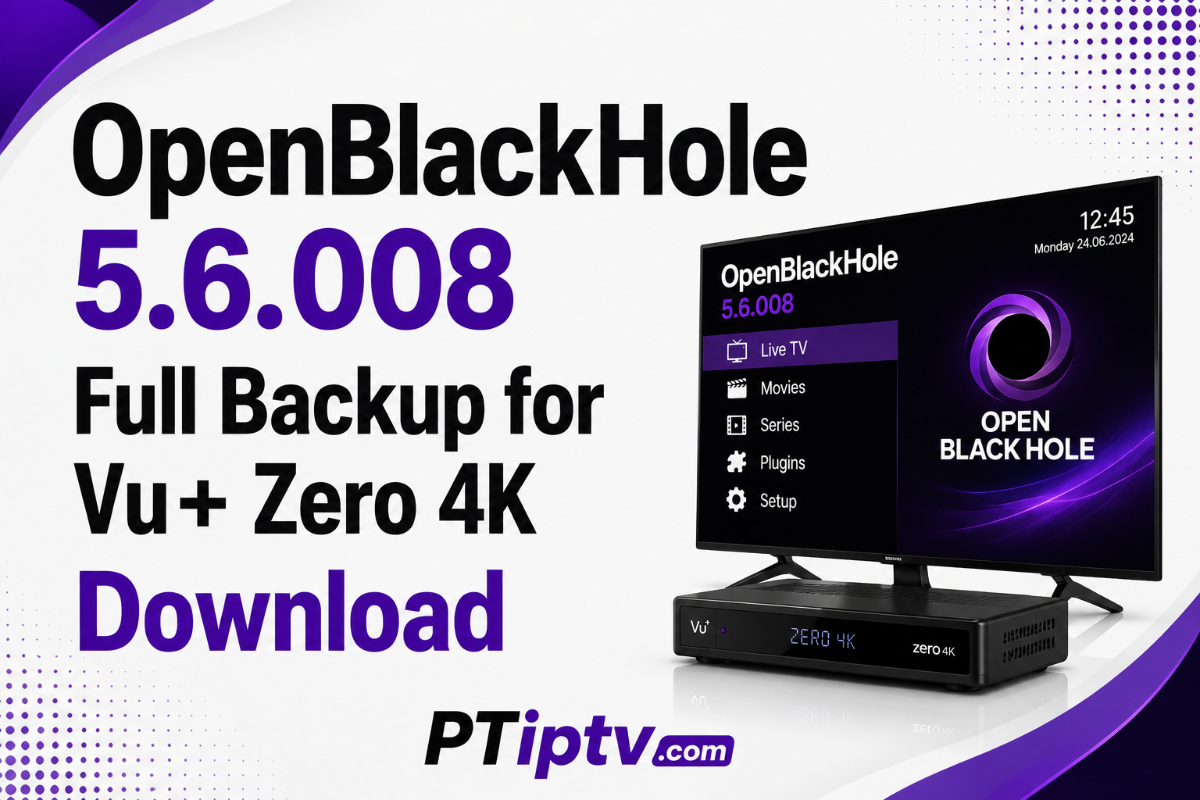
OpenBlackHole 5.6.008 Custom Backup for Vu+ Zero 4K (Internal & External Flash) This custom OpenBlackHole 5.6.008 Full Backup for the Vu+ Zero 4K delivers a complete, highly optimized Enigma2 environment for UHD-4K satellite reception, IPTV streaming, and multi-satellite viewing. Pre-configured with the Waves4 Weather-FHD Skin, full Wi-Fi driver compatibility, updated satellite bouquets with matching channel picons, and pre-installed softcams, this backup is ready for deployment on both internal and external flash (MultiBoot) storage. Backup Highlights & Specifications Base Firmware: OpenBlackHole 5.6.008 (Python 3 environment). Target Hardware: Vu+ Zero 4K (ARM 4K UHD Architecture). Flash Compatibility: Fully compatible with Internal Flash (Direct USB Flash) and External Flash (OpenMultiboot / MultiBoot Manager). Pre-Installed UI Skin: Waves4 Weather-FHD Skin (featuring integrated weather telemetry and high-contrast 1080p graphics). Wireless Connectivity: Pre-configured Wi-Fi driver packages (WIFI Ready). Multi-Satellite Bouquets: Organized channel lists for Nilesat (7.0°W), Badr / Arabsat (26.0°E), and Hotbird (13.0°E). Channel Picons: Comprehensive logo coverage for Nilesat, Badr, and Hotbird stations. Technical Specifications Overview System Attribute Details Receiver Model Vu+ Zero 4K Base Image OpenBlackHole 5.6.008 Flash Mode Internal Flash & External Flash (IN & OUT) Default Softcam NCam v15.8 Default Skin Waves4 Weather-FHD Release Date July 7, 2026 Included Softcams & Emulators NCam v15.8: Updated emulator softcam pre-configured for fast ECM decoding, low zapping times, and multi-protocol card-sharing connections (CCcam / Newcamd). Pre-Installed Plugins & Utilities MultiBoot Manager: Multi-image bootloader utility for managing external flash installations. SubsSupportPRO: Advanced subtitle downloader and sync tool for satellite channels, IPTV, and movie playback. xtraEvent: Dynamic metadata scraper for EPG backdrop images, posters, and extra event info. EPG-Importer: Automated 7-day Electronic Program Guide retriever. Bouquet Maker Xtream (BMX): Easy IPTV playlist import and bouquet organizer. SatelliwebLive Feeds: Live feeds retriever for satellite feed hunters. Key Adder: Quick softcam key manual updater. Savior: Image backup and configuration restore tool. Weather Plugin & Media Player: Native utilities for local weather monitoring and media file playback. Installation Guide 1.Select Installation Method : Choose between USB flashing or Multiboot deployment. Determine whether you are installing to the receiver's Internal Flash via USB drive or to External Flash via MultiBoot. 2.Method A: Internal Flash Installation (USB) : Formats USB drive to FAT32. Extract the backup zip file directly to the root of a FAT32-formatted USB drive. Ensure the directory structure is USB:\vuplus\zero4k\. Power OFF the Vu+ Zero 4K using the rear power switch. Insert the USB drive into the rear USB port. Power ON the receiver and press the front touch button when prompted to start flashing. 3.Method B: External Flash Installation (MultiBoot) : Deploys image archive via multiboot manager. Connect to your active receiver via FTP (FileZilla or WinSCP). Upload the backup archive (.zip or .tar.gz) to /media/usb/openMultiboot-Upload/ or /media/ba/backup/. Open MultiBoot Manager or OpenMultiboot from the receiver plugins menu. Select Install Image, choose the uploaded file, and boot into the new OpenBlackHole 5.6.008 image upon completion. 📥 Downloads & Attachments OpenBlackHole 5.6.008 Vu+ Zero 4K Backup: openbh-5.6.008-vuzero4k-uhd-07072026-usb.zip
-
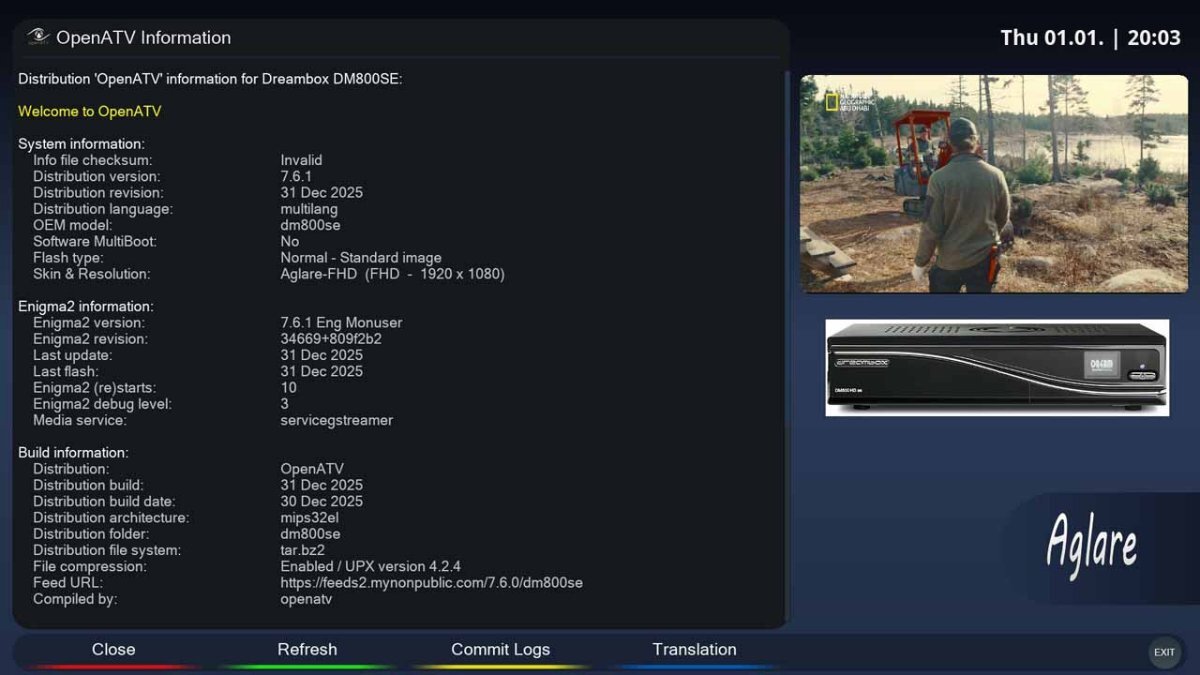
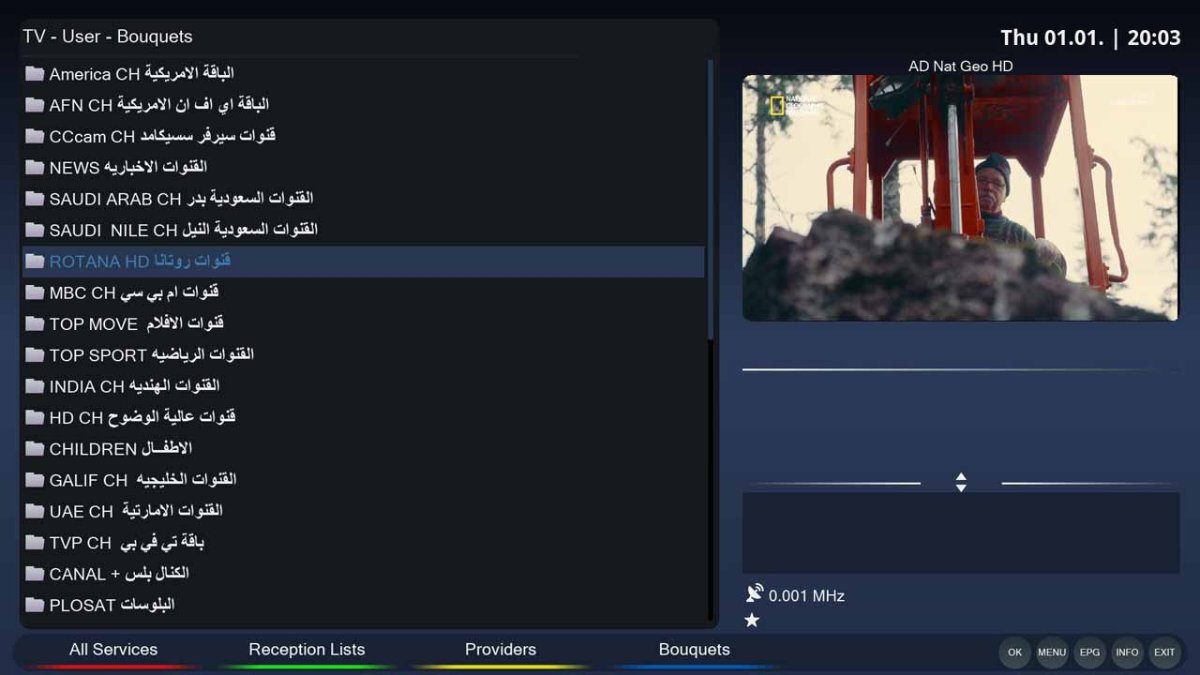
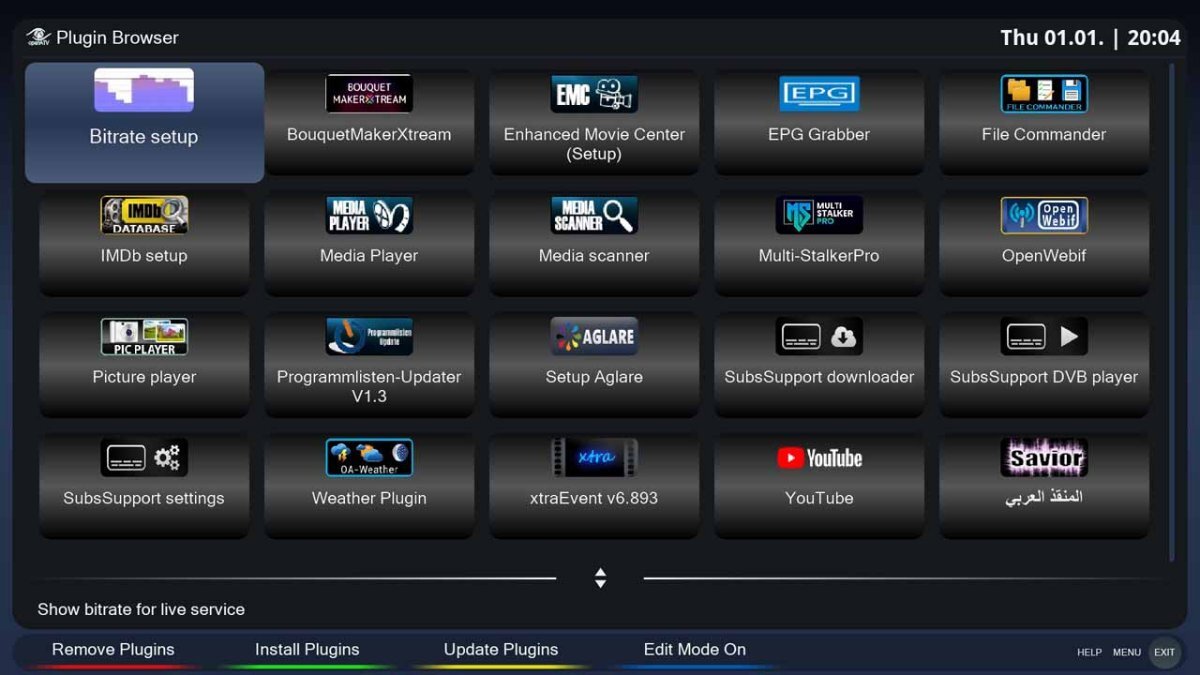
OpenATV 7.6.1 Full Backup for DM800se (External Flash / BA) OpenATV 7.6.1 Full Backup is a pre-configured firmware image built for the classic Dreambox DM800se satellite receiver. Specially optimized for external flash installation (Barry Allen / OpenMultiboot), this backup features the modern Aglare-FHD Skin, full Wi-Fi support, updated multi-satellite channel bouquets with matching picons, pre-configured softcams, and a comprehensive suite of EPG and media plugins. Backup Key Features & Specifications Base Firmware: OpenATV 7.6.1 (Python 3 environment). Target Hardware: Dreambox DM800se (MIPS Architecture) — External Flash Only (Barry Allen / OpenMultiboot). Pre-Installed UI Skin: Aglare-FHD Skin (Full HD 1080p layout with high-contrast menus). Wireless Connectivity: Pre-loaded Wi-Fi driver packages (WIFI Ready). Multi-Satellite Channel List: Pre-sorted channel bouquets for Nilesat (7.0°W), Badr / Arabsat (26.0°E), Hotbird (13.0°E), and Eutelsat 9B (9.0°E). Pre-Loaded Channel Picons: Full channel logo coverage for Nilesat, Badr, Hotbird, and Eutelsat 9B. Included Softcams & Emulators NCam v15.6: Pre-installed and configured softcam for fast ECM descrambling and multi-protocol server connections (CCcam, Newcamd). Included Plugins & System Utilities Bouquet Maker Xtream (BMX): For easy IPTV playlist parsing and bouquet generation. xtraEvent & TMDB Details: Automated backdrop and poster scraper for EPG event views. EPG-Importer: Automated 7-day Electronic Program Guide generator. SubsSupport: Subtitle manager for IPTV and VOD streams. Savior: System backup and configuration restoration utility. Media Player: Native high-performance media player for local media playback. Technical Specifications Overview System Attribute Details Receiver Model Dreambox DM800se Target Storage External Flash / MultiBoot (USB / eSATA) Image Base OpenATV 7.6.1 Default Skin Aglare-FHD Default Softcam NCam v15.6 Release Date January 3, 2026 External Flash Installation Guide (Barry Allen / OpenMultiboot) 1.Download Image Archive : Prepares backup file for multiboot manager. Download the OpenATV 7.6.1 DM800se backup image archive (.zip or .nfi / .tar.gz depending on your multiboot setup). 2.Upload to Multiboot Folder via FTP : Transfers image to multiboot storage directory. Connect to your Dreambox using FTP (FileZilla or WinSCP) and transfer the backup file to your multiboot media directory: For Barry Allen: /media/ba/backup/ or /media/ba/MB_Images/ For OpenMultiboot: /media/usb/openMultiboot-Upload/ 3.Extract & Unpack via Multiboot Plugin : Deploys image onto external USB/eSATA storage. Turn ON your Dreambox and navigate to Menu > Plugins > Barry Allen (or OpenMultiboot). Select Install Image / Unpack Image, choose the uploaded OpenATV 7.6.1 file, and confirm execution. Wait until the extraction process completes successfully. 4.Boot New Image : Loads new OpenATV 7.6.1 environment. Restart your receiver, select OpenATV 7.6.1 from the multiboot boot menu, and enjoy your fully configured system. 📥 Downloads & Attachments OpenATV 7.6.1 DM800se Backup File: openatv-7.6.1-dm800se-fhd-03012025-rootfs.tar.bz2.zip
-
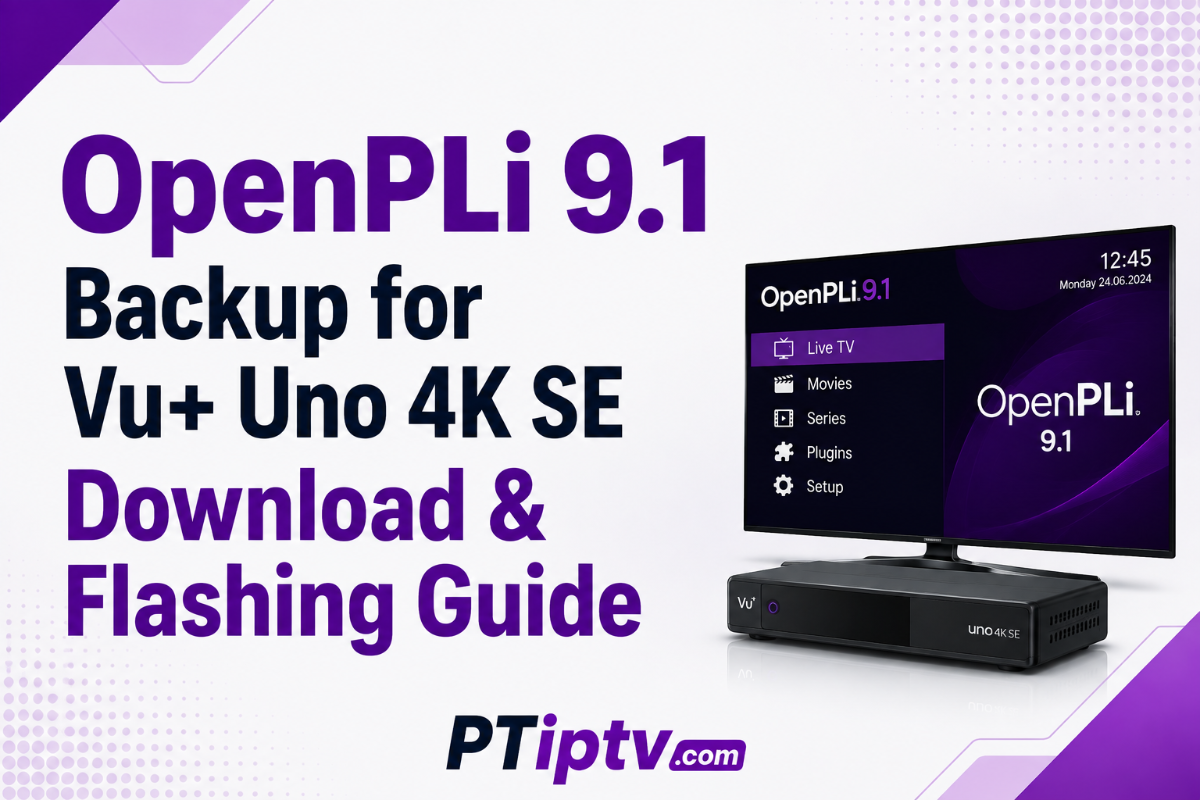
OpenPLi 9.1 Custom Backup for Vu+ Uno 4K SE: Features, Setup & Download Guide This custom OpenPLi 9.1 Backup for the Vu+ Uno 4K SE delivers a fully configured, out-of-the-box Enigma2 system tailored for satellite, cable, and IPTV streaming. Built on the stable OpenPLi 9.1 Python 3 base, this backup comes pre-loaded with essential plugins, working CrossEPG integration, pre-configured softcam managers, and customized Full HD skins. Key Highlights & Features Pre-Configured Base Image: Built on stable OpenPLi 9.1 with updated kernel drivers for Vu+ Uno 4K SE hardware. Working CrossEPG Integration: Fully configured CrossEPG importer for automated 7-day Electronic Program Guide (EPG) fetching. Pre-Loaded Plugins & Utilities: Includes popular tools for IPTV playlist management, softcam setup, channel list maintenance, and system monitoring. Custom Skins Included: Pre-installed Full HD and 4K interface skins for smooth menu navigation and visual picon/poster rendering. Default Root Access: Pre-configured SSH/FTP login details for quick remote management via FileZilla, WinSCP, or Telnet. Technical Specifications & Access Credentials System Attribute Details Target Receiver Vu+ Uno 4K SE (ARM Architecture) Base Firmware OpenPLi 9.1 (Python 3) FTP / SSH Username root FTP / SSH Password vuplus Default EPG Engine CrossEPG / EPGImport Flashing File Format .zip (USB Flash Folder Structure) USB Flashing Guide for Vu+ Uno 4K SE 1.Prepare USB Drive : Prepares flash drive for bootloader recognition. Format a USB flash drive (16GB or smaller recommended) to FAT32. 2.Download & Extract Image Archive : Preserves required folder hierarchy. Download the backup zip file and extract its contents directly to the root of your USB drive. Ensure the folder structure on the USB drive is: USB:\vuplus\uno4kse\ containing the image files (rootfs.tar.bz2, initrd.bin, etc.). 3.Flash Image via USB : Triggers firmware update procedure. Turn OFF the receiver using the rear power switch. Insert the USB drive into the front USB port behind the front flap. Power ON the receiver using the rear power switch. When the OLED screen displays "Press Power", press the front touch power button on the receiver to start flashing. 4.Reboot & Post-Flash Access : Initializes updated environment. Wait until the display indicates flashing is complete and the receiver reboots automatically. Remove the USB drive. You can now access the receiver via FTP/SSH using username root and password vuplus. 📥 Downloads & Attachments OpenPLi 9.1 Backup (Vu+ Uno 4K SE): 20251219_2006openpli9.1.zip
-
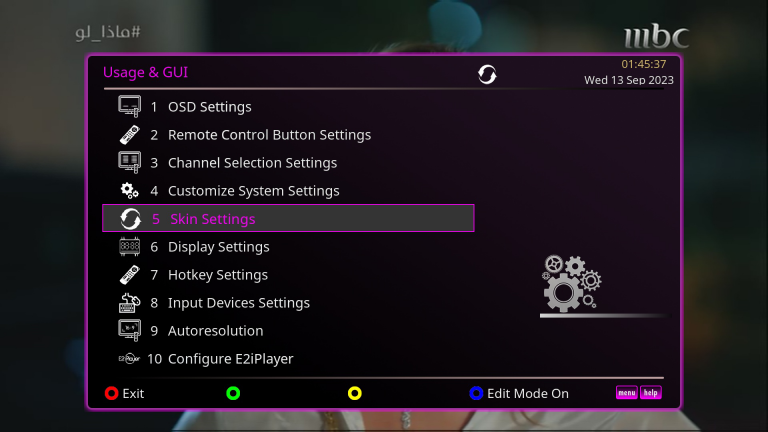
XDREAMY Skin for Enigma2: Features, Setup & Download Guide XDREAMY is a next-generation, highly customizable user interface skin created by Inspiron for Enigma2 Linux satellite receivers. Drawing aesthetic inspiration from the Dreamy and oDreamy skins, XDREAMY combines advanced rendering engine technologies—including the re-coded PosterX component by Lululla—with deep user personalization, allowing full control over layouts, color schemes, typography, and poster integration. Key Features & Customization Options Dedicated Customization Plugin: Built-in plugin to adjust all skin settings, color palettes, fonts, and screen layouts directly from the receiver GUI. 5+ Layout Styles: Multiple main menu and InfoBar layout styles to choose from. 15+ GUI Color Themes: Extensive color selection for menus, borders, highlights, and text elements. 15+ Font & 6+ Key Styles: Easily change system typography and button key visual appearances. 11+ Channel List Layouts: Diverse bouquet selection templates available with or without movie poster scrapers. TMDB & OMDB Private API Integration: Add personal API keys to dramatically speed up movie poster and event metadata downloads. Integrated Weather Setup: Direct configuration and installation for oaWeather and MSNWeather from the image feed with custom city search. High-Performance PosterX Engine: Powered by Lululla's recoded PosterX component for fluid poster rendering without system lag. Supported Images & OE Distributions Image Distribution Supported Versions EGAMI 10.x OpenATV 6.x & 7.x OpenSPA 8.x PurE2 6.x & 7.x OE-Alliance Builds OpenPLi, OpenViX, OpenBH, OpenDROID What's New in This Release (Changelog) Recoded Setup Plugin: Fully rebuilt setup interface with a new About section detailing skin specifications and supported images. Direct Weather Configuration: Easily install oaWeather or MSNWeather from feed and configure local city locations directly inside the plugin. Private API Keys: Added TMDB and OMDB user API key input fields to optimize event posters and VOD metadata fetching. Enhanced Progress & Signal Bars: Replaced color gradient renderers on OpenPLi & OpenViX with high-definition gradient images for smoother SNR, AGC, and time-elapsed progress bar displays. UI & Template Enhancements: Adjusted main menu templates across all image distributions for better readability and added numerous screen previews. OpenPLi Fixes: Fixed screen saving functions, section headers, and preview renders under OpenPLi firmware. Virtual Keyboard Progress: Initial implementation of an integrated virtual keyboard (work in progress across select images). Special thanks to Lululla (code revisions, debugging, and PosterX improvements), giopet (testing and bug reporting), and oktus (design ideas). Step-by-Step Installation Guide 1.Upload Package to /tmp/ : Transfers IPK installer to receiver memory. Transfer the enigma2-plugin-skins-xdreamy_all.ipk file to the /tmp/ folder on your receiver using FTP (FileZilla or WinSCP). 2.Install Package via Terminal : Executes skin installer script via SSH terminal. Connect via SSH or Telnet (PuTTY) and execute the installation command: opkg update opkg install --force-overwrite /tmp/*.ipk 3.Activate Skin & Restart GUI : Applies new graphical skin interface. Go to Menu > Setup > Usage & GUI > Skin Setup, select XDREAMY, press OK, and confirm the GUI restart prompt. 4.Configure XDREAMY Plugin Settings :Configures weather and API keys. Navigate to Menu > Plugins > XDREAMY Control Plugin. Input your TMDB / OMDB API keys for enhanced movie poster fetching. Install oaWeather or MSNWeather from the feed and set your target city location. 📥 Downloads & Attachments IPK Package (All OE-Alliance Images): enigma2-plugin-skins-xDreamy_4.0.0_all.ipk
-
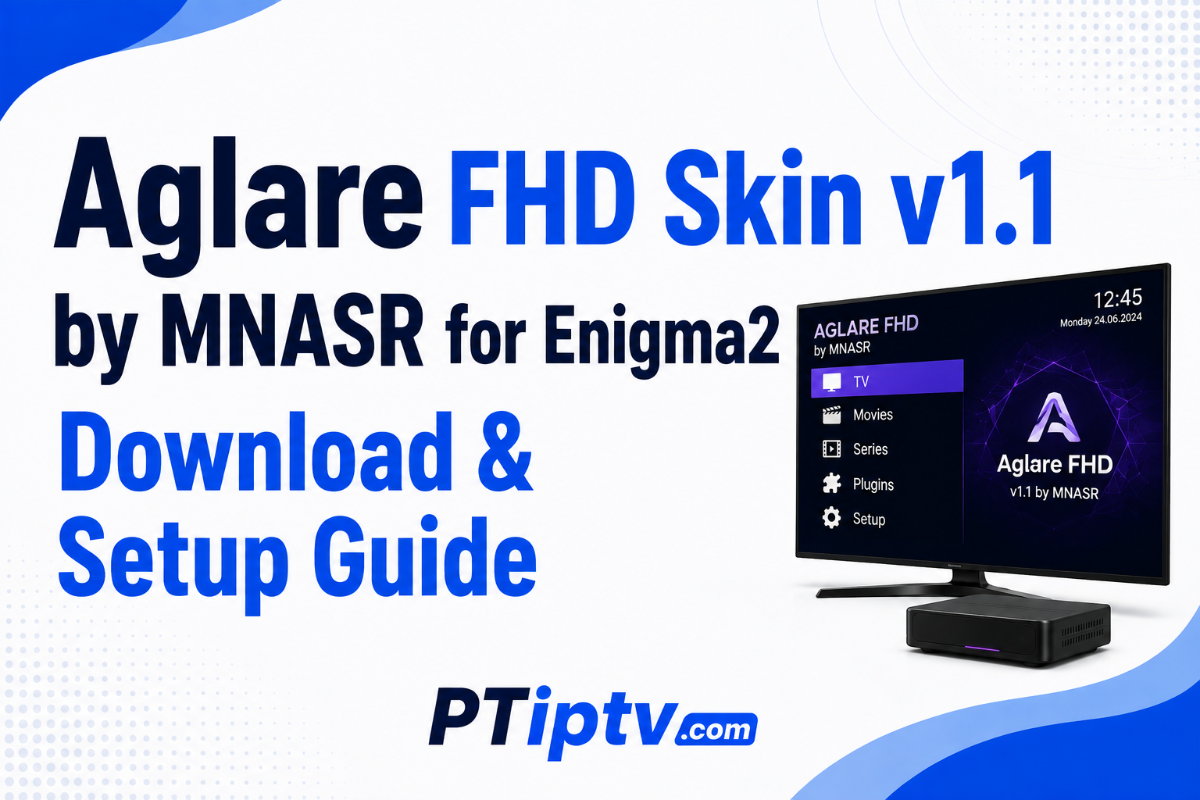
Aglare FHD Skin v1.1 by MNASR for Enigma2: Update & Features Guide Aglare FHD v1.1 is a clean, modern Full HD (1080p) user interface skin created by MNASR for Enigma2 Linux satellite receivers. Built specifically to integrate with the PosterX movie poster rendering engine, version 1.1 delivers critical code cleanup, screen fixes, and unified system converters to ensure smooth menu and infobar performance. What's New in Version 1.1 (Changelog) Code & File Cleanup: Removed unnecessary system files to reduce the skin package size and improve overall execution speed. Screen Fixes: Corrected visual bugs and layout alignment across several Enigma2 UI screens. Unified Converter Engine: Renamed and reorganized all renderers and converters to the unified Aglarexxxxxx naming convention to prevent crashes and file conflicts with other installed skins. PosterX Integration: Maintained exclusive, optimized support for PosterX (Special thanks to Lululla for PosterX renderer enhancements and Madhouse for technical support). Supported Images & Compatibility To ensure maximum system stability and prevent system crash loops, Aglare FHD v1.1 strictly supports four specific OE-Alliance image builds: Image Distribution Supported Versions OpenATV 7.3 & 7.4 EGAMI 10.4 & 10.5 PurE2 7.3 OpenSPA 8.3 Quick Installation Guide 1.Ensure PosterX Dependency is Active : Required for movie and EPG poster rendering. Before installing Aglare FHD, make sure the PosterX renderer plugin is installed and running on your image. 2.Upload Package to /tmp/ : Transfers IPK installer to receiver memory. Transfer the enigma2-plugin-skins-aglare-fhd_1.1_all.ipk file to the /tmp/ folder on your receiver using FTP (FileZilla or WinSCP). 3.Install via Terminal / Console : Executes skin installer via SSH terminal. Connect via SSH/Telnet (PuTTY) and execute the installation command: opkg update opkg install --force-overwrite /tmp/*.ipk 4.Activate Skin & Restart GUI : Applies new graphical skin interface. Go to Menu > Setup > Usage & GUI > Skin Setup. Select Aglare FHD. Press OK and confirm the prompt to restart the Enigma2 User Interface. 📥 Downloads & Attachments IPK Package: enigma2-plugin-skins-aglare-fhd_1.1_all.ipk
-
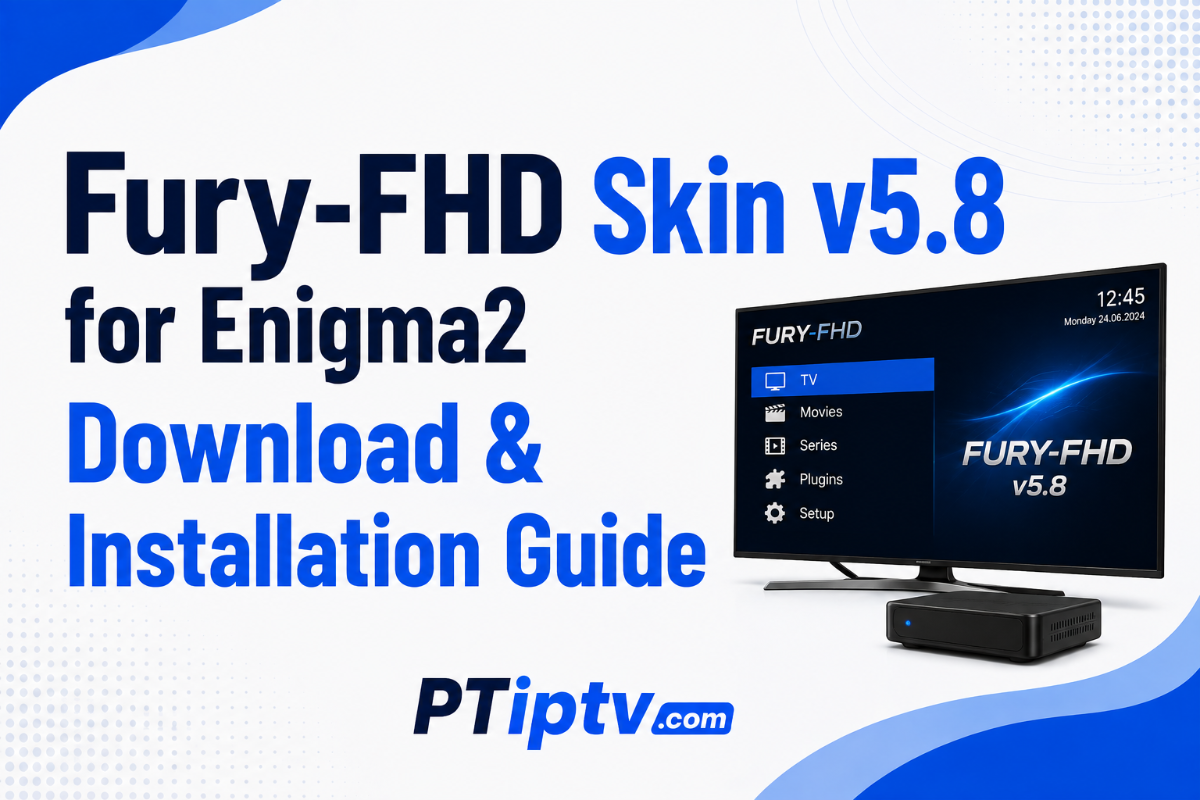
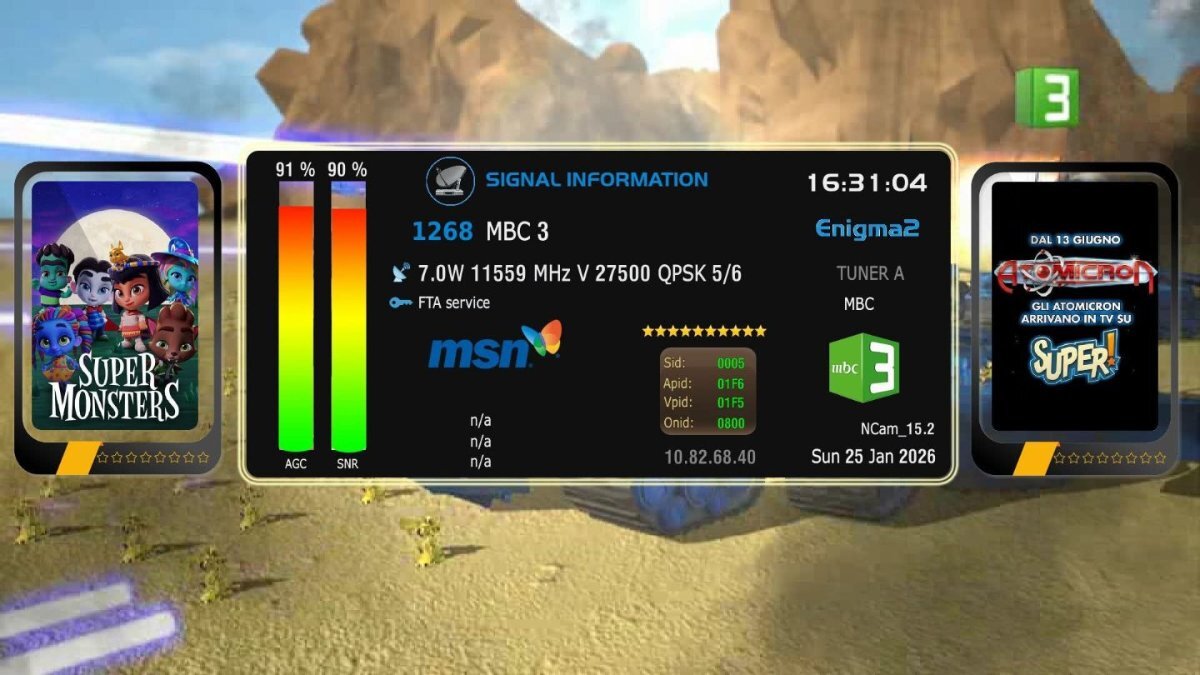
Fury-FHD Skin v5.8 for Enigma2: Features, Changelog & Installation Guide Fury-FHD Skin v5.8 is a major update to the popular Full HD (1080p) interface skin for Enigma2 Linux satellite receivers. Designed for high aesthetic appeal and performance, version 5.8 introduces new circular InfoBar layouts, enhanced signal telemetry with dB readings, dedicated support for softcam management plugins, and a reduced footprint of just 12 MB for maximum menu fluidness. What's New in Version 5.8 (Changelog) New Circular InfoBar Screens: Added 2 circular InfoBar layouts — one minimalist option without posters, and one featuring dual circular poster displays. Enhanced SecondInfobar Signal Screen: Now displays real-time signal quality in dB alongside active encryption/CAID decoding metrics. Plugin Layout Additions: Added a dedicated custom layout screen for the Alternative Softcam Manager plugin. Deep Black Color Theme: Added Color Option #12 for a pure dark black UI background. Skin Setup & Update Fixes: Refreshed the skin control plugin screen and resolved direct online update issues on OpenATV images. Size & Performance Optimization: Compressed the total skin package to 12 MB for faster loading times and lower RAM consumption. Image & Software Compatibility Matrix Image Distribution Supported Versions / Builds OpenATV All Versions EGAMI All Versions PurE2 All Versions OpenBH Versions 5.4 & 5.5.1 OpenViX Version 6.7 OpenPLi Foxbob build, Python 3.9.9, and Python 3.11 builds Installation & Update Methods 1.Option 1: Direct Update via Skin Setup Plugin : Fastest method for existing users. If you already have a previous version installed, open the Fury-FHD Control Plugin from your receiver menu and execute the online update function directly. 2.Option 2: Single Terminal Command (Recommended) : Automatic download & dependency resolution via SSH. Connect to your receiver via SSH or Telnet (PuTTY) and run the following command: opkg update && wget -q "--no-check-certificate" https://raw.githubusercontent.com/islam-2412/IPKS/refs/heads/main/fury/installer.sh -O - | /bin/sh 3.Option 3: Manual IPK / Script Installation : For offline or FTP installation. Download the .ipk package or installer.sh script file below. Transfer the file to /tmp/ on your receiver via FTP (FileZilla or WinSCP). Install via terminal using opkg install --force-overwrite /tmp/*.ipk or execute the shell script. 📥 Downloads & Attachments enigma2-plugin-skins-fury-fhd_5.8_all.ipk Fury-FHD-installer.sh
-
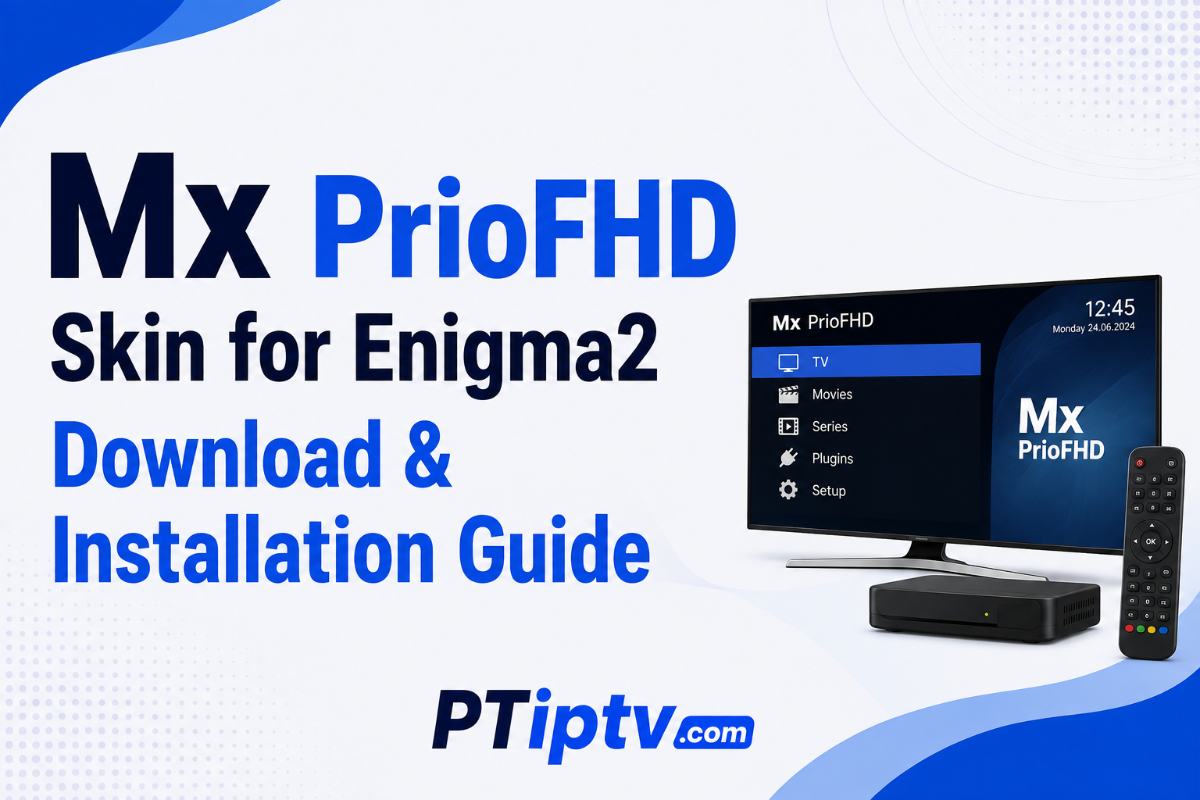
Mx PrioFHD Skin for Enigma2: Features, Setup & Download Guide Mx PrioFHD is a custom, lightweight Full HD (1080p) user interface skin designed for Enigma2 satellite receivers (Vu+, Dreambox, Octagon, Zgemma, Gigablue). It replaces default menus, channel selection screens, and InfoBars with a high-contrast layout optimized for crisp typography, detailed CAID/ECM information, and smooth menu navigation without slowing down the receiver. Fully compatible with Python 2 and Python 3 images (OpenATV 7.x, OpenBH, OpenPLi, EGAMI, PurE2, ViX, and Dreambox OS). Key Features Native 1080p FHD Interface: Clean graphical layout designed specifically for 1920x1080 displays. Detailed Prio & ECM Display: InfoBar and SecondInfoBar show real-time ECM times, Active CAID, Provider ID, Hop counts, and softcam reader stats. Optimized Channel Selection: Bouquet list view with EPG progress bars, channel numbers, and picon integration. Low System Resource Usage: Lightweight XML rendering ensures zero menu lag and low RAM consumption. Weather & Poster Support: Native compatibility with OAWeather and standard EPG poster renderers. Compatibility Matrix Skin Attribute Details Resolution Full HD (1920x1080) Python Support Python 2.7 & Python 3.10+ Supported Images OpenATV, OpenBH, OpenPLi, EGAMI, ViX, PurE2, Newnigma2 Package Formats .ipk (OE-Alliance) / .deb (Dreambox OS) Quick Installation Guide 1.Upload Package to /tmp/ : Transfers package to receiver memory. Download the appropriate package format and upload the file to /tmp/ on your receiver via FTP (FileZilla or WinSCP). 2.Install via SSH / Terminal : Executes skin installer script. Connect via SSH/Telnet (PuTTY) and run: For IPK Images (OpenATV, OpenPLi, EGAMI, etc.): opkg update opkg install --force-overwrite /tmp/*.ipk For DEB Images (Dreambox OS): dpkg -i /tmp/*.deb apt-get install -f -y 3.Activate Skin & Restart GUI : Applies new visual interface. Go to Menu > Setup > Usage & GUI > Skin Setup, select Mx PrioFHD, press OK, and restart the user interface. 📥 Downloads & Attachments Mx-PrioFHD-Skin.zip
-
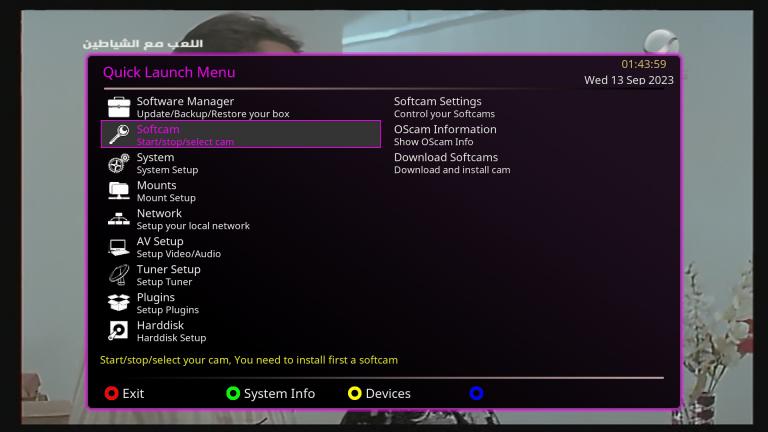
NCam v15.8 Softcam for Enigma2: Download, Features & Installation Guide NCam v15.8 is an advanced emulator softcam based on OSCam source code, heavily optimized for Linux Enigma2 satellite receivers. Build 15.8 delivers enhanced ECM processing speed, automatic softcam key updating (PowerVu, Tandberg, BISS), optimized card reader drivers, and improved server connection stability across CCcam, Newcamd, and Gbox protocols. Compatible with Python 2 and Python 3 images (OpenATV, OpenPLi, OpenBH, EGAMI, VTi, BlackHole, and Dreambox OS). Key Features & Improvements in v15.8 Ultra-Fast Zapping: Refined descrambling algorithms reduce channel decoding time and prevent micro-stuttering. Auto-Update Softcam Keys: Automatically fetches and updates keys for PowerVu, Tandberg, and BISS channels without manual file editing. Broad Architecture Support: Compiled binaries for ARM 4K, MIPS, and ARM64 (AArch64) processors. Dual Package Availability: Available in .ipk for OE-Alliance distributions and .deb for Dreambox OS images. Low System Resource Usage: Optimized memory footprint for legacy receivers and high-end 4K boxes alike. Hardware & Image Compatibility Package Format Supported Architecture Supported Images IPK Packages ARM 4K & MIPS: Vu+, Octagon, Zgemma, Mut@nt, Edision, Gigablue OpenATV, OpenPLi, OpenBH, EGAMI, BlackHole, VTi, PurE2, OpenHDF DEB Packages ARM64 / MIPS (Dreambox OS): DM900, DM920, DM520, DM820, DM7080, DM ONE / TWO Newnigma2, Dream Elite, OoZooN, GP4 / Gemini, Merlin5 Quick Installation Guide 1.Upload Package to /tmp/ : Transfers installer to receiver system. Upload the appropriate .ipk (for Vu+, Octagon, Zgemma) or .deb file (for Dreambox) to the /tmp/ folder via FTP (FileZilla or WinSCP). 2.Install via SSH / Terminal : Installs softcam binaries and startup scripts. Connect via SSH/Telnet (PuTTY) and run the installer command: For IPK Images: opkg update opkg install --force-overwrite /tmp/*.ipk For DEB Images (Dreambox OS): dpkg -i /tmp/*.deb apt-get install -f -y 3.Upload Configuration Files : Required for server reader authentication. Transfer your configuration files (ncam.server, ncam.conf, ncam.user) to /etc/tuxbox/config/ncam/ (or /etc/tuxbox/config/). 4.Start NCam via Softcam Panel : Activates softcam service. Go to Menu > Setup > Softcam / CI > Softcam Panel, select NCam 15.8, and press Green (Start/Restart). 📥 Downloads & Attachments IPK Package (ARM 4K / MIPS - Vu+, Octagon, Zgemma): enigma2-plugin-softcams-ncam_V15.8-r0_all.ipk DEB Package (Dreambox OS - DM900, DM920, ONE, TWO): enigma2-plugin-softcams-ncam-osdreambox_V15.8-r0.deb
-
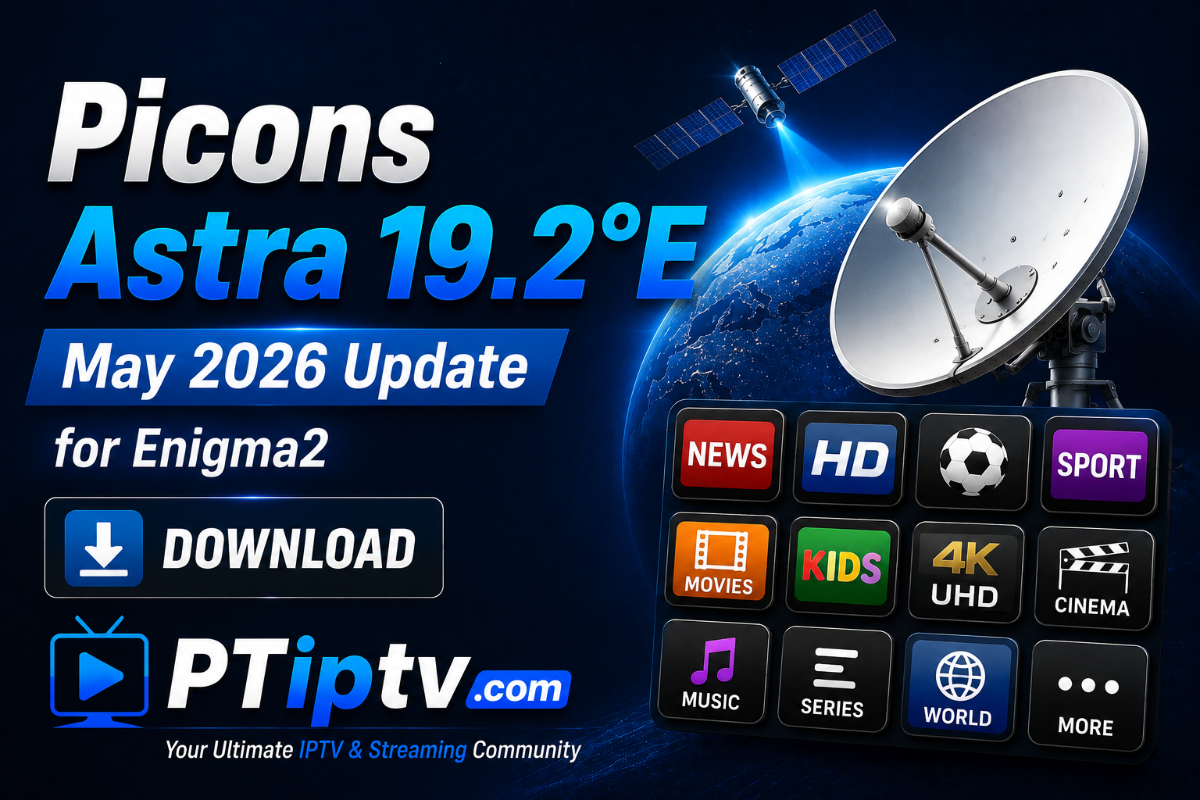
Picons Astra 19.2°E Update (May 2026) for Enigma2: Overview & Installation The Picons Astra 19.2°E (May 2026 Update) release provides a fresh package of high-quality channel logos designed for Enigma2 Linux satellite receivers. This update includes corrected Service Reference Parameters (SRP) for updated transponder frequencies, rebranded station logos, and newly launched channels across the Astra 19.2°E orbital position (including Sky Deutschland, Movistar+, Canal+ France, HD+, and DAZN packages). Fully compatible with all Enigma2 images such as OpenATV, OpenPLi, OpenBH, EGAMI, VTi, PurE2, and Dreambox OS. Package Highlights Satellite Coverage: Astra 19.2°E full transponder mapping up to May 2026. Format & Transparency: High-definition PNG format with transparent backgrounds for seamless skin integration. Skin Compatibility: Works on standard Infobars, SecondInfoBars, and Bouquet Channel Selection screens across 1080p and 4K resolution skins. Updated Service References: Fixes missing picons on recently shifted satellite channels and transponders. Quick Installation Guide 1.Unpack Archive : Extracts picon files on your PC. Download the package and extract the archive to reveal the picon folder containing the PNG files. 2.Upload Picons via FTP : Transfers logos to storage location. Connect to your receiver via FTP (FileZilla or WinSCP) and upload the picon directory to your preferred system path: Internal Flash: /usr/share/enigma2/picon/ USB Drive (Recommended): /media/usb/picon/ 3.Set Permissions : Ensures correct file read permissions. Set file permissions to 755 for the directory and 644 for the individual PNG files. 4.Restart Enigma2 GUI : Reloads picon graphics into memory. Go to Menu > Standby / Restart > Restart User Interface to apply the new channel logos. 📥 Downloads & Attachments Picons_Astra_19.2e_300x130-mai-2026.rar
-
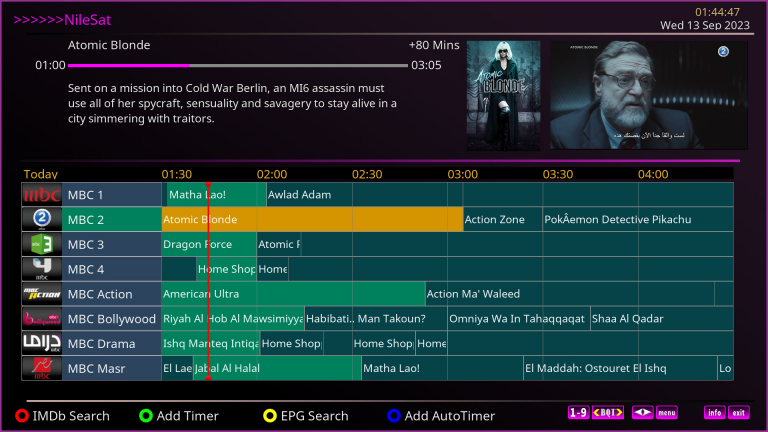
Satellites.xml Update for Enigma2: Full Transponder List & Setup Guide The Updated satellites.xml File is an essential system file for Enigma2 Linux satellite receivers (Vu+, Dreambox, Octagon, Zgemma, Gigablue). It contains the complete, up-to-date transponder frequency database (Ku-Band, C-Band, and Ka-Band) covering orbital positions from 45.0°E to 30.0°W. Keeping your satellites.xml file current ensures your receiver accurately detects all active transponders, new channel frequencies, DVB-S2 multi-stream signals, and updated symbol rates during automatic tuner scans. What's Included in This Update? Full Satellite Coverage: Updated transponder parameters for NileSat (7.0°W), Astra (19.2°E), HotBird (13.0°E), Badr/Es'hail (26.0°E), Eutelsat 9B/16A/21B, Hispasat (30.0°W), and Thor (0.8°W). Multi-Stream & DVB-S2 Support: Includes updated parameters for MIS (Multi-Stream) transponders, 8PSK/16APSK modulation types, and exact FEC rates. Optimized & Clean XML Syntax: Formatted without duplicate entries to speed up manual/automatic satellite search routines and prevent tuner crashes. Universal Compatibility: Works across all Enigma2 distributions including OpenATV, OpenPLi, BlackHole, OpenBH, EGAMI, PurE2, VTi, and Dreambox OS. File Details & System Paths System Attribute Details Filename satellites.xml System Path (All Images) /etc/tuxbox/ (Primary) or /etc/enigma2/ File Permissions 644 (rw-r--r--) Step-by-Step Installation Guide 1.Download & Unpack File : Extracts the raw XML database file. Download the attached archive and extract it on your computer to get the uncompressed satellites.xml file. 2.Transfer via FTP to /etc/tuxbox/ : Connects to receiver system filesystem. Connect to your receiver using FTP (FileZilla, WinSCP) with your IP address (User: root). Navigate to /etc/tuxbox/. Upload the new satellites.xml file, replacing the existing file. 3.Set File Permissions to 644 : Ensures correct system access permissions. Right-click the uploaded satellites.xml in your FTP client, select File Permissions, and set it to 644. 4.Restart Enigma2 GUI & Perform Channel Scan :Reloads transponder tables into memory. On your remote, go to Menu > Standby / Restart > Restart User Interface. After reboot, navigate to Menu > Setup > Service Searching > Automatic Scan (or Manual Scan) to search for channels with updated frequencies. 📥 Downloads & Attachments Satellites.xml Package: Satellites.xml-by_update-03-06-2026.zip
-
Picons Astra 19.2°E (300x130 32bit Transparent) August 2026 Update The Astra 19.2°E Picon Package (August 2026 Update) provides high-definition, 32-bit transparent channel logos tailored for Enigma2 receivers. Designed at 300x130 pixels, these picons offer sharp, high-contrast visual display across all modern Full HD and 4K skin interfaces (including MetrixHD, OpenVision, Estuary, and KravenHD). Compatible with all Enigma2 distributions including OpenATV, OpenPLi, OpenBH, VTi, EGAMI, PurE2, and Dreambox OS. Package Highlights & Specifications Resolution & Format: 300x130 pixels, PNG format with 32-bit Alpha Transparency (no solid background borders). Satellite Coverage: Astra 19.2°E full transponder update (Sky Deutschland, Canal+ France, Movistar+ Spain, HD+, ARD/ZDF HD, DAZN, AustriaSat). Updated Frequency Mapping: Includes modified Service References (SRP) for newly added channels, frequency shifts, and rebranded station IDs up to August 2026. Skin Compatibility: Optimized for Infobar, Channel Selection List, and SecondInfoBar views on 1080p/2160p displays. Installation Guide 1.Unpack Downloaded Archive : Extracts archive to local system. Download and extract the .tar.gz or .zip file on your PC to reveal the picon folder containing all PNG image files. 2.Transfer Picons via FTP : Transfers picons to Enigma2 system storage. Connect to your receiver using FTP (FileZilla or WinSCP) and upload the picon folder to one of the following recommended Enigma2 paths: Internal Flash (Recommended for fast load times): /usr/share/enigma2/picon/ USB Drive / Hard Drive Mount: /media/usb/picon/ or /media/hdd/picon/ 3.Set File Permissions : Ensures correct file reading access. Select the uploaded picon directory in your FTP client and set permissions to 755 (for directories) and 644 (for PNG files). 4.Restart Enigma2 GUI : Forces skin engine to refresh channel graphics. Press Menu > Standby / Restart > Restart User Interface to reload picons into your skin's infobar memory. 📥 Downloads & Attachments Astra 19.2°E Picons (300x130 Transparent): Astra_19.2e_-300x130_32BIT_Transparent.zip
-
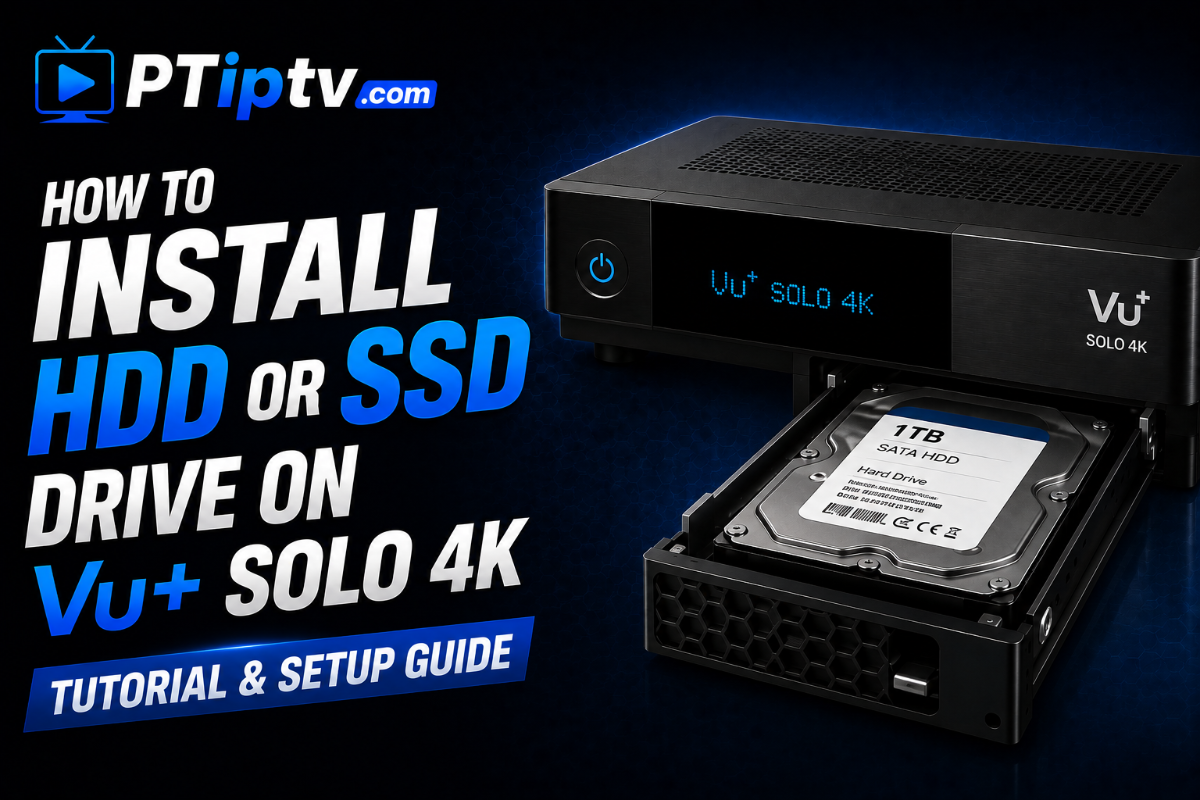
How to Install an HDD or SSD Drive on Vu+ Solo 4K: Complete Guide The Vu+ Solo 4K features a toolless rear detachable hard drive tray designed for easy installation of 2.5-inch SATA hard disk drives (HDD) or solid-state drives (SSD). Installing an internal drive enables direct PVR recording of 4K/HD satellite streams, persistent timeshifting, EPG data storage, and local media playback without relying on external USB drives. Hardware Specifications & Drive Requirements Component Specification Supported Drive Size 2.5-inch SATA HDD or 2.5-inch SATA SSD Maximum Drive Height Standard 10.5 mm 2.5" form factor Recommended File System Linux EXT4 (Formatted via Enigma2 GUI) Default Mount Point /media/hdd Step-by-Step Installation Procedure 1.Power Down Receiver : Prevents electrical damage during insertion. Turn off your Vu+ Solo 4K using the rear power switch and disconnect the power supply cable. 2.Remove the Detachable HDD Bracket : Located on the rear panel. Locate the detachable HDD tray on the rear panel of the receiver. Press the release latch and slide the plastic bracket completely out of the slot. 3.Mount Drive into Bracket : Secure drive using screws. Place your 2.5-inch SATA HDD or SSD into the bracket. Secure the drive using the mounting screws provided with the receiver accessories. Ensure the SATA connectors face inward toward the slot. 4.Reinsert Bracket into Slot : Connects drive directly to internal SATA interface. Slide the bracket back into the rear slot until it clicks firmly into position, engaging the internal SATA and power connections. 5.Format & Initialize in Enigma2 : Prepares EXT4 file system for recordings. Power ON the receiver and boot into Enigma2. Go to Menu > Setup > System > Storage Devices (or Harddisk). Select Initialization, choose your drive (/dev/sda), and press Red (Initialize). Confirm the prompt to format the drive as EXT4. 6.Configure Recording & Timeshift Paths : Links PVR functions to new drive. Go to Menu > Setup > System > Recording & Timeshift: Default Movie Location: Set to /media/hdd/movie Timeshift Location: Set to /media/hdd/timeshift Troubleshooting & Tips Drive Not Recognized: If Enigma2 does not detect the drive under Storage Devices, perform a full box restart via Menu > Standby / Restart > Restart. SSD vs. HDD: An SSD operates completely silently, generates less heat, and provides faster EPG/boot response times, making it ideal for bedroom or main living room setups.
-
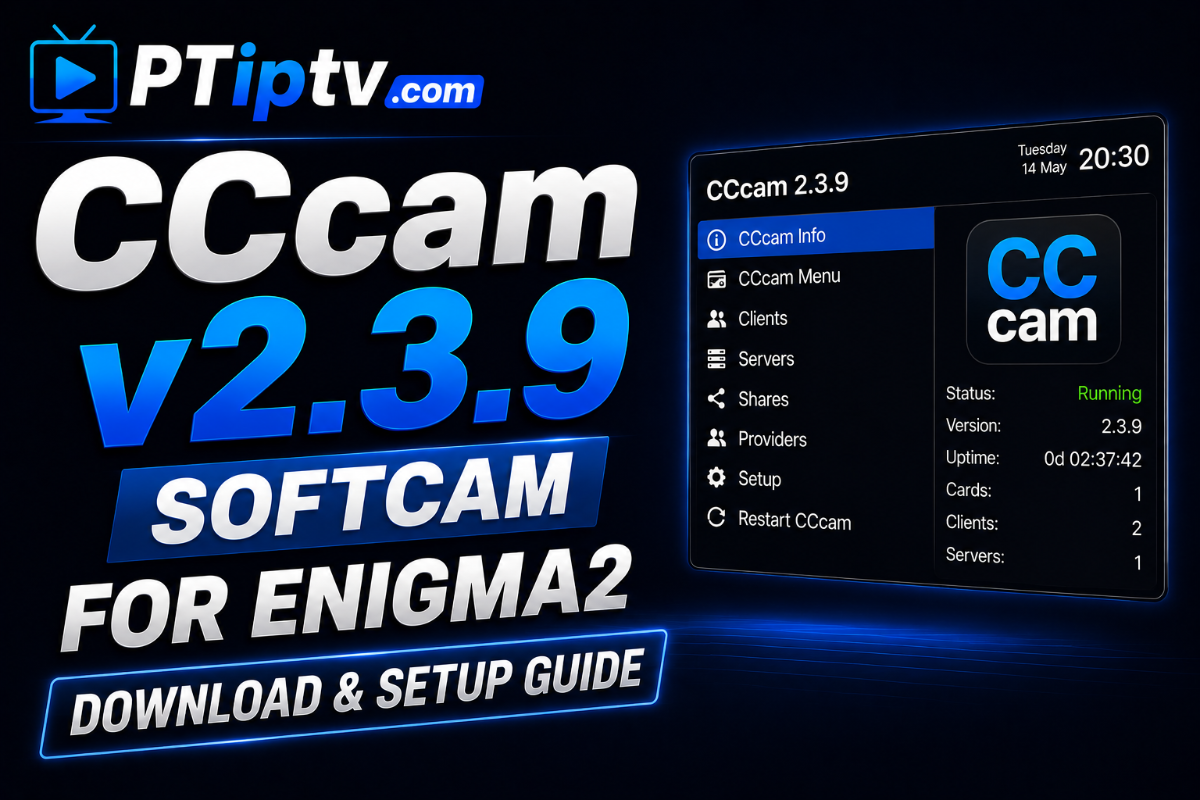
CCcam v2.3.9 Softcam for Enigma2: Features, Installation & Download Guide CCcam v2.3.9 is an updated release of the classic card-sharing emulator softcam for Linux Enigma2 satellite receivers. Build 2.3.9 provides enhanced ECM response times, updated Long ECM handling, improved server auto-reconnect routines, and full compatibility with modern Python 2 and Python 3 firmware images. Compatible with all major Enigma2 distributions including OpenATV, OpenPLi, BlackHole, OpenBH, EGAMI, VTi, and Dreambox OS. Key Features of CCcam 2.3.9 Fast Channel Zapping: Optimized decryption processing reduces ECM lag during satellite channel switching. Stable Server Connectivity: Automatic handshake recovery ensures uninterrupted connection to C-lines and N-lines. Low Memory Footprint: Extremely lightweight resource consumption, ideal for both high-end 4K receivers and legacy MIPS boxes. Multi-Format Packaging: Available as .ipk for OE-Alliance distributions and .deb for official Dreambox OS. Compatibility Matrix Package Type Architecture & Hardware Supported Images IPK Packages ARM 4K & MIPS: Vu+, Octagon, Zgemma, Mut@nt, Gigablue, Edision OpenATV, OpenPLi, BlackHole, OpenBH, EGAMI, VTi, OpenHDF, PurE2 DEB Packages Dreambox OS: DM900, DM920, DM520, DM820, DM7080, DM ONE/TWO Newnigma2, Dream Elite, OoZooN, GP4 / Gemini, Merlin5 Quick Installation & Setup Guide 1.Upload Config File : Required for server authorization. Transfer your CCcam.cfg file via FTP (FileZilla or WinSCP) to the /etc/ directory on your receiver. 2.Upload Package to /tmp/ : Transfers plugin installer to system memory. Upload the appropriate .ipk file (for Vu+, Zgemma, etc.) or .deb file (for Dreambox OS) to /tmp/. 3.Install via SSH Terminal : Executes package installation. Connect via SSH/Telnet (PuTTY) and run the installer command: For IPK Images: opkg update opkg install --force-overwrite /tmp/*.ipk For DEB Images (Dreambox): dpkg -i /tmp/*.deb apt-get install -f -y 4.Start CCcam 2.3.9 :Activates softcam service. Go to Menu > Setup > Softcam / CI > Softcam Panel, select CCcam 2.3.9, and press Green (Start/Restart). 📥 Downloads & Attachments IPK Package (ARM 4K / MIPS - Vu+, Octagon, Zgemma): enigma2-softcams-cccam-all-images_2.3.9-r0-RAED_OE2.0_all.ipk DEB Package (Dreambox OS - DM900, DM920, ONE, TWO): enigma2-softcams-cccam-all-images_2.3.9-r0-RAED_OE2.0_all.deb
-
OpenSPA 8.7 Image for Vu+ Receivers: Download & USB Flashing Guide OpenSPA 8.7 is a feature-packed, custom Linux Enigma2 firmware image specifically optimized for Vu+ satellite receivers. Built on an updated Python 3 environment and the OE-Alliance core, OpenSPA stands out for its exclusive SPA Panel, advanced media playback features, spzRemote interface, and seamless 4K IPTV stream processing. Compatible with all Vu+ 4K Ultra HD models as well as legacy Vu+ MIPS HD receivers. Key Features of OpenSPA 8.7 Exclusive SPA Panel: Built-in control panel for softcam activation, plugin downloads, backup management, and quick system tweaks. Optimized IPTV & VOD Engine: Enhanced GStreamer and FFmpeg integration for fast zapping and smooth playback of 4K H.265/HEVC streams. spzRemote & TVWeb: Advanced remote web control tools and custom web browsing integrations tailored for Enigma2. Advanced EPG & Channel Manager: Integrated 7-day EPG importer and custom bouquet sorting built directly into the firmware. High-Contrast SPA Skins: Default modern full-HD skins (SPA-FHD) designed for fluid navigation without menu latency. Supported Vu+ Receiver Models Architecture Model Series Package Extension Vu+ ARM 4K Vu+ Duo 4K / Duo 4K SE, Uno 4K / Uno 4K SE, Zero 4K, Ultimo 4K, Solo 4K .zip (Flashing via USB) Vu+ MIPS HD Vu+ Solo2, Duo2, Solo SE, Zero, Uno, Ultimo, Solo .zip (Flashing via USB) Quick USB Flashing Guide 1.Prepare USB Drive : Prepares flash drive for receiver bootloader. Format a USB flash drive (16GB or smaller recommended) to FAT32. 2.Download & Extract Image : Preserves required folder structure. Download the OpenSPA 8.7 .zip archive matching your exact Vu+ model and extract it directly to the root of your USB drive. Ensure the directory path looks like USB:\vuplus\your_model_name\. 3.Flash Firmware via USB : Triggers firmware deployment on boot. Turn OFF the receiver using the rear power switch. Insert the USB drive into the front USB port (or rear port if front is unavailable). Power ON the receiver. When the display shows "Press Power" (or touch button LED flashes), press the front panel Power Button to start flashing. 4.Reboot & Initial Setup : Initializes new OpenSPA environment. Wait for the installation to reach 100%. The receiver will reboot automatically. Remove the USB drive and complete the initial setup wizard on your TV screen. 📥 Downloads & Attachments (The files are available for direct download in the attachments section at the bottom of this thread.)openspa-8.7.001-vuduo4k-20260704_usb.zip openspa-8.7.001-vusolo4k-20260704_usb.zip openspa-8.7.001-vusolose-20260704_usb.zip openspa-8.7.001-vuuno4kse-20260704_usb.zip openspa-8.7.001-vuultimo4k-20260704_usb.zip openspa-8.7.001-vuuno4k-20260704_usb.zip openspa-8.7.001-vuzero4k-20260704_usb.zip openspa-8.7.001-vuduo2-20260704_usb.zip openspa-8.7.001-vuzero-20260704_usb.zip
-
OSCam v11966 for All Enigma2 Images: Download & Setup Guide (IPK / DEB) OSCam v11966 is available for all Enigma2 hardware architectures (ARM, MIPS, ARM64) and firmware distributions. This update provides optimized IPK packages for OE-Alliance images and dedicated DEB packages for official Dreambox OS images, delivering fast zapping times, low memory consumption, and enhanced stability across all softcam protocols. What's New & Core Highlights Universal Compatibility: Native binaries compiled for ARM, MIPS, and ARM64 (AArch64) receiver hardware. Dual Package Distribution: Dedicated .ipk installers for OE-Alliance images and .deb installers for Dreambox OS. Optimized Protocol Handshake: Faster response times for CCcam, Newcamd, Gbox, and internal card reader emulation. Stable CW/ECM Decoding: Prevents audio/video stuttering on encrypted satellite transponders. Image & Hardware Compatibility Matrix Package Type Hardware Architectures & Models Supported Images IPK Packages ARM 4K & MIPS: Vu+ (Zero 4K, Solo 4K, Ultimo 4K, Uno 4K, Solo, Uno, Duo, Zero), Octagon 4K, Zgemma, Mut@nt HD51/52, AX 51/52, Xtrend, ET11000/12000, Spycat 4K, Edision 4K OpenATV, BlackHole, OpenBH, OpenPLi, VTi, EGAMI, OpenVix, OpenHDF, OpenDROID, TeamBlue, OpenMIPS, SatDreamGr DEB Packages Dreambox OS: DM900, DM920, DM520, DM525, DM820, DM7080, Dreambox ONE / TWO Ultra HD Newnigma2, Dream Elite, OoZooN, GP4 / Gemini, Merlin5, SatLodge, Powersat Quick Installation Guide 1.Upload Package to /tmp/ : Selects correct package format for your receiver. Transfer the .ipk file (for Vu+, Octagon, Zgemma, etc.) or .deb file (for Dreambox OS) to the /tmp/ directory on your receiver using FTP (FileZilla or WinSCP). 2.Install Package via Terminal : Executes installer command via SSH. Connect via SSH/Telnet (PuTTY) and execute the matching command: For IPK Images (OpenATV, OpenPLi, EGAMI, etc.): opkg update opkg install --force-overwrite /tmp/*.ipk For DEB Images (Newnigma2, Dream Elite, GP4, etc.): dpkg -i /tmp/*.deb apt-get install -f -y 3.Upload Config Files : Required for server connection. Transfer your oscam.server, oscam.conf, and oscam.user files to /etc/tuxbox/config/ (or /etc/tuxbox/config/oscam/). 4.Start OSCam : Activates softcam service. Navigate to your image's Softcam Panel, select OSCam 11966, and press Green (Start/Restart). 📥 Downloads & Attachments IPK Package (ARM 4K / MIPS - Vu+, Octagon, Zgemma): enigma2-plugin-softcams-oscam_11966_all.ipk (Attached below) DEB Package (Dreambox OS - DM900, DM920, DM520, DM820, DM7080): enigma2-plugin-softcams-oscam_11966_all.deb (Attached below) enigma2-plugin-softcams-oscam-emu-pcsc-levi45_11966-803_all.deb enigma2-plugin-softcams-oscam-emu-pcsc-levi45_11966-803_all.ipk
-
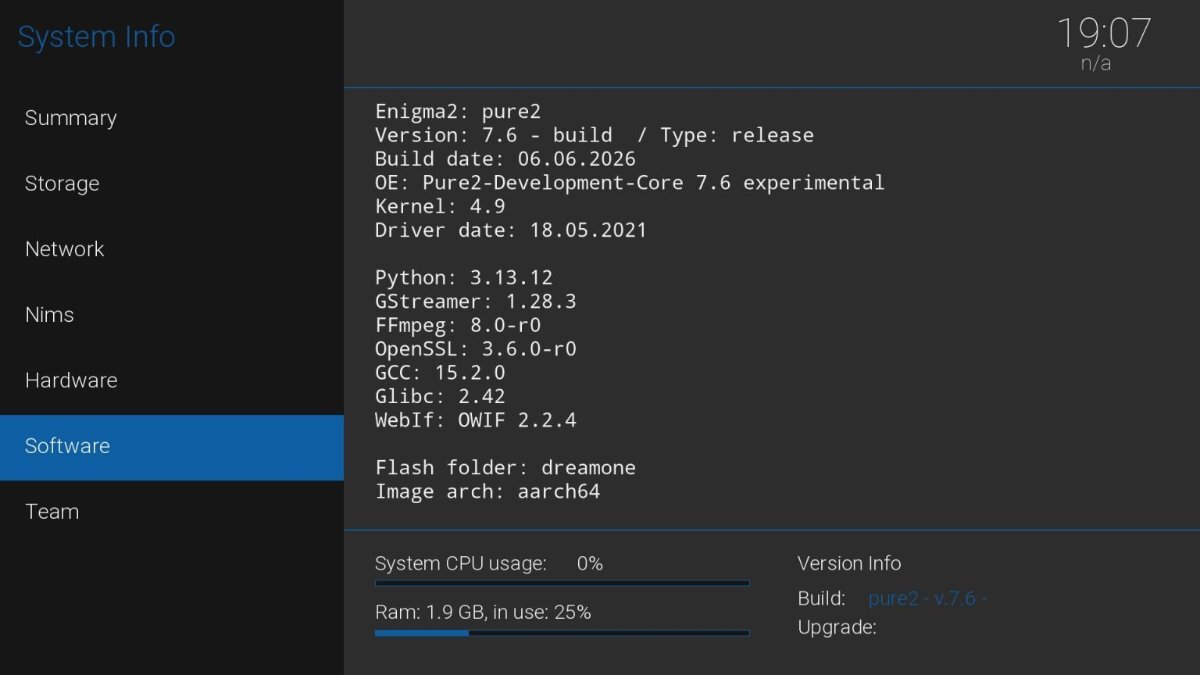
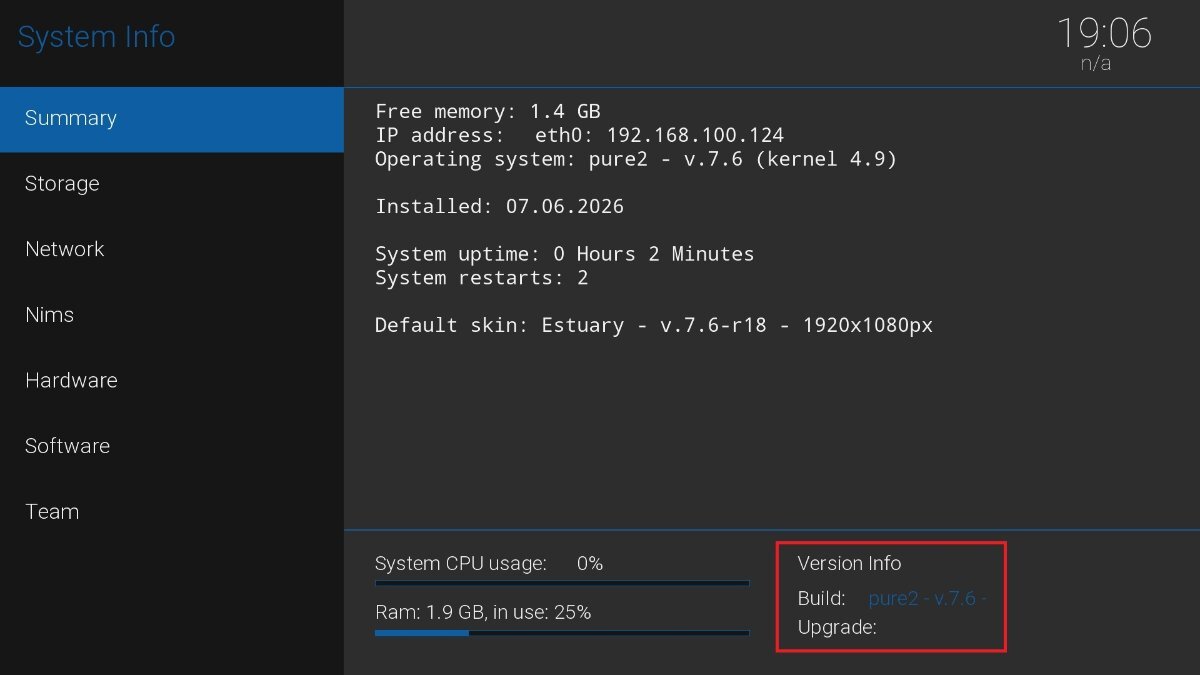
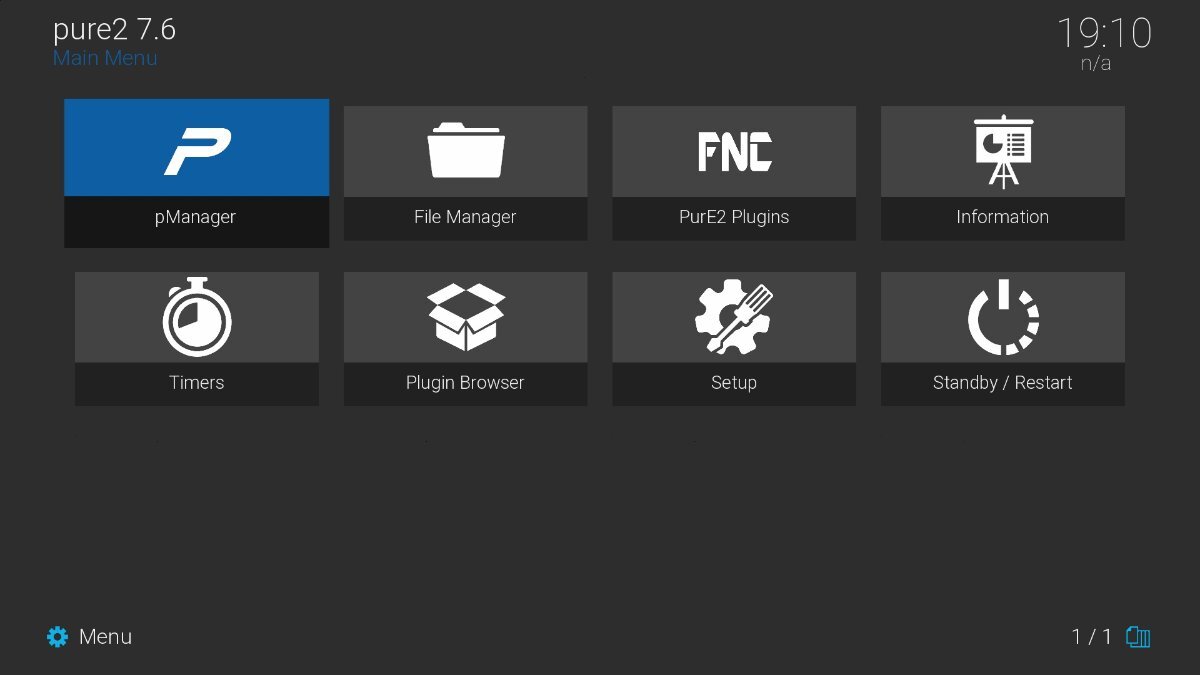
PurE2 7.6 Image for Dreambox: Features, Flashing & Download Guide PurE2 7.6 is a fast, lightweight, and highly customizable Linux Enigma2 firmware image developed specifically for Dreambox satellite receivers. Built on the OE-Alliance core with updated Python support, PurE2 is renowned for its superior GStreamer multimedia handling, clean Estuary-FHD interface, and built-in PurE2 Control Panel. Key Features of PurE2 7.6 Enhanced Media Player Engine: Optimized FFmpeg & GStreamer integration for smooth playback of 4K H.265/HEVC IPTV streams and VOD content. PurE2 Manager: Integrated panel for managing softcams, downloading picons, backing up configurations, and tuning system parameters. Estuary FHD Interface: Includes modern, high-contrast Estuary skins designed for fluid 1080p rendering without menu lag. Fast Channel Zapping: Fine-tuned kernel modules and tuner drivers ensure rapid switching across satellite, cable, and terrestrial transponders. Supported Dreambox Models Model Series SoC Architecture Package Format Dreambox DM900 / DM920 4K Broadcom ARM (v7) .tar.xz / .rootfs.tar.xz Dreambox DM520 / DM525 / DM820 / DM7080 MIPS Architecture .tar.xz / .rootfs.tar.xz Dreambox ONE / TWO Ultra HD Amlogic ARM64 (AArch64) .tar.xz / .rootfs.tar.xz Step-by-Step Flashing Guide (Rescue Mode) Flashing PurE2 7.6 onto your Dreambox is performed via the browser-based Rescue Mode. 1.Enter Rescue Mode :Initiates web recovery interface. Power off the Dreambox using the rear power switch. Touch and hold the front power sensor while turning the rear switch back ON. Release when the front LED changes color and the OLED display shows "Rescue Mode" along with an IP address. 2.Access Web Interface : Establishes web connection. Open a browser on your PC or phone (connected to the same local network) and enter the IP address displayed on your Dreambox screen. 3.Upload PurE2 7.6 Image : Deploys the PurE2 firmware file. Click Firmware Upload, choose your downloaded PurE2 7.6 .tar.xz file matching your receiver model, and click Go!. 4.Reboot Receiver : Finalizes firmware installation. Once the upload and flash process reaches 100%, click Reboot on the web page to start PurE2 7.6. 📥 Downloads & Attachments DM900 4K: pure2-7.6-dm900-rootfs.tar.xz (Attached at the bottom of this post) DM920 4K: pure2-7.6-dm920-rootfs.tar.xz (Attached at the bottom of this post) Dreambox ONE 4K: pure2-7.6-dreamboxone-rootfs.tar.xz (Attached at the bottom of this post) Dreambox TWO 4K: pure2-7.6-dreamboxtwo-rootfs.tar.xz (Attached at the bottom of this post) dreamtwo-PurE2-7.6-20260606.tar.bz2 dreamone-PurE2-7.6-20260606.tar.bz2 dm900-PurE2-7.6-20260605.tar.bz2 dm920-PurE2-7.6-20260605.tar.bz2
-
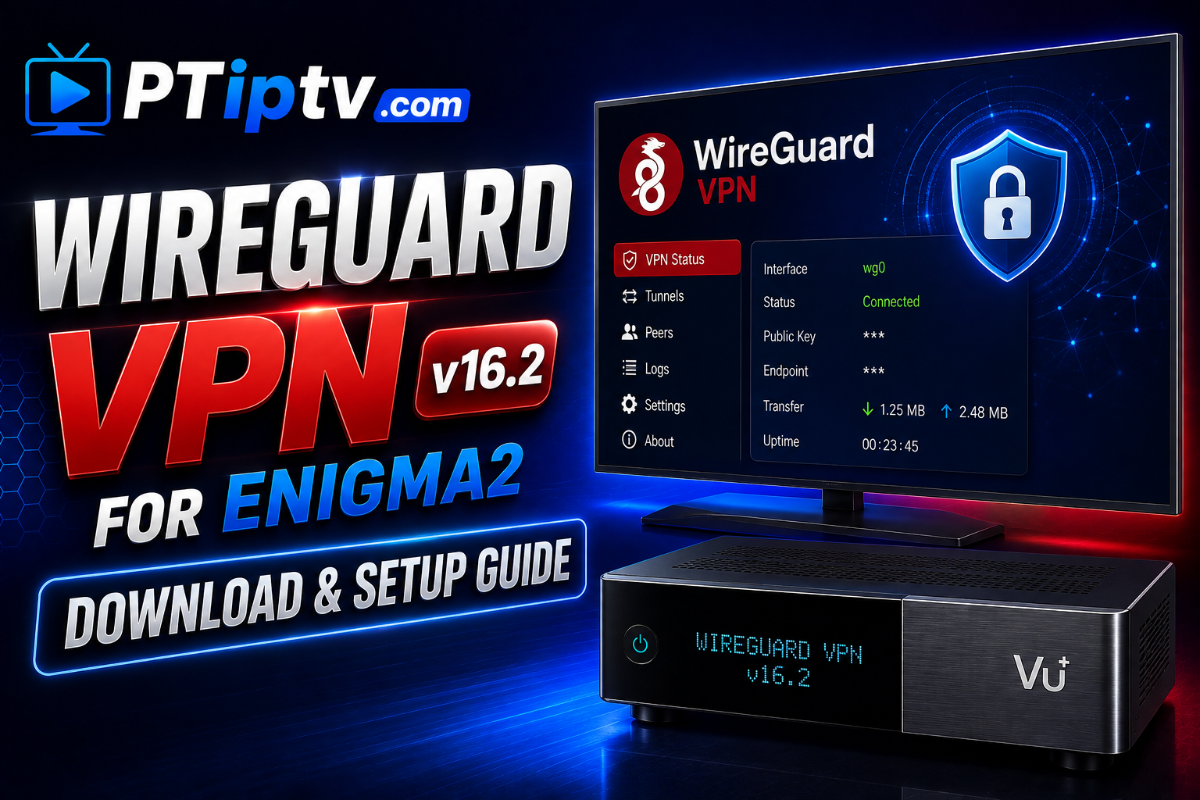
WireGuard VPN v16.2 for Enigma2: Quick Installation & Setup Guide WireGuard VPN v16.2 is a lightweight, high-performance VPN plugin built for Enigma2 Linux satellite receivers. Running directly inside the Linux kernel, WireGuard delivers significantly higher speeds and lower CPU usage than traditional OpenVPN, making it the ideal protocol for 4K IPTV streaming and secure browsing. Compatible with Python 2 and Python 3 images (OpenATV 7.x, OpenBH, EGAMI 10.x, OpenPLi, and ViX). Key Features High Speeds: Maximum bandwidth efficiency for buffer-free 4K/HEVC IPTV streams. Low CPU Overhead: Operates at the kernel level (wg0), keeping CPU consumption below 5%. Instant Handshake: Fast connection startup and automatic reconnects under 100ms. Provider Support: Works with .conf files from NordVPN, Surfshark, ExpressVPN, ProtonVPN, Mullvad, and self-hosted servers. Leak Protection: Prevents IP and DNS leaks during stream playback. Quick Installation Guide 1.Transfer Config File : Required for VPN configuration. Download your provider's wg0.conf file and upload it via FTP to /etc/wireguard/ on your receiver. 2.Install WireGuard Kernel Tools via SSH : Installs core system components. Connect via SSH/Telnet (PuTTY) and run: opkg update opkg install wireguard-tools kernel-module-wireguard 3.Install Plugin IPK : Deploys the plugin package. Upload the attached IPK package to /tmp/ and execute: opkg install --force-overwrite /tmp/*.ipk 4.Activate VPN Connection : Activates encrypted tunnel. Go to Menu > Plugins > WireGuard VPN, select your configuration profile, and press Green (Connect). 📥 Downloads & Attachments enigma2-plugin-extensions-wireguard-vpn-aarch64_16.2_all.ipk enigma2-plugin-extensions-wireguard-vpn-mips_16.2_all.ipk enigma2-plugin-extensions-wireguard-vpn_16.2_all(1).ipk enigma2-plugin-extensions-wireguard-vpn_16.2_all(2).ipk enigma2-plugin-extensions-wireguard-vpn_16.2_all(3).ipk enigma2-plugin-extensions-wireguard-vpn_16.2_all.ipk
-
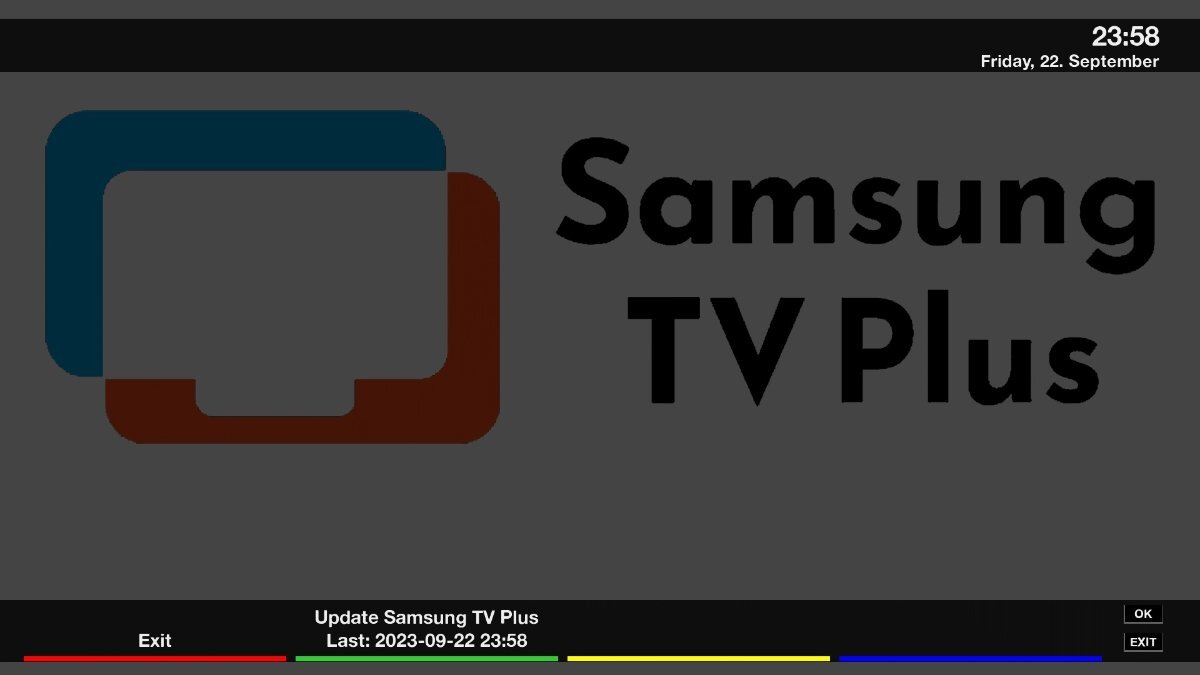
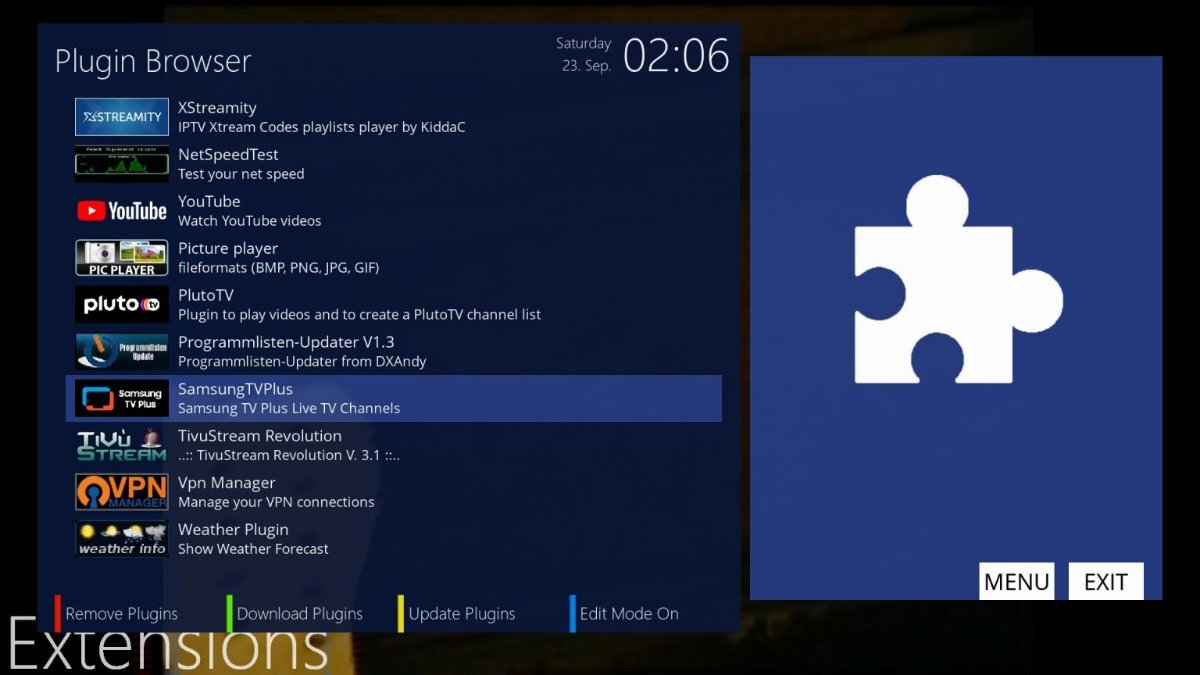
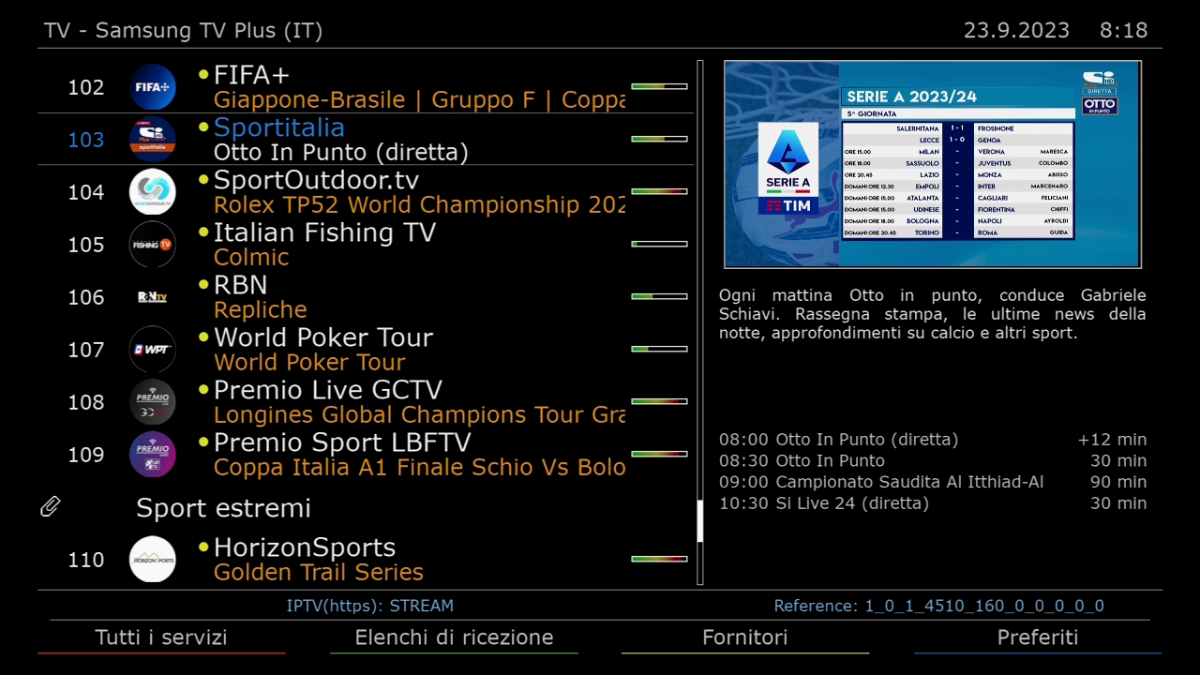
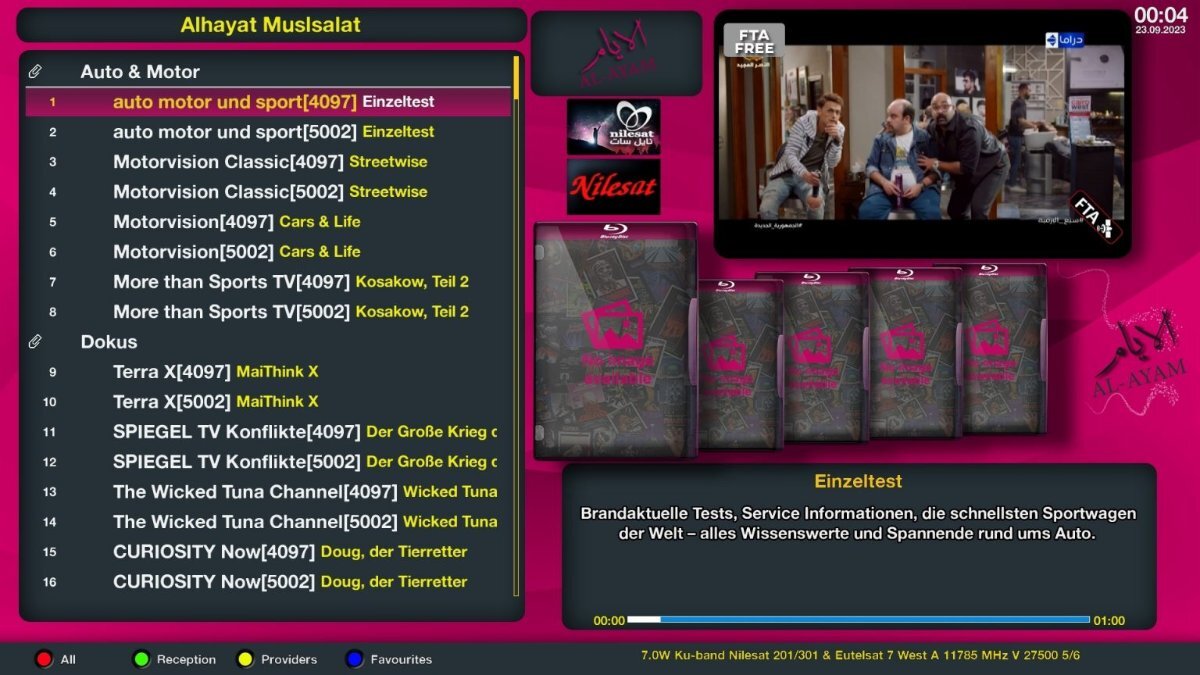
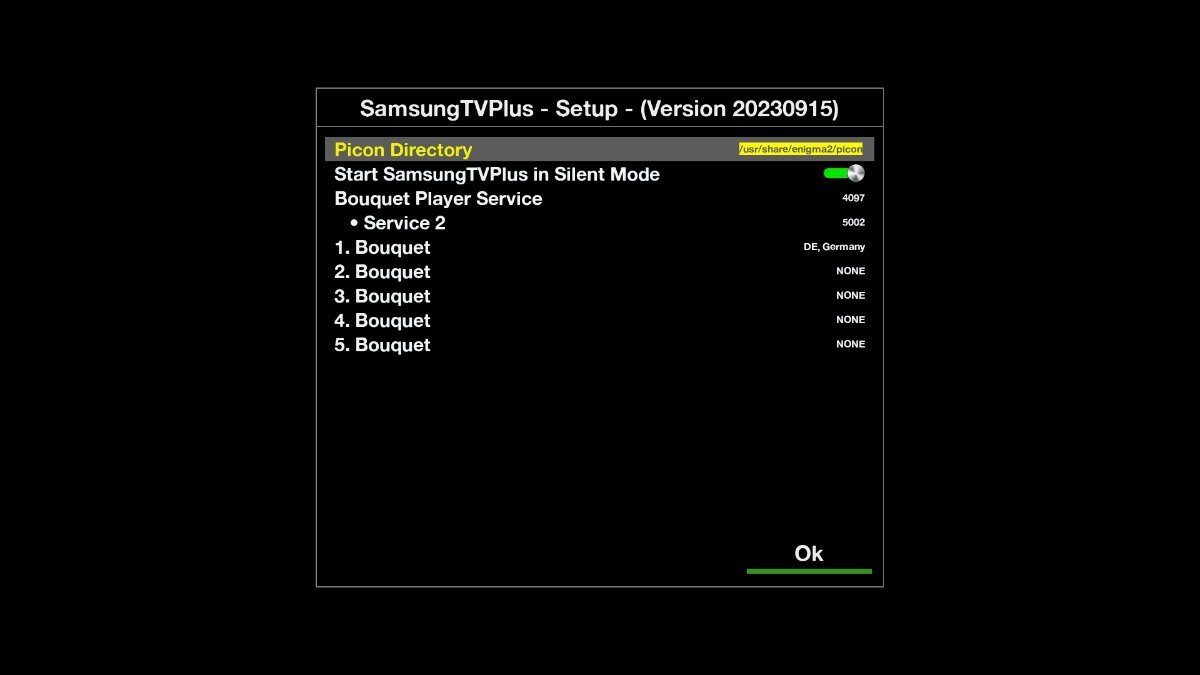
Samsung TV Plus Plugin for Enigma2: Download, Features, Bouquet Creation & Setup Guide (2026) The Samsung TV Plus plugin for Linux Enigma2 receivers allows users to import hundreds of free FAST (Free Ad-supported Streaming TV) live channels directly into native channel bouquets. Developed for OE-Alliance and OpenPLi distributions, this extension extracts official Samsung TV Plus M3U8 streams and EPG metadata across multiple regions (US, UK, Germany, France, Italy, Spain, and more) without requiring a Samsung Smart TV or account login. 1. Key Features & How It Works Unlike third-party IPTV plugins that require external players, the Samsung TV Plus extension creates native Enigma2 bouquet files (userbouquet.samsungtvplus.tv). This allows channels to be zapped, recorded, and browsed directly using your remote control's standard channel list and EPG grid. [Samsung TV Plus API Engine] ──► [Region / Country Selector] │ ▼ [Stream & EPG Parser Engine] ──► [Auto-Generates Enigma2 Bouquets] │ ▼ [ServiceApp / exteplayer3] ──► [Native Live TV List (0.5s Zapping)] 100% Free Live FAST Channels: Access live news, movies, entertainment, sports, documentary, and kids streams across dozens of localized channel packages. Automatic Bouquet Generation: Creates and updates localized channel bouquets directly inside /etc/enigma2/ with auto-assigned service references for picon matching. Multi-Country Support: Select streams from specific geographic regions, including United States (US), United Kingdom (UK), Germany (DE), France (FR), Italy (IT), Spain (ES), Switzerland (CH), and Canada (CA). Integrated EPG Data Parsing: Fetches real-time program descriptions, start/end times, and upcoming event listings without needing extra XMLTV importers. Python 2 & Python 3 Dual Compatibility: Fully compatible with legacy OE 2.0 images as well as modern Python 3.10+ environments (OpenATV 7.x, OpenBH 5.x/6.x, EGAMI 10.x, ViX, and PurE2). 2. Firmware Compatibility & Attached Installation Packages The plugin is delivered as a lightweight, architecture-independent IPK file that can be installed on any Enigma2 receiver running OE-Alliance or OpenPLi firmware. Plugin Package Name Receiver Architecture Python Compatibility Download Package File Samsung TV Plus Enigma2 Universal (ARM / MIPS / SH4) Python 2.7 & Python 3.10+ enigma2-plugin-extensions-samsungtvplus_20231005-r1_all.ipk enigma2-plugin-extensions-samsungtvplus_20231005-r1_all.deb 3. Step-by-Step Installation Procedure Follow this sequence to upload the attached plugin file to your receiver and deploy the Samsung TV Plus channel bouquet. 1.Download & Upload IPK File : Required for transferring installation package. Download the attached enigma2-plugin-extensions-samsungtvplus_all.ipk package to your computer. Connect to your receiver via FTP (FileZilla or WinSCP) using your receiver's IP address (User: root). Upload the .ipk file into the /tmp/ folder on your box. 2.Update Package Index & Dependencies via SSH : Installs required HTTP request libraries. Open terminal access (PuTTY or Terminal) and run the update command to ensure required Python network packages are present: opkg update opkg install python3-requests ffmpeg exteplayer3 (For Python 2 images, use opkg install python-requests ffmpeg exteplayer3) 3.Install IPK Package via Terminal : Executes extension package installation. Run the following terminal command to force package deployment: Bash opkg install --force-overwrite /tmp/*.ipk 4.Configure Region & Generate Channels : Generates channel bouquet and updates EPG. Restart your Enigma2 GUI after installation finishes. Go to Menu > Plugins > Samsung TV Plus. Select your desired target country (e.g., US - United States or UK - United Kingdom). Press Green (Generate Bouquet). Press Exit and open your main channel list (Favorites / Bouquets) to find your new Samsung TV Plus bouquet. 4. Optimization Tips for Smooth Stream Playback A. Assigning exteplayer3 via ServiceApp Since Samsung TV Plus streams rely on HLS (.m3u8) protocol with dynamic bitrates, setting ServiceApp to use exteplayer3 prevents audio-video sync lag and buffering: Install serviceapp from your image feeds (Plugins > Download Plugins > Systemplugins > serviceapp). Go to Menu > Setup > Usage & GUI > ServiceApp. Set Enigma2 Playback System to serviceapp. Set Player Service Architecture to exteplayer3 and save. B. Bypassing Regional Geoblocking Some regional bouquets (such as US or UK channels) enforce geo-fencing on stream requests. If certain streams fail to load, ensure your receiver is routing internet traffic through a VPN configured for the matching country, or choose the bouquet corresponding to your actual IP location. Frequently Asked Questions (FAQ)
-
Skin HDSuisse FHD for Enigma2: Download, Features, Customization & Installation Guide (2026) The HDSuisse FHD skin is widely recognized as one of the cleanest, most responsive, and visually balanced user interfaces developed for Linux Enigma2 satellite receivers. Created with a minimalist Swiss design philosophy, this native 1920x1080 Full HD skin delivers high-contrast typography, crisp channel bouquet layouts, and crystal-clear InfoBars without burdening the receiver's CPU or memory. Fully compatible with both Python 2 and modern Python 3 Enigma2 images—including OpenATV 7.x, OpenPLi, OpenBH 5.x/6.x, EGAMI 10.x, ViX, and PurE2—HDSuisse FHD offers an ideal balance of elegance and speed. 1. Key Features of HDSuisse FHD While many feature-heavy skins introduce menu delay and slow down channel zapping, HDSuisse FHD utilizes optimized XML rendering structures to ensure immediate button responses and smooth navigation. [Satellite / Cable / IPTV Signal] ──► [DVB Demuxer Engine] │ ▼ [HDSuisse FHD Skin Core] ──► [Minimalist InfoBar & SecondInfoBar] │ ▼ [Custom Picon Engine & EPG Grid] ──► [1080p Crystal Clear UI] Ultra-Clean InfoBar Architecture: Displays vital broadcast parameters at a glance, including channel resolution (1080i, 1080p, 2160p HDR), audio codecs (Dolby Digital, AAC), signal strength meters (SNR/AGC percentage), and orbital satellite positions. Extended SecondInfoBar: Displays detailed ECM times, crypt system identification (CAID, Provider ID, Hop count), local/remote reader info, and extended program descriptions. Minimalist Channel Selection (Bouquet) View: Features multi-line channel views with built-in progress bars, event percentage indicators, and clean picon alignment. Low System Resource Overhead: Uses minimal background skin renderers, maintaining idle RAM usage near ~150MB—making it suitable for both flagship 4K receivers and mid-range HD boxes. Native Weather & EPG Integration: Seamlessly displays current weather conditions and multi-day forecasts using OAWeather or MSN Weather plugins. 2. Firmware Compatibility & Package Information HDSuisse FHD is packaged as an architecture-independent IPK archive compatible with all major Enigma2 distributions. Package Name Enigma2 Distribution Python Version Download Package File Skin HDSuisse FHD Universal (OE-Alliance / OpenPLi) Python 2.7 & Python 3.10+ enigma2-skin-hdsuisse.fhd_merlin_8.3_all.deb 3. Step-by-Step Installation Guide Follow this sequence to transfer and install the skin package on your receiver using FTP and SSH/Terminal. 1.Download & FTP Transfer IPK File : Transfers the IPK archive to the receiver. Download the attached enigma2-plugin-skins-hdsuisse-fhd_all.ipk package to your computer. Connect to your receiver using an FTP client (FileZilla or WinSCP) with your receiver's IP address (User: root). Upload the .ipk file into the /tmp/ directory on your box. 2.Update Package Index via SSH :Refreshes local opkg package indexes. Open terminal access (PuTTY or Terminal) and log in to your box, then run the package refresh command: opkg update 3.Execute IPK Installation Command : Deploys skin layout and graphical assets. Install the skin package by executing the following terminal command: opkg install --force-overwrite /tmp/*.ipk 4.Activate Skin & Restart GUI : Applies the new skin to Enigma2. Once the terminal reports successful installation, restart your Enigma2 GUI. On your remote control, go to Menu > Setup > Usage & GUI > Skin Setup (or Menu > System > Skin). Select HDSuisse FHD, press OK, and confirm restarting the GUI. 4. Post-Installation Picon & Weather Setup To ensure channel logos and weather widgets display properly within HDSuisse FHD, verify the following configuration paths: A. Channel Picon Directories Transfer your 220x132 or 400x240 transparent channel picons to one of these standard system paths via FTP: /usr/share/enigma2/picon/ (Internal Storage) /media/usb/picon/ (External USB - Recommended) B. Installing Weather Dependencies If weather info appears blank on the main screen, install the missing weather component via terminal: opkg install enigma2-plugin-extensions-oaweather Frequently Asked Questions (FAQ)
-
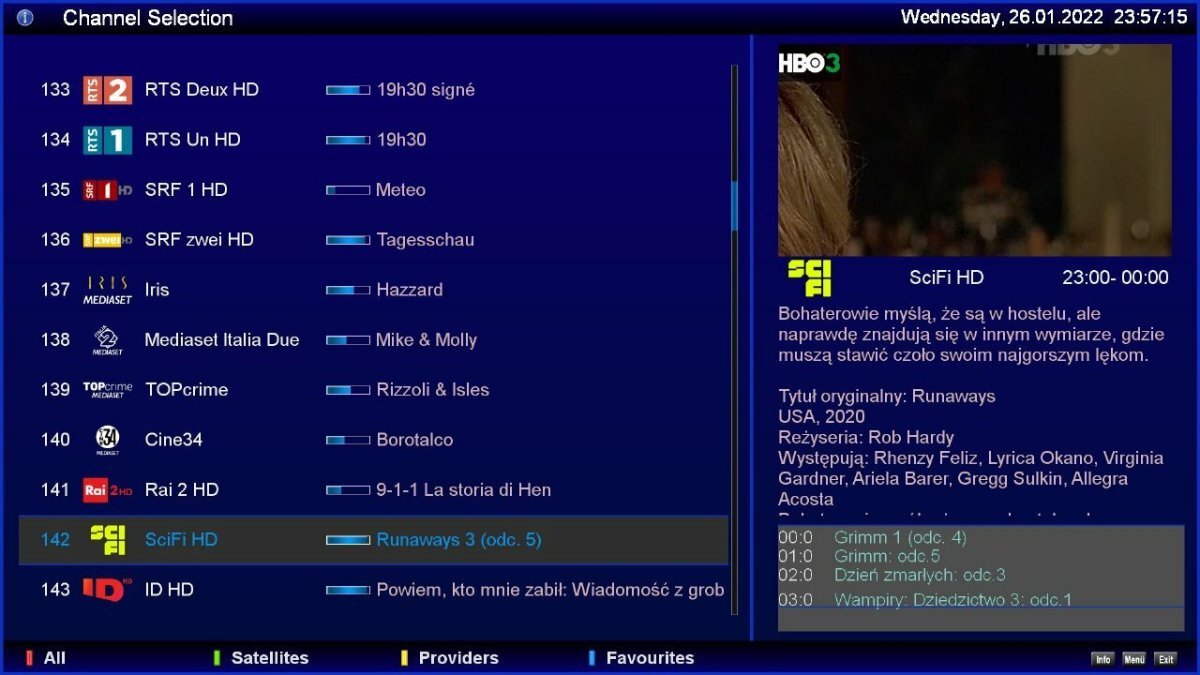
Skin Premium FHD v2.4 for Enigma2: Download, Features, Customization & Installation Guide (2026) The Premium FHD v2.4 skin is one of the most polished, responsive, and visual-rich user interfaces available for Linux Enigma2 satellite receivers. Designed natively for 1920x1080 Full HD resolution, version 2.4 brings complete compatibility with both Python 2 and modern Python 3 Enigma2 images (including OpenATV 7.x, OpenBH 5.x/6.x, OpenPLi, EGAMI 10.x, PurE2, and ViX). Whether you are looking for clean channel selection screens, rich poster integration for VOD services, or detailed ECM/tuner InfoBars, Premium FHD v2.4 combines high aesthetic appeal with lightweight CPU rendering. 1. Key Features of Premium FHD v2.4 Unlike generic skins that cause UI stuttering on older processors, Premium FHD v2.4 is optimized to maintain fast menu navigation and instantaneous channel zapping while rendering rich media assets. [Satellite / Cable / IPTV Signal] ──► [Enigma2 Demuxer] │ ▼ [Premium FHD v2.4 Skin Engine] ──► [OAWeather & PosterX Renderers] │ ▼ [Dual InfoBar / Custom Channel Selection] ──► [1080p FHD UI Display] Multi-InfoBar Configurations: Switch seamlessly between standard compact InfoBars and extended SecondInfoBars containing tuner frequencies, SNR/AGC meters, CAID/ECM information, and encryption protocols. PosterX & VOD Integration: Automatically fetches movie/TV series posters and backdrops for active programs, E2iPlayer streams, Xstreamity IPTV categories, and recorded files. Custom Channel Selection Layouts: Multiple bouquet list layouts supporting single-line, dual-line with EPG progress bars, picons, and next-program event previews. Native Weather Widget Integration: Full support for OAWeather and MSN Weather components directly on the main screen and event info panels. Skin Control Plugin Support: Customize accent colors, clock styles, font sizes, transparency levels, and layout styles directly from the receiver GUI without editing XML files manually. 2. Firmware Compatibility & Attached Package Files Premium FHD v2.4 is packaged as a universal IPK archive compatible with OE-Alliance and OpenPLi-based firmware builds. Package Name Enigma2 Architecture Python Compatibility Attachment Package File Skin Premium FHD v2.4 Universal (OE-Alliance / OpenPLi) Python 2.7 & Python 3.10+ enigma2-plugin-skins-premium-fhd_2.4_all.ipk Package Name Enigma2 Architecture Python Compatibility Attachment Package File Skin Premium Black FHD v2.4 Universal (OE-Alliance / OpenPLi) Python 2.7 & Python 3.10+ enigma2-plugin-skins-premium-fhd-black_2.4_all.ipk Package Name Enigma2 Architecture Python Compatibility Attachment Package File Skin Premium Blue FHD v2.4 Universal (OE-Alliance / OpenPLi) Python 2.7 & Python 3.10+ enigma2-plugin-skins-premium-fhd-blue_2.4_all.ipk (The installation IPK file is available for direct download in the attachments section at the bottom of this thread.) 3. Step-by-Step Installation Procedure You can install the attached IPK package using FTP and terminal access (PuTTY / SSH) or directly through your image's built-in Software Manager. 1.Download & Transfer IPK File : Required for transferring installation files. Download the attached enigma2-plugin-skins-premium-fhd_2.4_all.ipk package to your computer. Connect to your receiver via FTP (FileZilla or WinSCP) using your box IP address (User: root). Transfer the IPK file into the /tmp/ directory on your receiver. 2.Install Dependencies via SSH / Terminal : Ensures all graphics and renderer packages are present. Connect to your box via SSH/Telnet using PuTTY or Terminal, then run the update command to ensure required renderers (python-requests, enigma2-plugin-extensions-oaweather) are installed: opkg update 3.Execute IPK Installation Command : Deploys skin XML and graphical components. Run the following command in the terminal to force installation of the skin and auto-resolve dependencies: opkg install --force-overwrite /tmp/*.ipk 4.Activate Skin & Restart Enigma2 :Applies new UI configuration. Once the terminal reports Installation complete, reboot your Enigma2 GUI. On your remote, navigate to Menu > Setup > Usage & GUI > Skin Setup (or Menu > System > Skin). Select Premium FHD v2.4 from the list, press OK, and confirm restarting the GUI. 4. Post-Installation Dependencies & Weather Setup To enable all dynamic widgets (weather, posters, and extra channel info), run these helper commands via SSH if any component displays blank data: A. Install Missing Poster & Rendering Components opkg install python3-requests enigma2-plugin-extensions-oaweather B. Configuring Picons Path Ensure your channel logo picons are placed in one of the standard system search paths for automatic display: /usr/share/enigma2/picon/ (Internal Flash) /media/usb/picon/ (USB Drive - Recommended) /media/hdd/picon/ (Hard Disk Drive) Frequently Asked Questions (FAQ)
.png.8bfd00d3d5ff7530846269a088164e7f.png)


.png.90ac3813d814568a7f74c6aaa8296c5f.png)


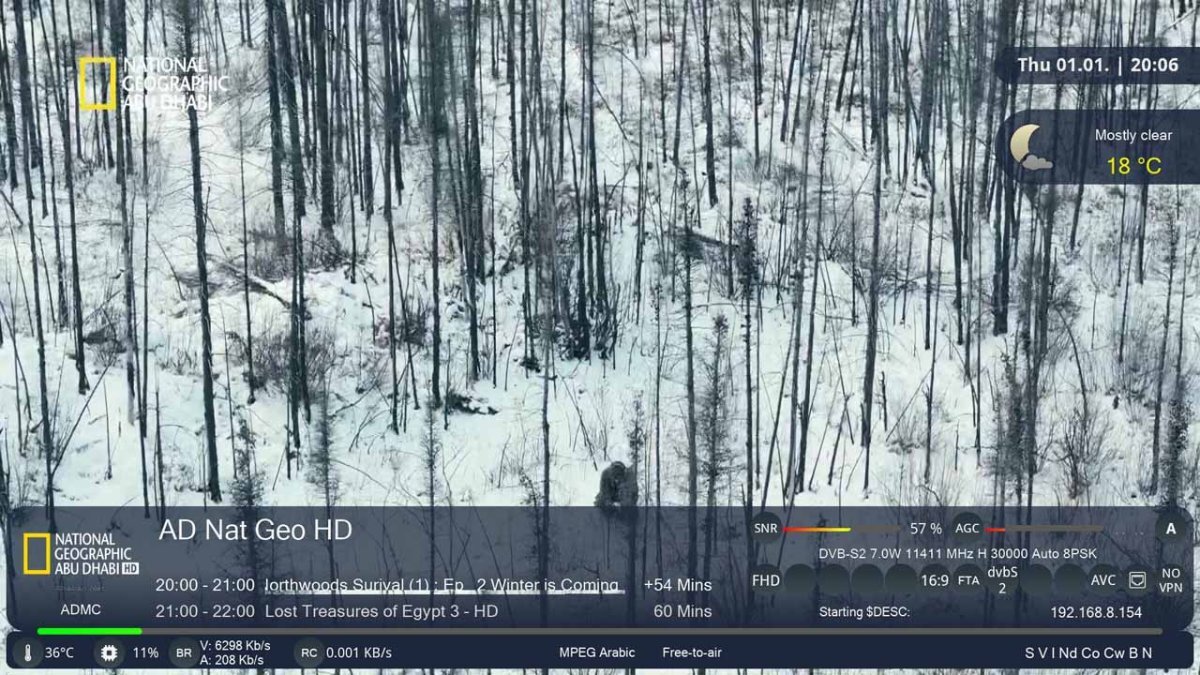
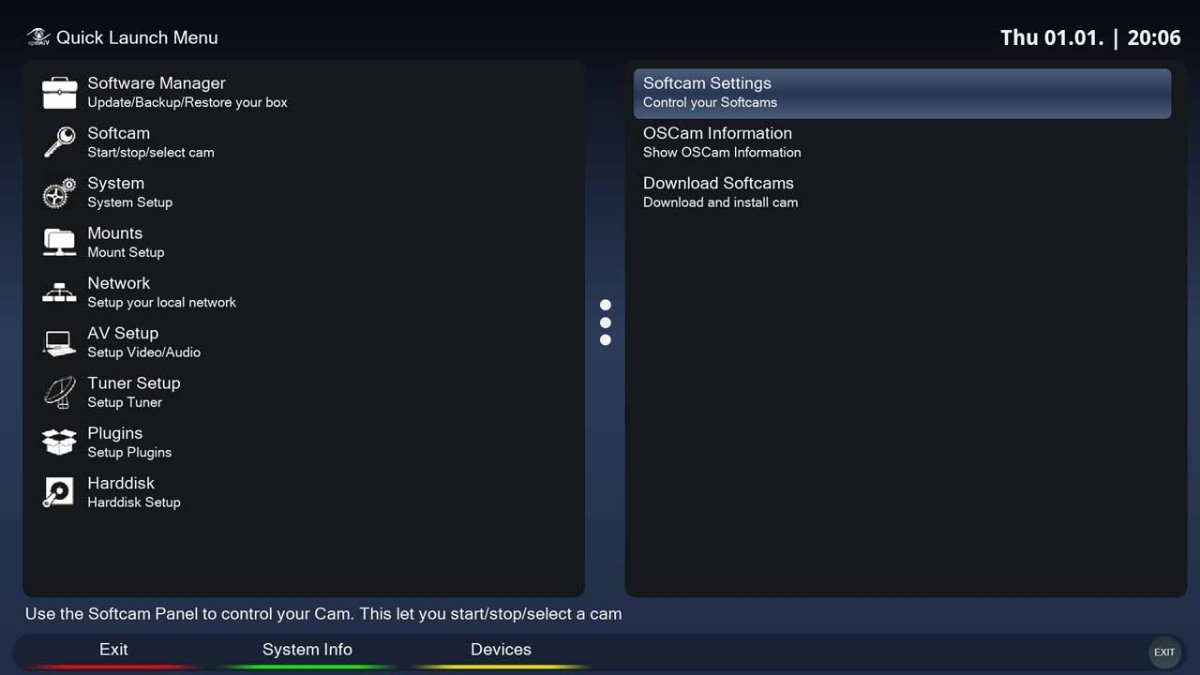

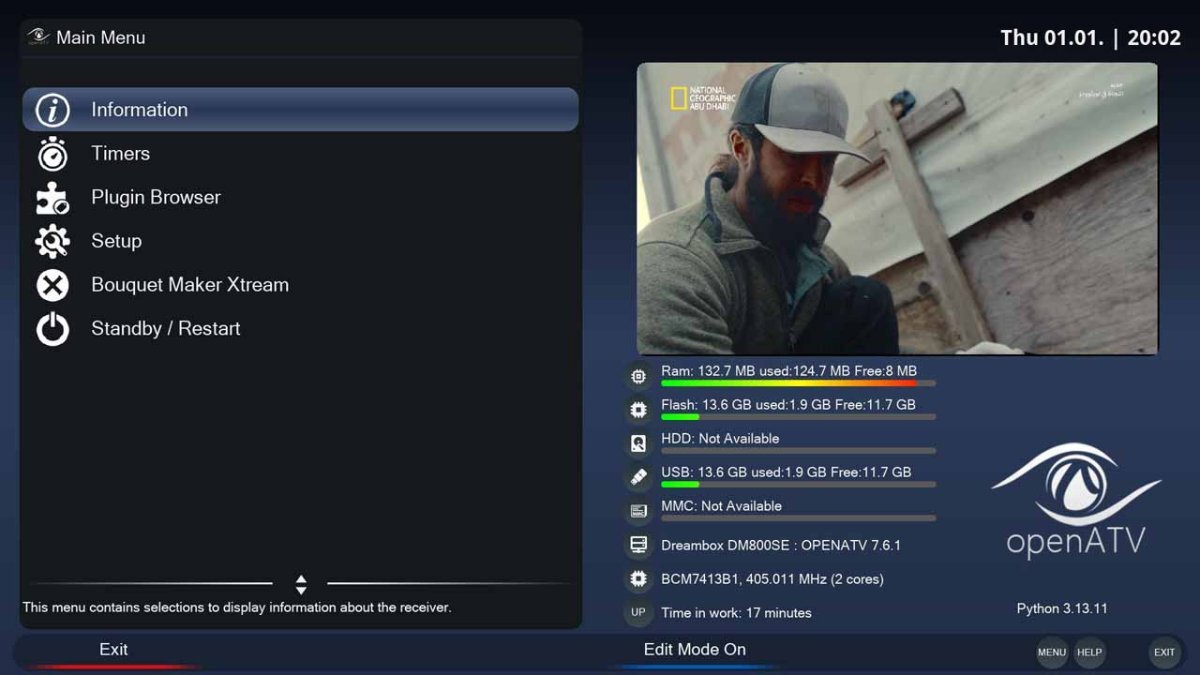
Download.png.a60c9b65911f3a9e2777d742c732f322.png)
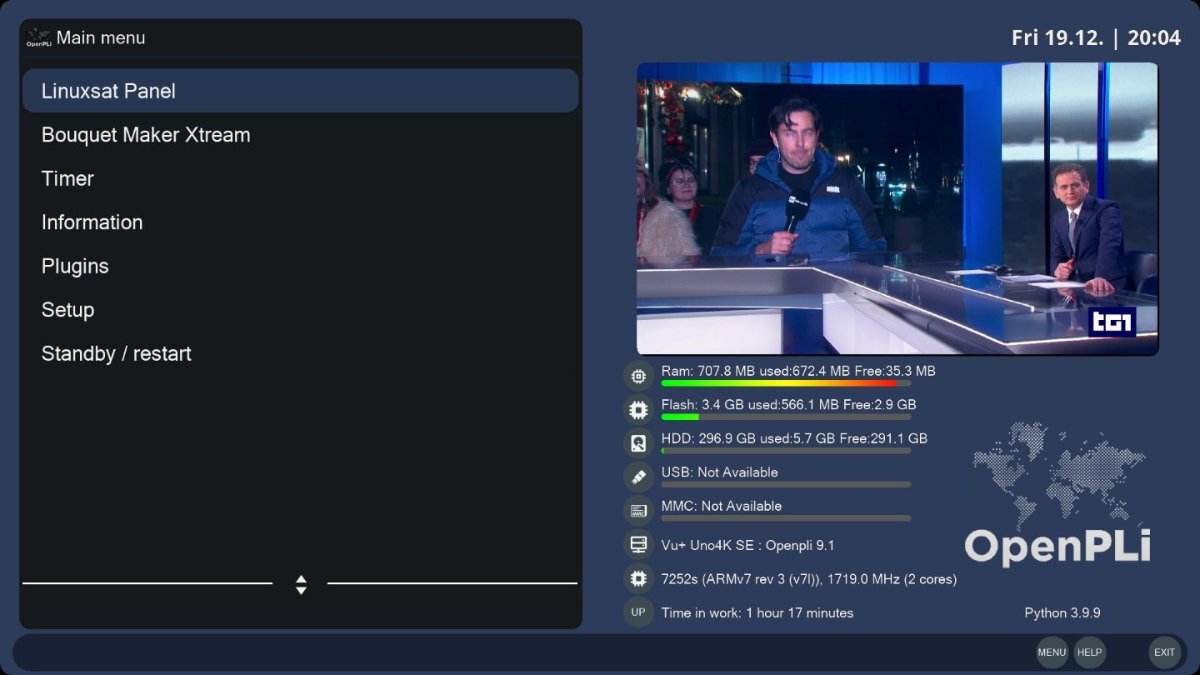
.png.efa75f009c938885167293a1810aa6be.png)
August2026Update.png.697b2f9c83ef3ed1580e06b15669a7fd.png)
.png.cedf55d1c135cf9346a3e8204111af5c.png)
.png.e71baf527c1bf9fa2a3d4825d4d3cea2.png)
.png.062d073224b80a8c492dbf1706ffa68e.png)
.png.342ee5747b46641f8aab33861b86064f.png)